


Fusing
Fuse skirt front edge facing, front waist, centre back waist and side back waist facing pieces.


Step 1
With right sides facing pin tie A to tie B on the diagonal. Stitch. Press seam allowance open.


Step 2
Fold tie in half along long edge with right sides facing and pin in place. You may want to mark in your stitch line first with some tailors chalk, like we have here, as a guide. Stitch around tie edge leaving the short end open. Trim seam allowance in half and clip at point. Turn through to the right side and press well. Repeat steps 1 & 2 for the other tie. Put ties aside until needed.


Step 3
With right sides together, pin side back waist facing to centre back waist facing, matching notches. Stitch together. Clip seam allowance at waist point and press seam allowance open. Repeat for other side back piece.

Step 4
Neaten bottom edge of front & back waist facings. Neaten the long straight edge and hem of front skirt facing. Neaten side seams of front and back skirt pieces.
Note: You may want to mark in any notches on these seams with chalk first.


Step 5
With right sides together, pin front waist facing to neatened straight edge of front skirt facing. Stitch. Press seam allowance towards waist facing.


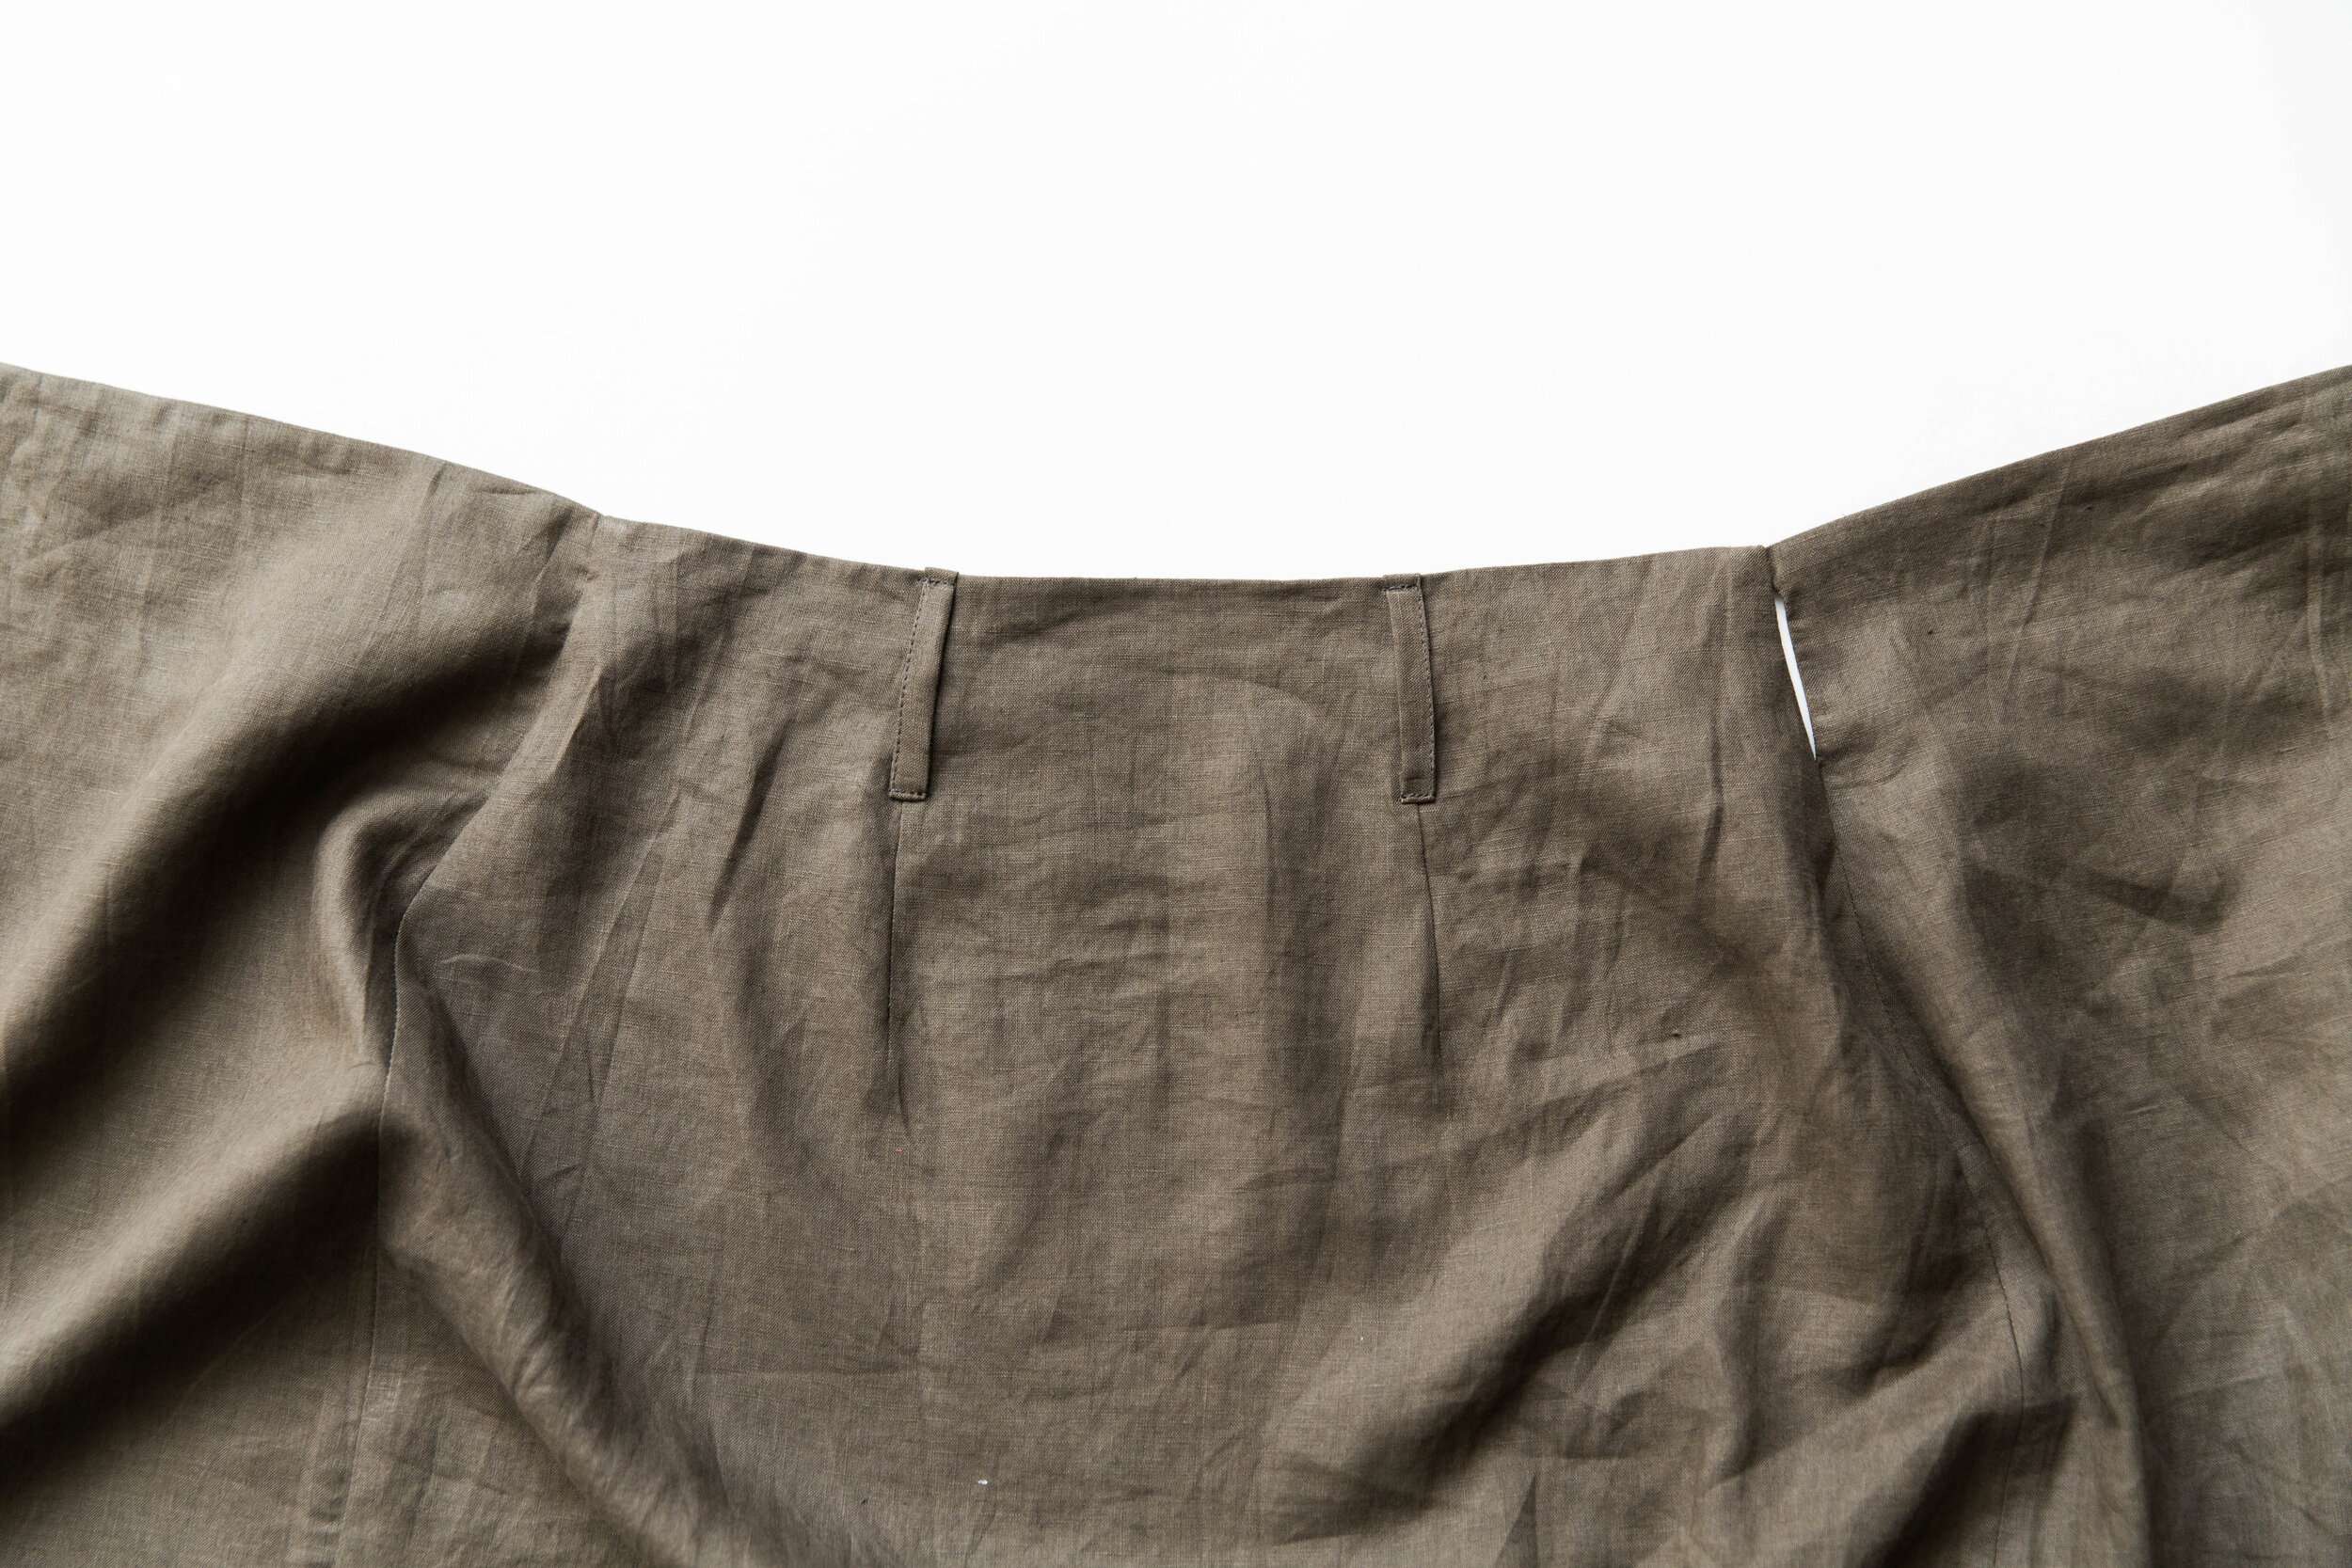
Step 6
With right sides together, pin the front skirt facing over the right front skirt piece (right side when worn), at side seam. At the top notch on the side seam, stitch in 1.2cm/0.5”, pivot your needle and stitch down to the second notch. Pivot your needle again and stitch out to the side seam. Clip into the corners, and under-stitch the seam allowance toward the facing on the long stitchline between notches. Once turned through, this will become the opening for your waist tie to thread through.


Step 7
Pin the facing to skirt front along waistline on both sides. Stitch. Trim seam allowance in half and under stitch toward facing where you can. Turn through to the inside and press.


Step 8
Mark darts onto wrong side of fabric on skirt back. With right sides facing, pin darts in place. Stitch, pivoting at waist point. Press dart excess towards the centre.

Step 9
Fold belt loop strip in half length ways and press. Fold short ends of belt loop strip to centre again and press. Fold in half again so that the folded edges are together and stitch in place. Top stitch other edge to match.
Cut your belt loop strip into 2 x 10cm belt loops.

Step 10
Pin your belt loops to the top edge of your back facing piece, in line with the side back seamlines. Stitch in place.


Step 11
With right sides together, pin the back facing to the skirt back piece along waist line with beltloops sandwiched between. Stitch. Trim seam allowance in half and under stitch towards the facing.

Step 12
Folding the back facing up out of the way, pin the skirt front to skirt back at side seam, with right sides facing. Line the top edge of the front skirt up with the seam line between back skirt and facing.


Fold the back facing over, sandwiching the skirt front between. Stitch, being careful not to stitch your waist tie opening (that you created in step 22) closed. Turn skirt through to the right way out and press. Repeat for other front.


Step 13
Pin open end of tie (that you made in step 1-2) to right side of skirt front, placing top edge of the tie to meet the waistline stitching. Make sure to pull skirt facing pieces out of the way. Stitch together with a 5mm/0.2” seam allowance. Repeat for other front piece. Folding skirt facing over tie, with right sides together, pin to skirt along front edge. Stitch together along front edge, pivot at hem and stitch along hem to end of facing edge. Trim seam allowance in half and clip at corners. Under stitch seam allowance toward facing where you can. Turn facing through to the inside. Press edges well.

Step 14
Neaten skirt hem edge. Pin hem edge up 3cm/1.3”.
Starting at the point where the front facing meets the finished hemline, stitch up 3cm/until you reach the neatened hem edge. Pivot needle and stitch all along hem until you reach the front facing on the side. Pivot needle again and stitch down until you get to hemline to finish.


Step 15
Press front skirt facing in place, then topstitch or slipstitch along edge to secure.
Step 16
Press open edges of beltloops under 1cm and topstitch along bottom edge of beltloop down where it folds to, centred with dart. Press.

Voilà!