


fusing
On one pair of your bust cup pieces, fuse the top edges with bust cup fusing. These will become the outer layer.

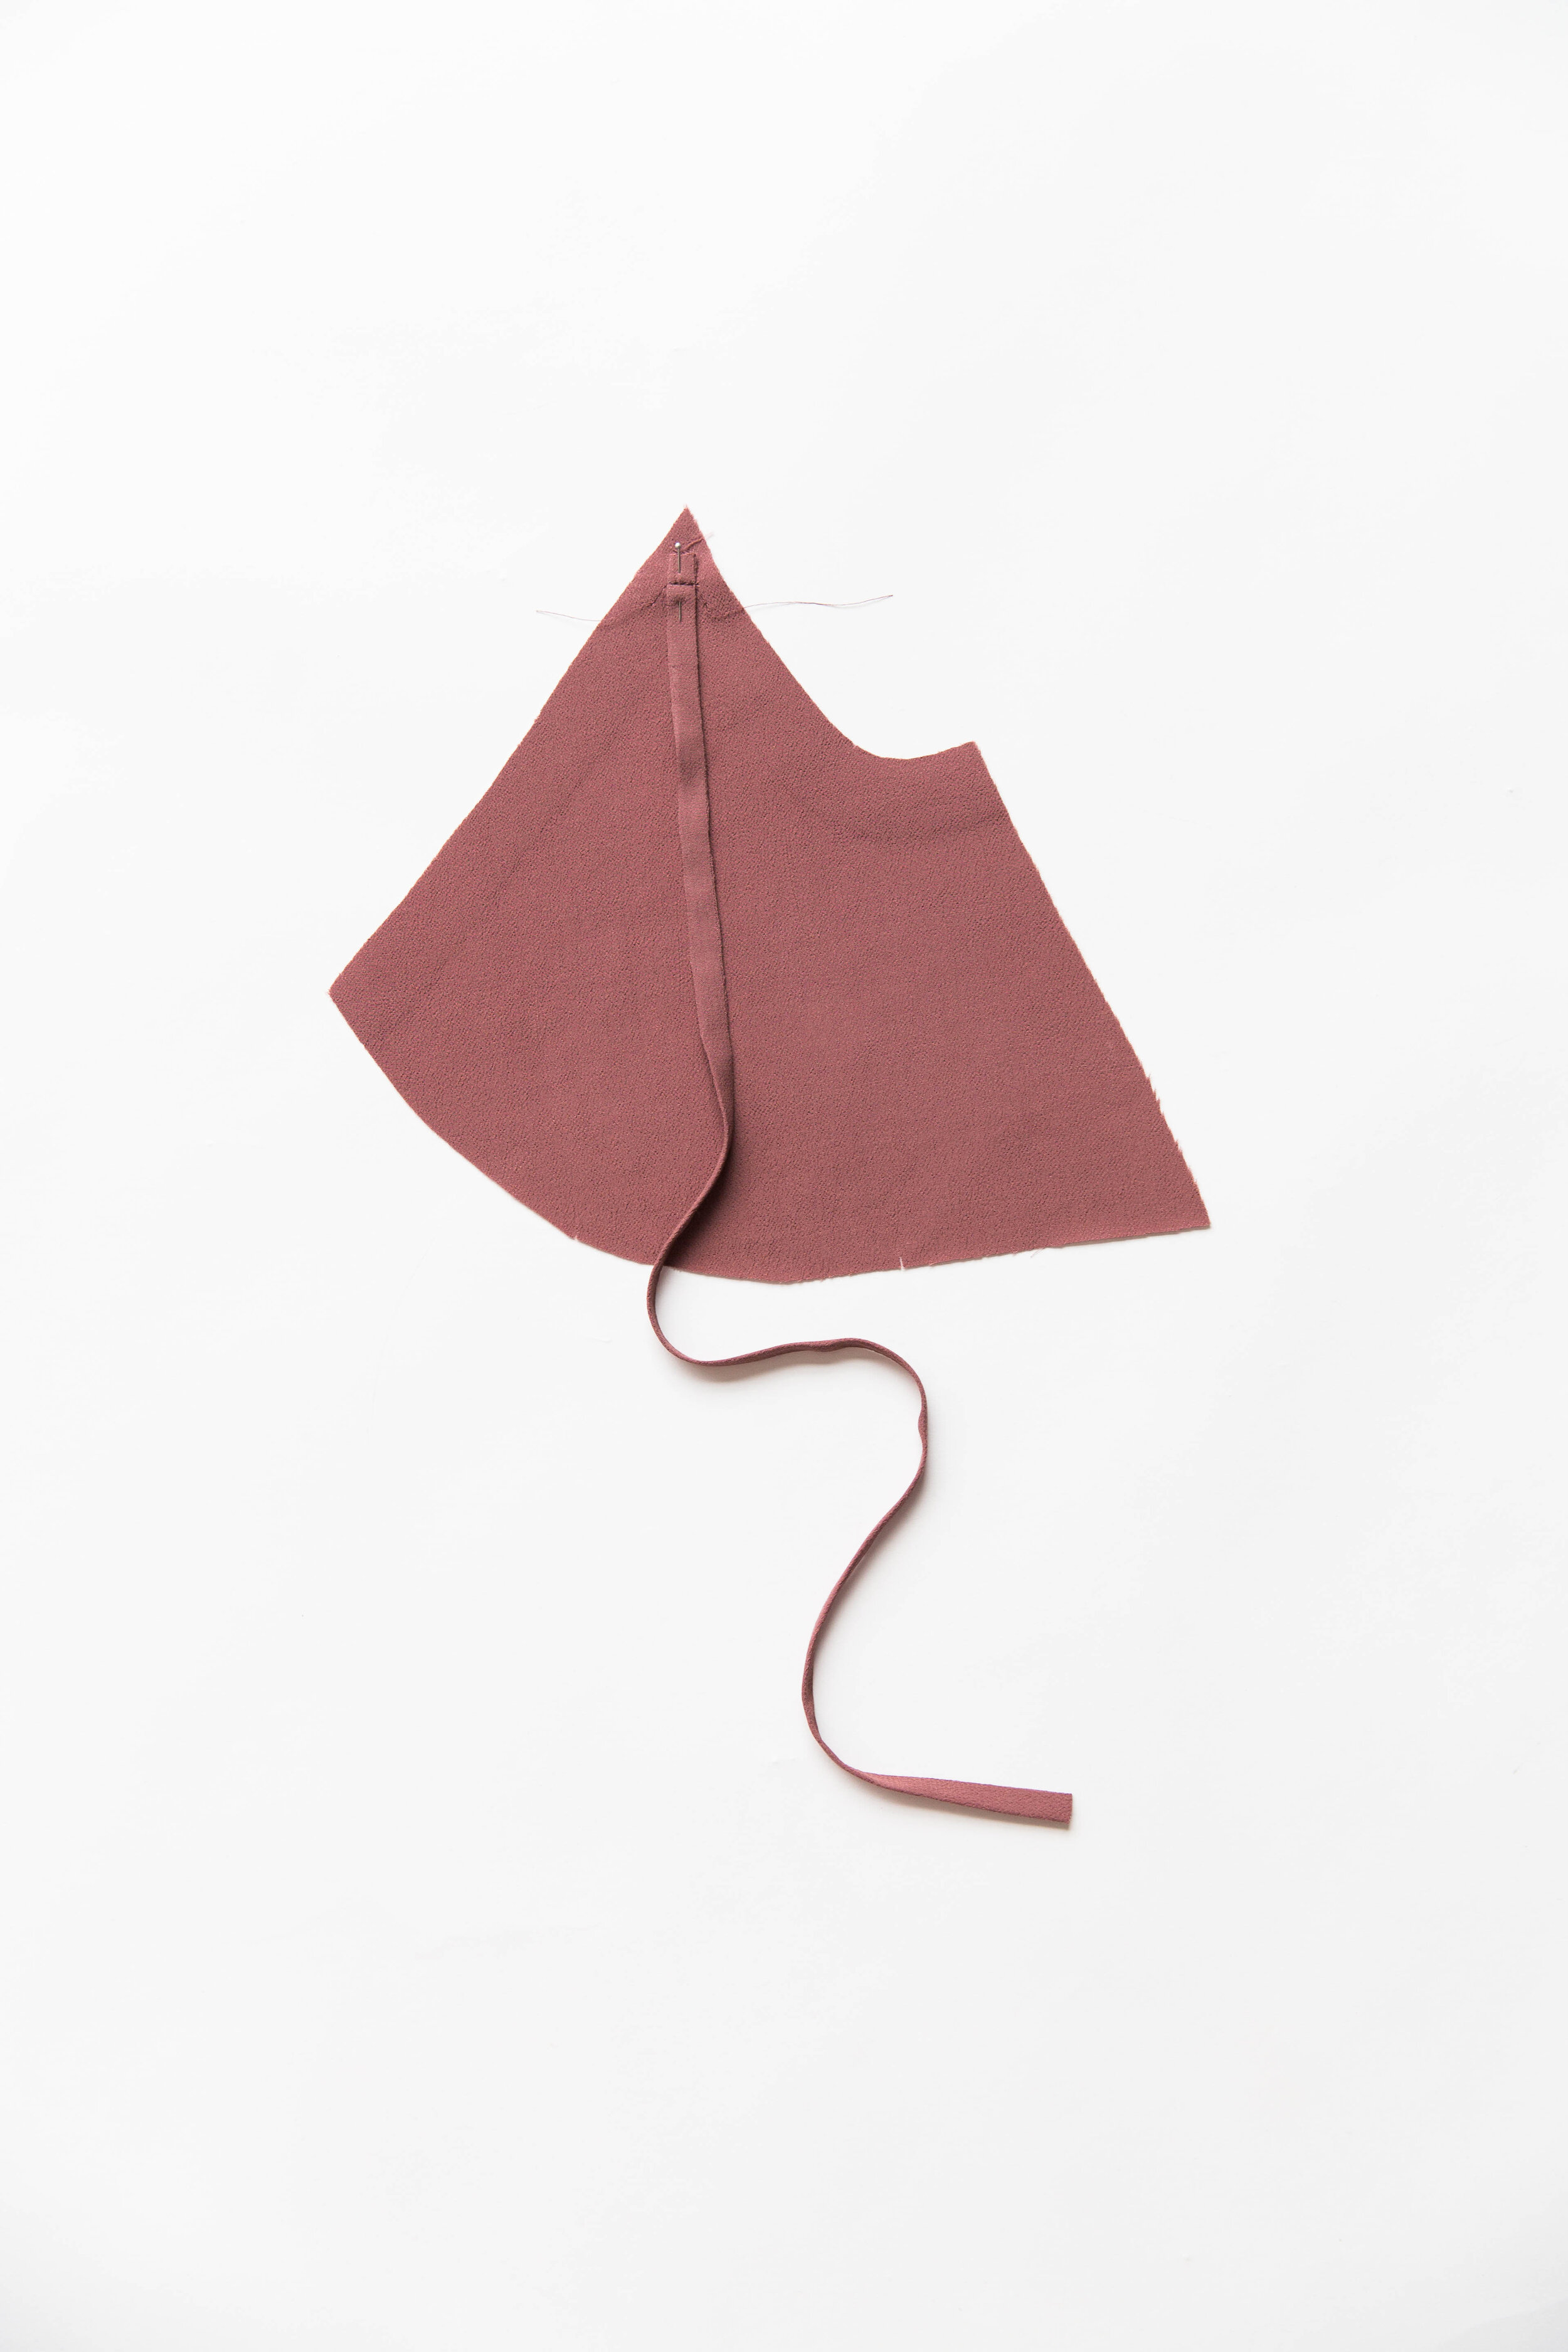
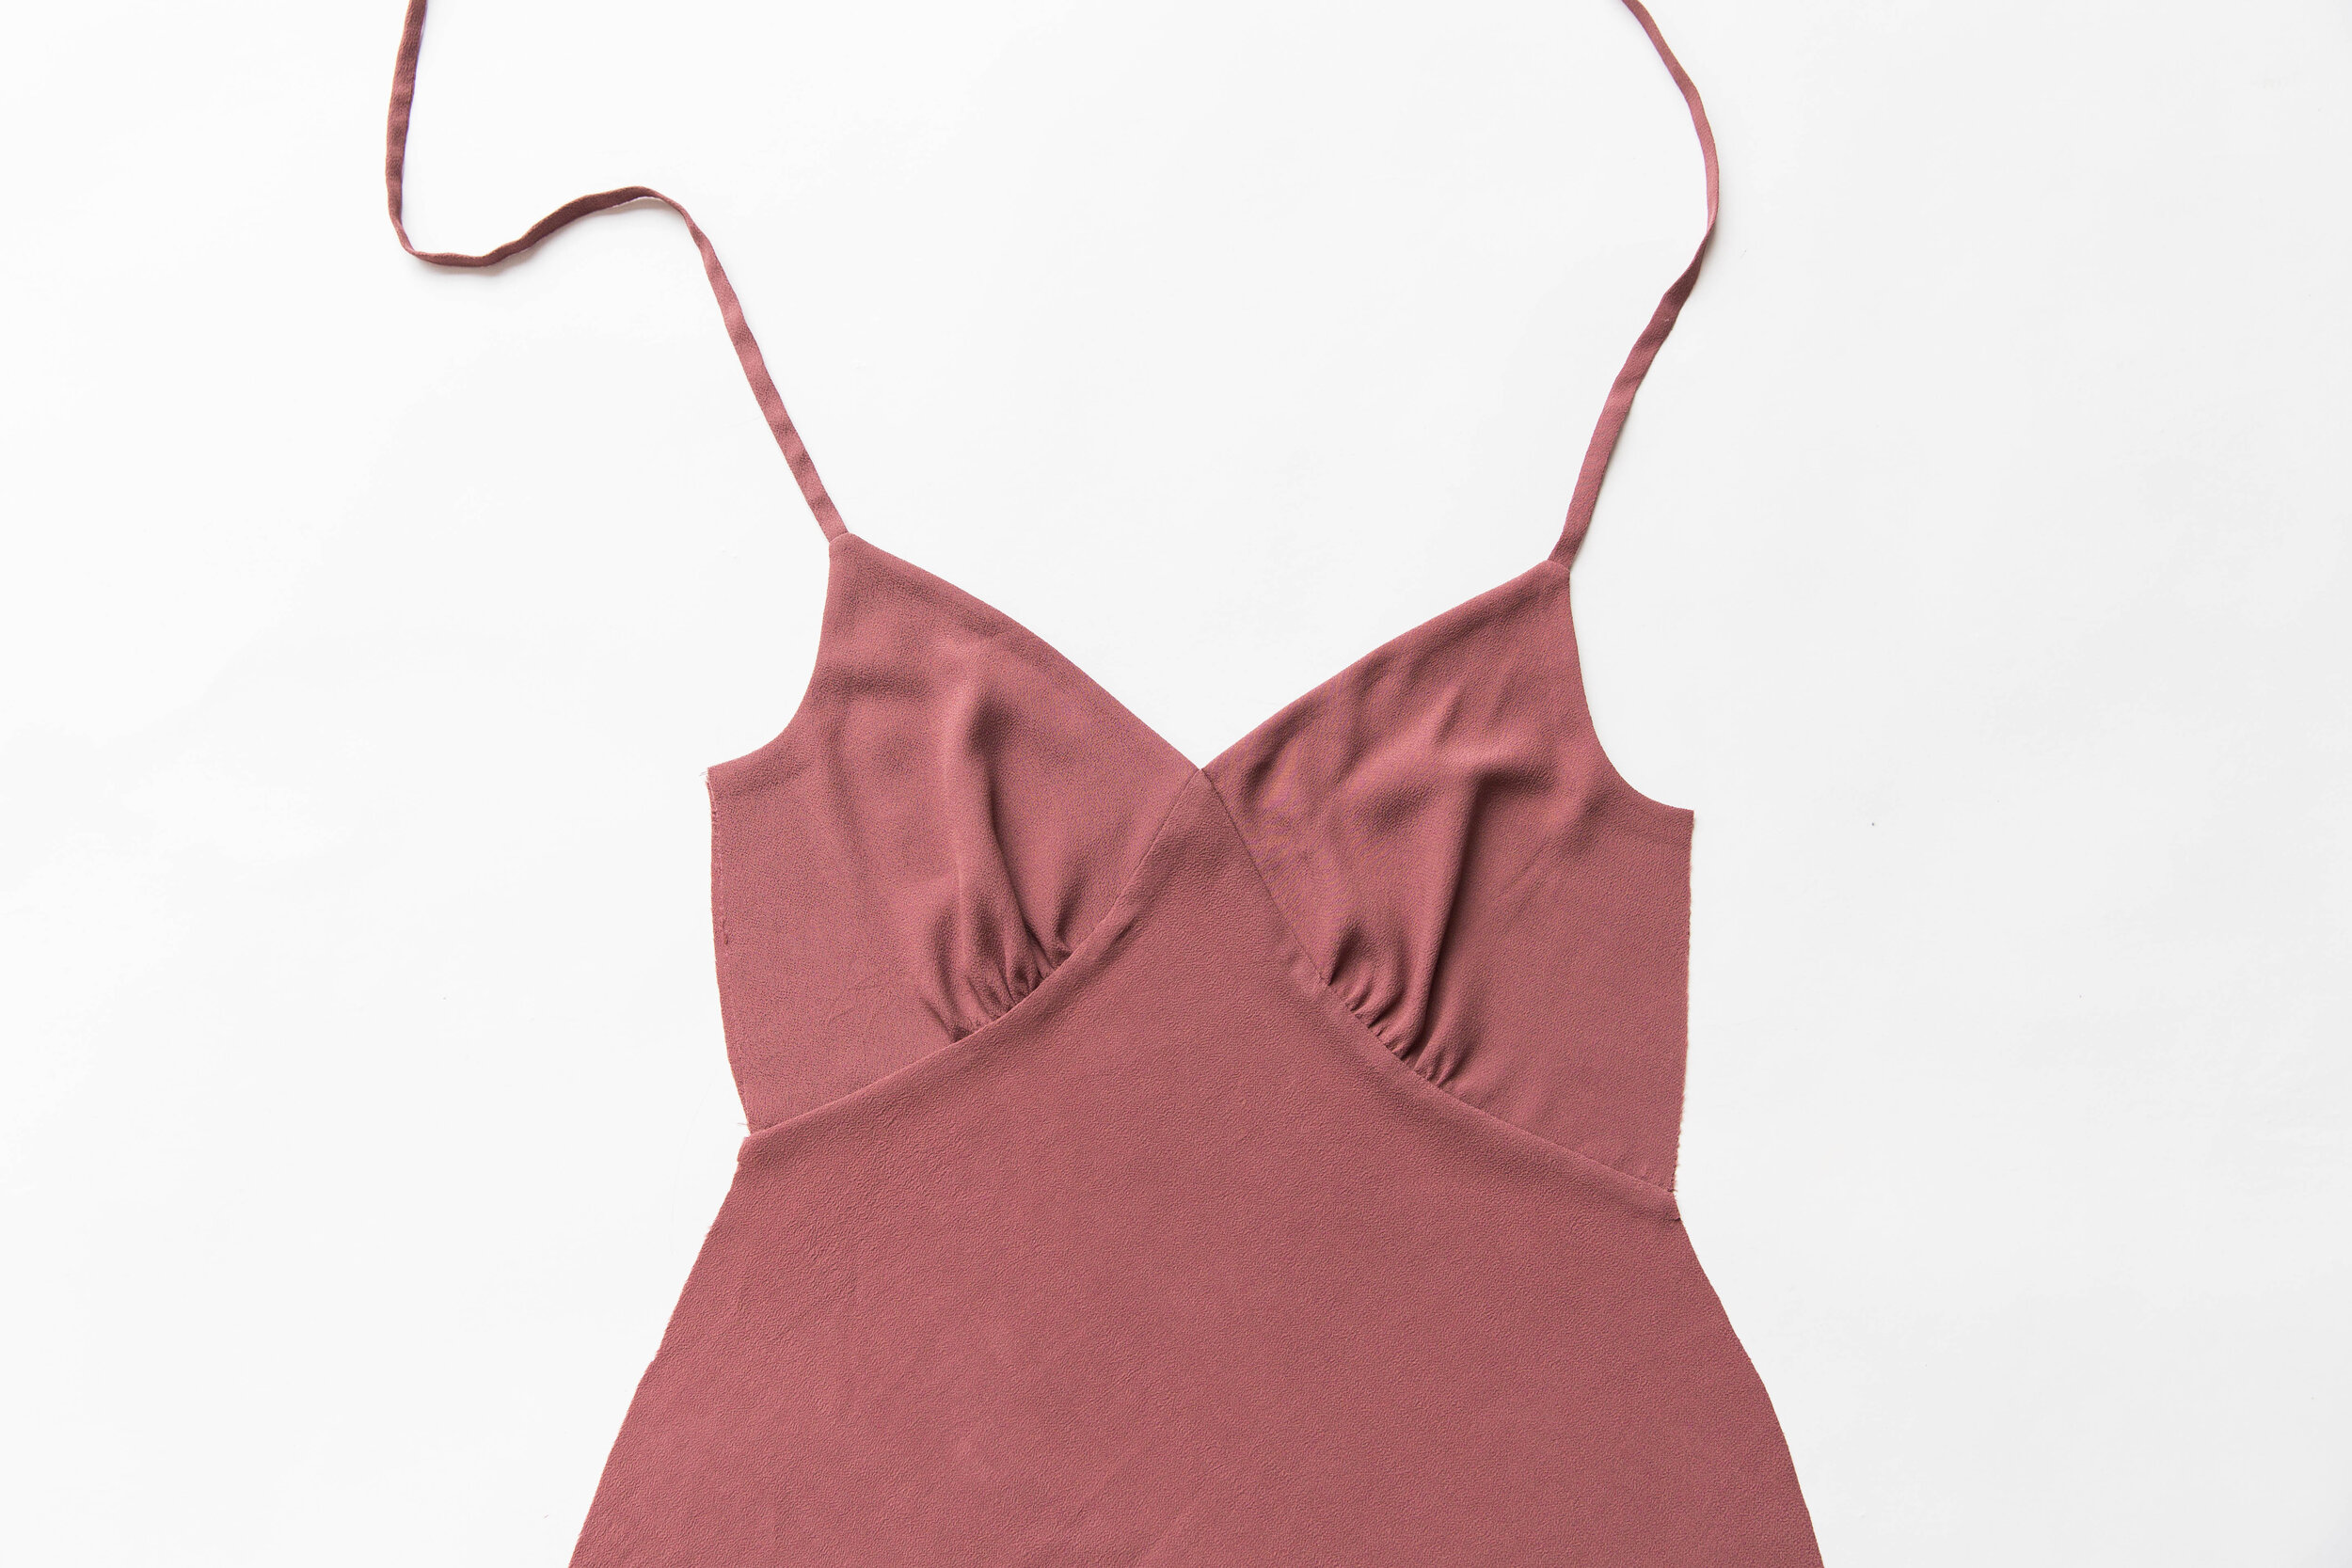
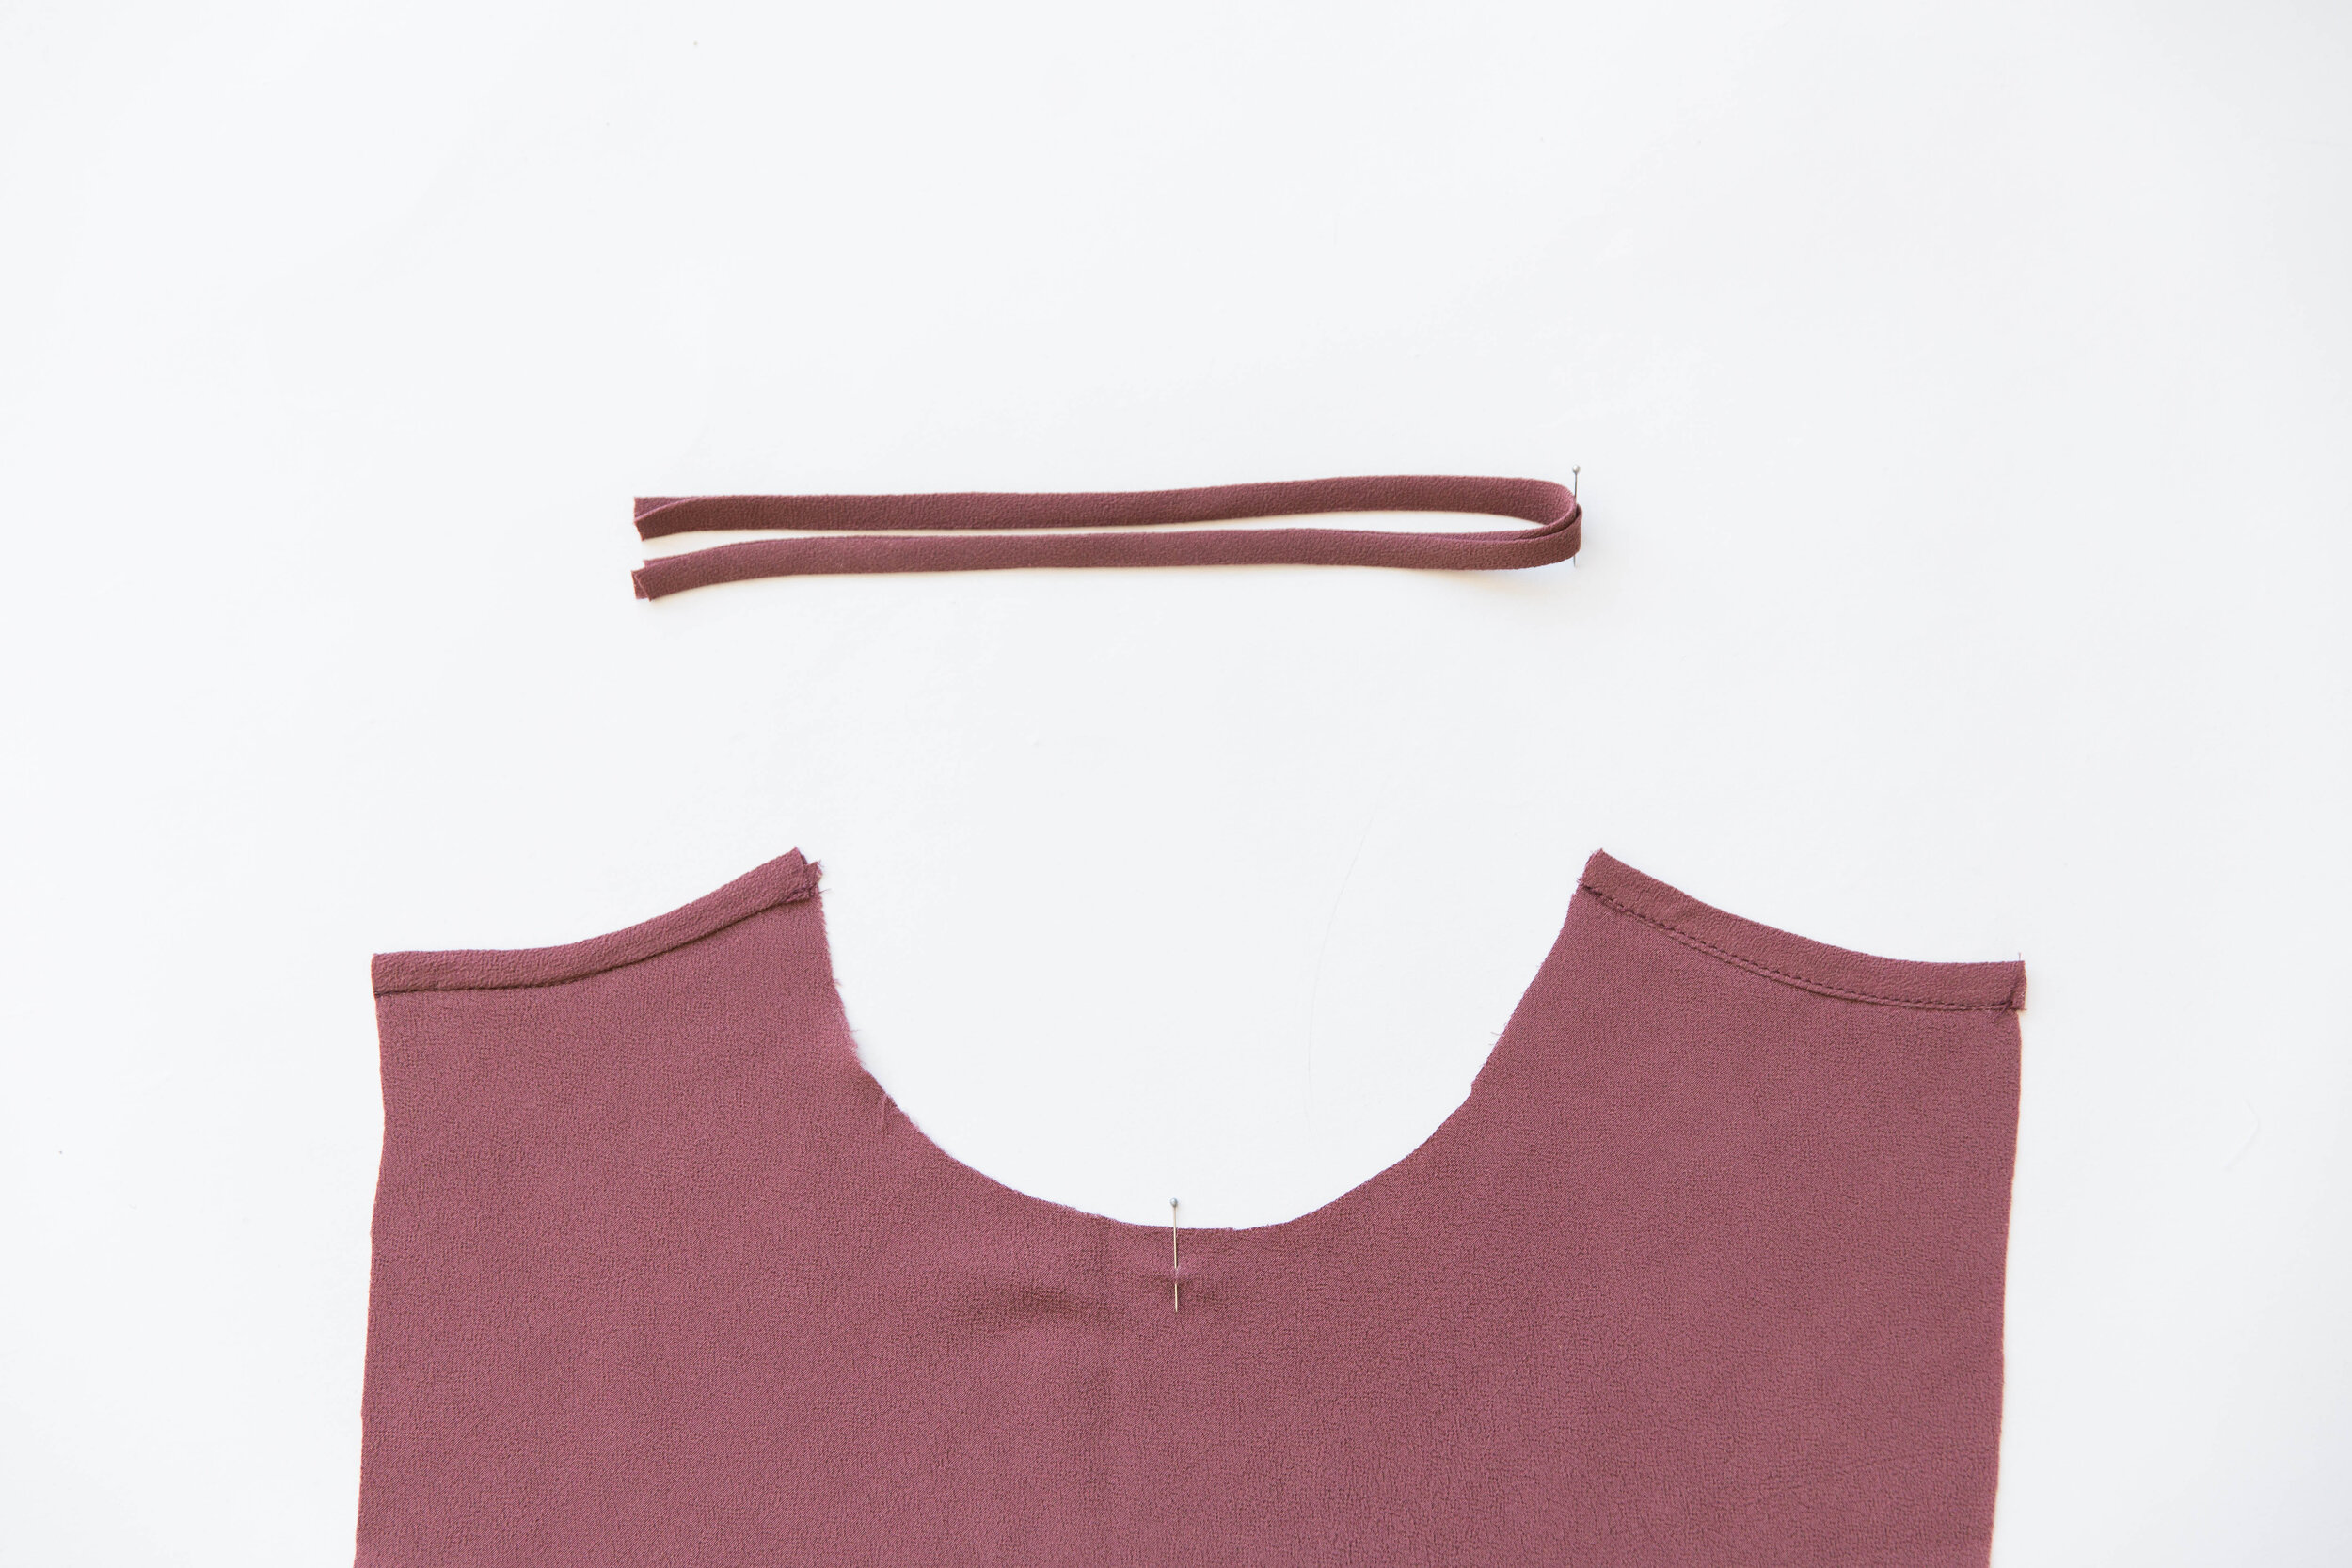
Step 1
Baste a stitch line at the top point of the triangle, 1cm/0.39” in from the edge on each of the front bust panels. This will act as a guide for the strap placement.

Step 2
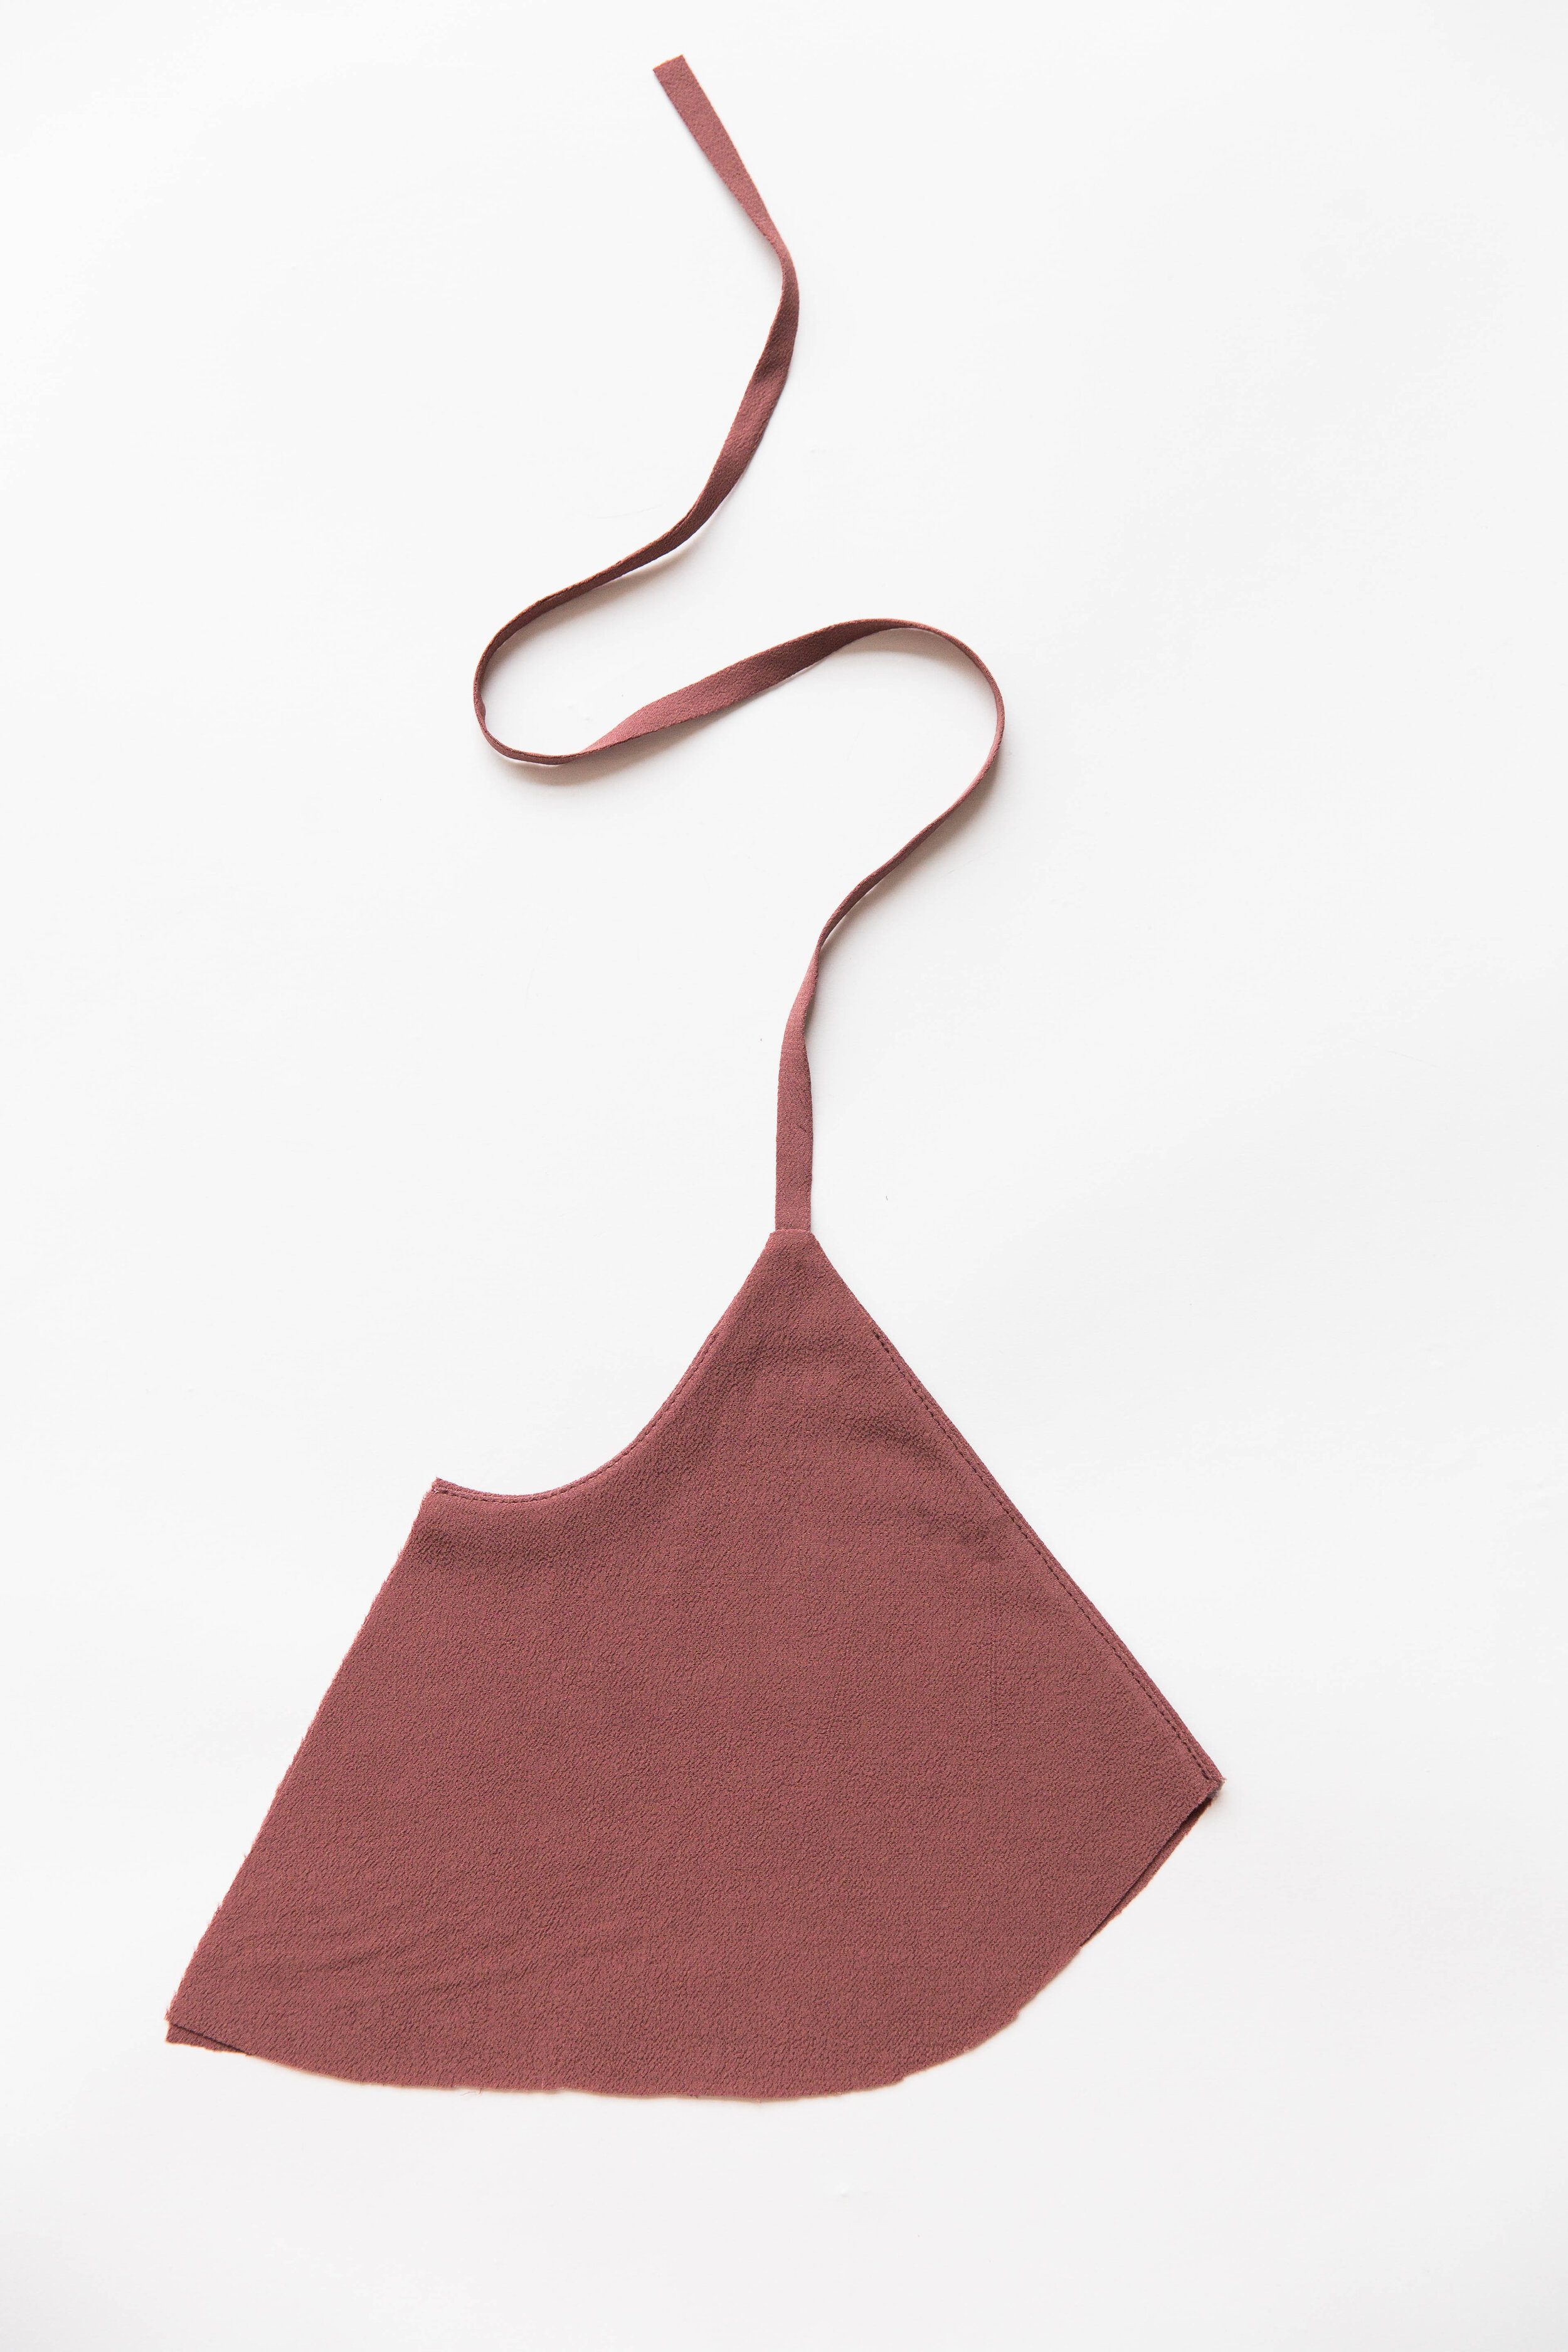
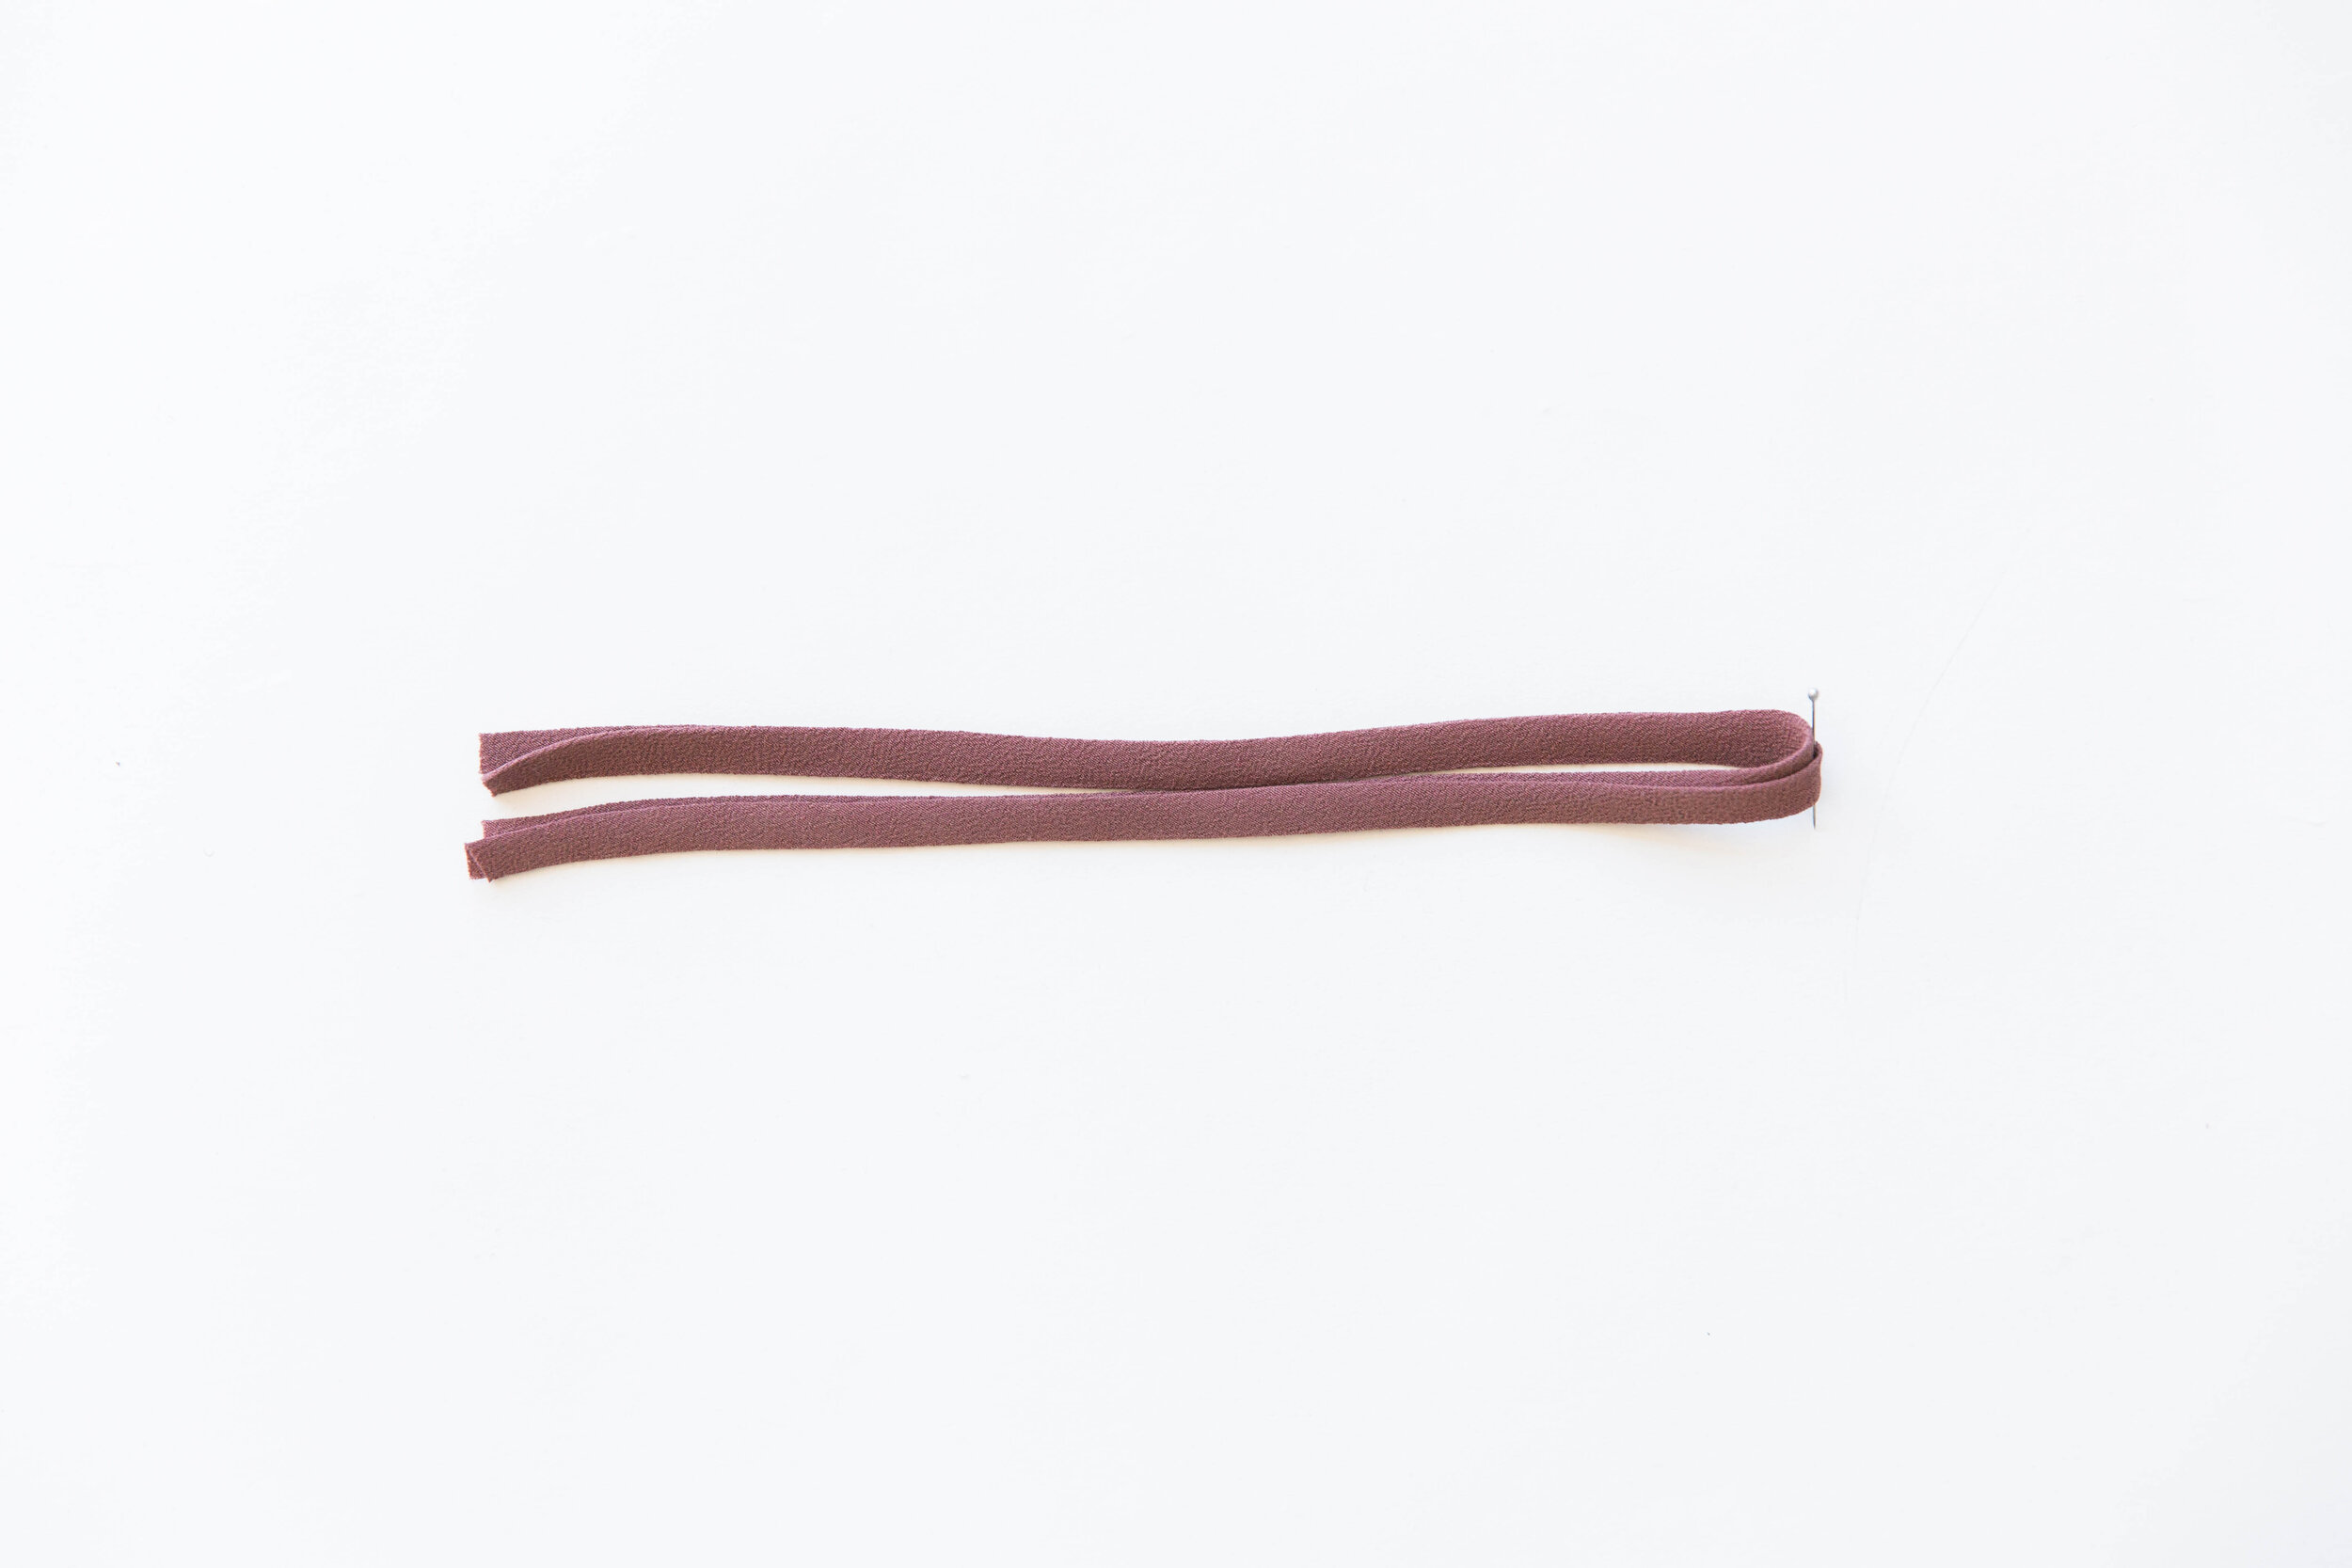
Construct straps.
Stitch long ends of front strap pieces with right sides facing. Trim seam allowance in half. Attach a safety pin to one end of strap and thread through itself, until it comes out the other end through the right way. Press. Repeat for other strap.
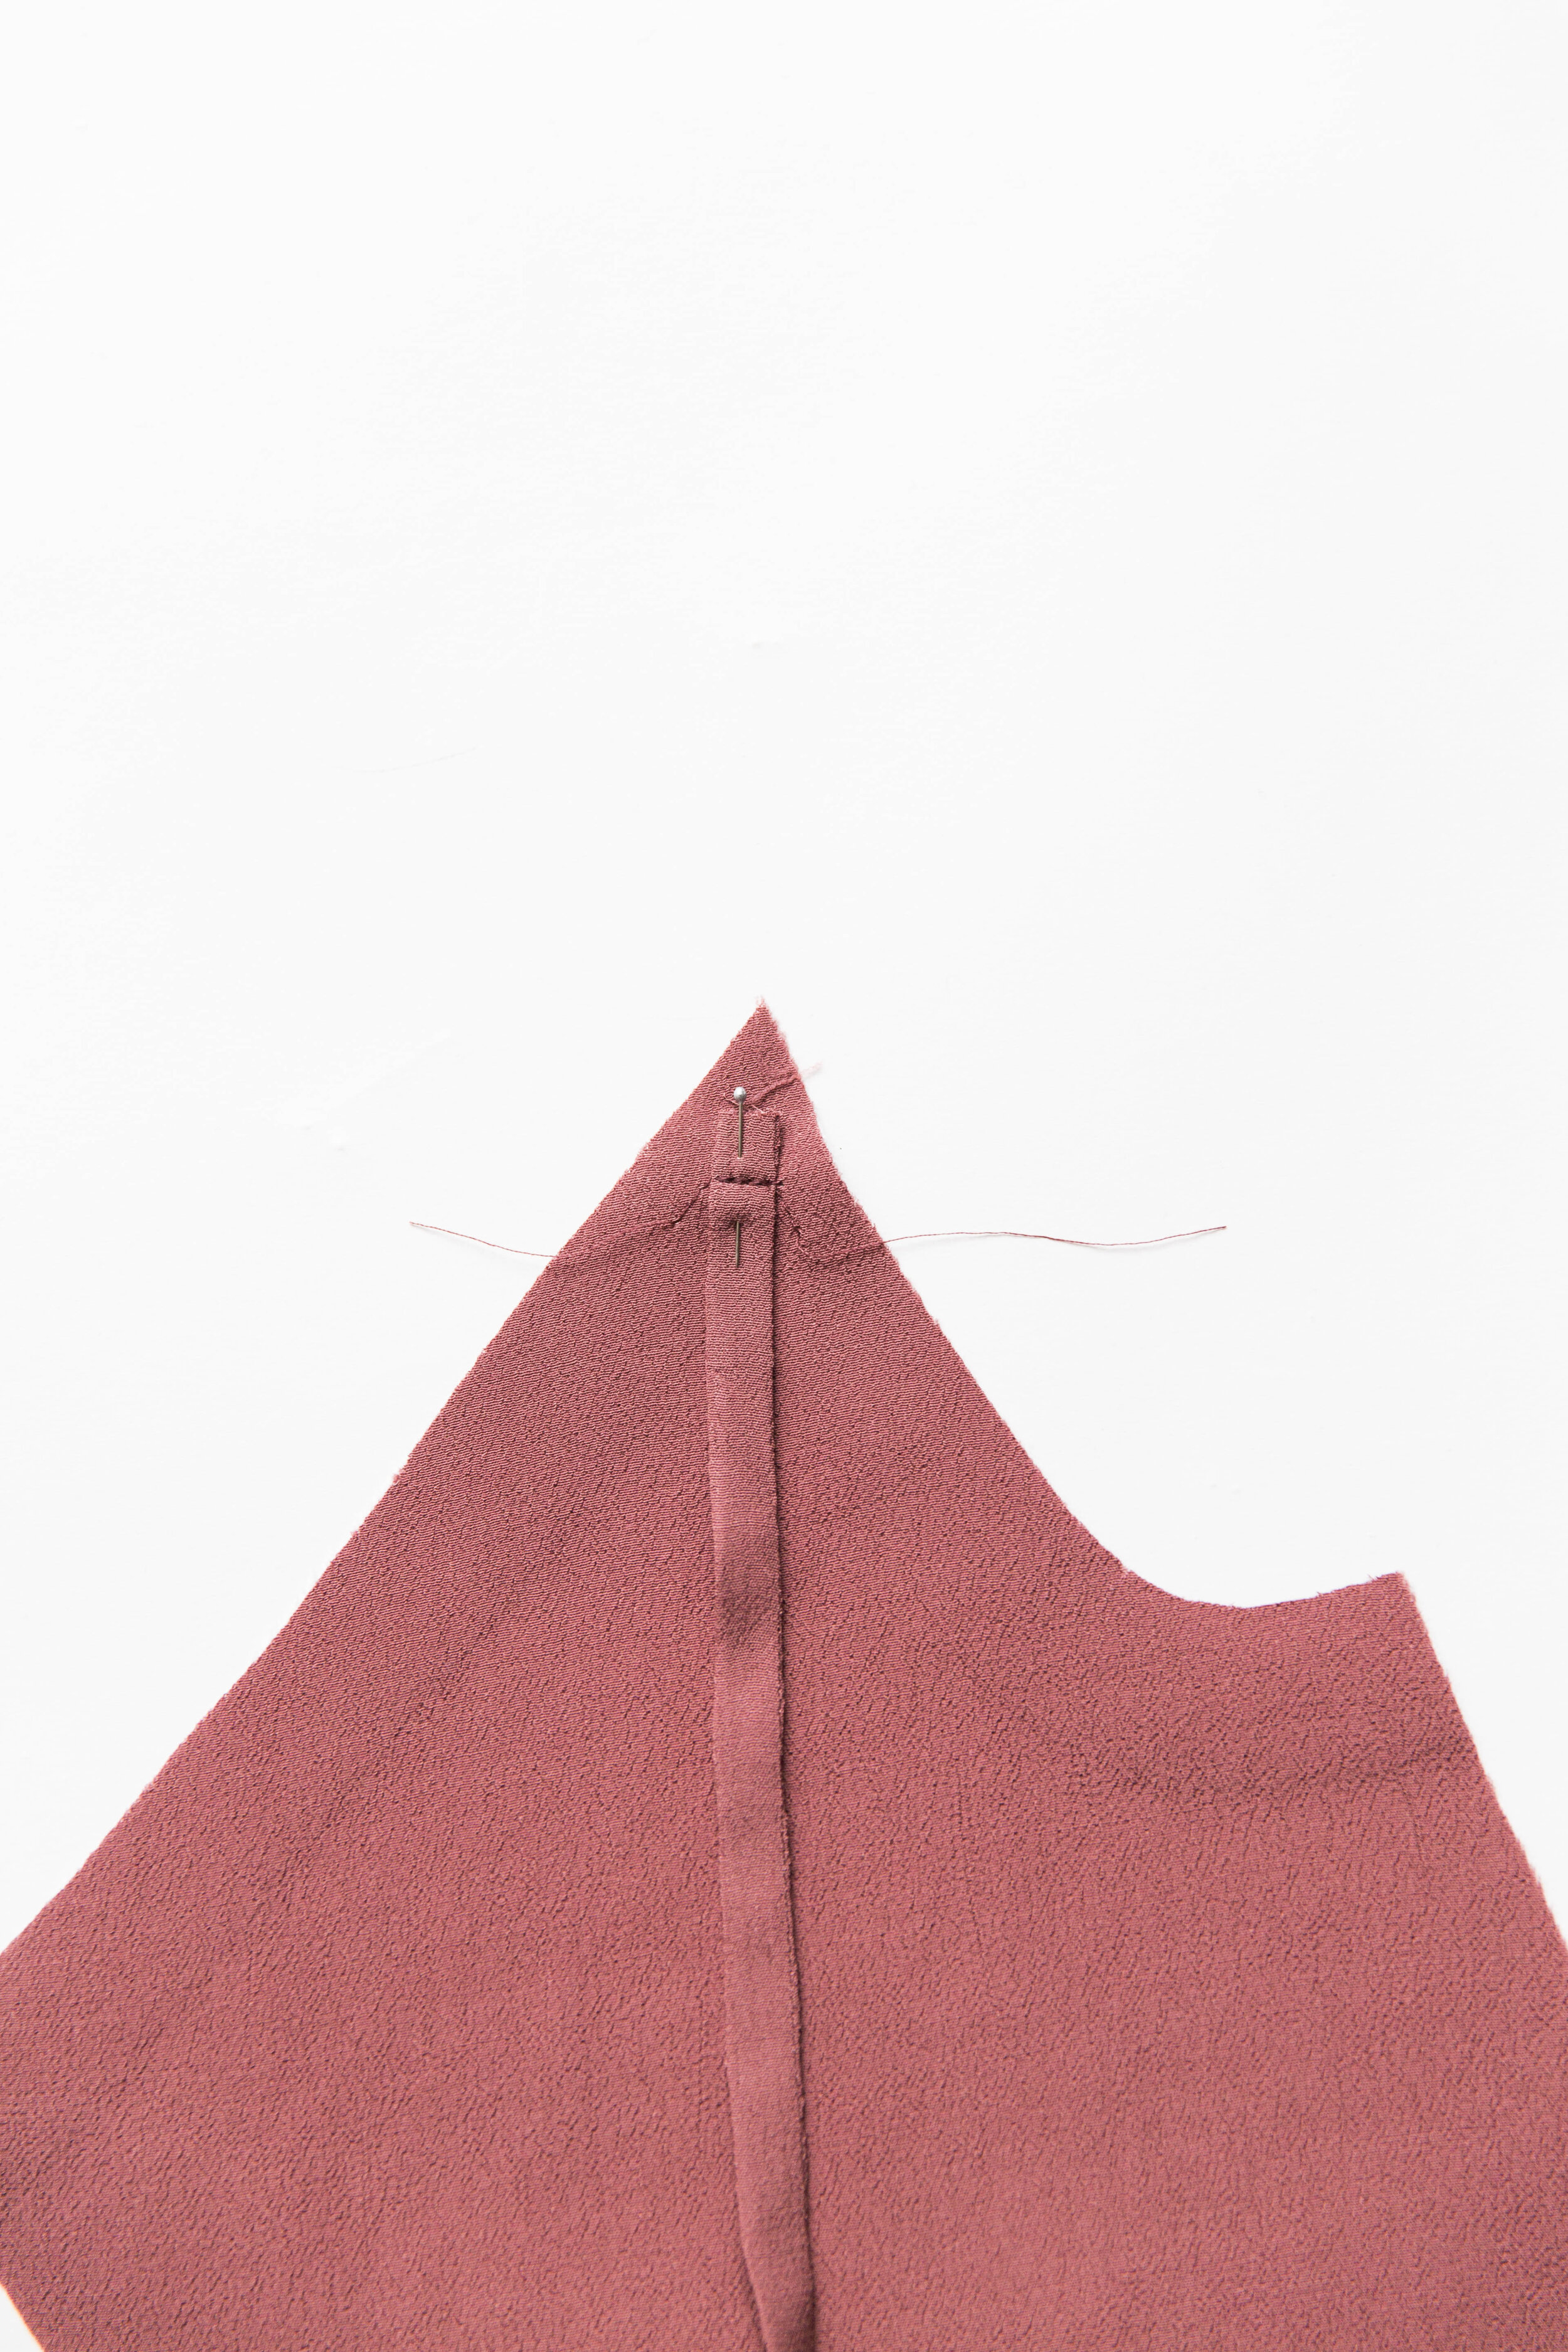
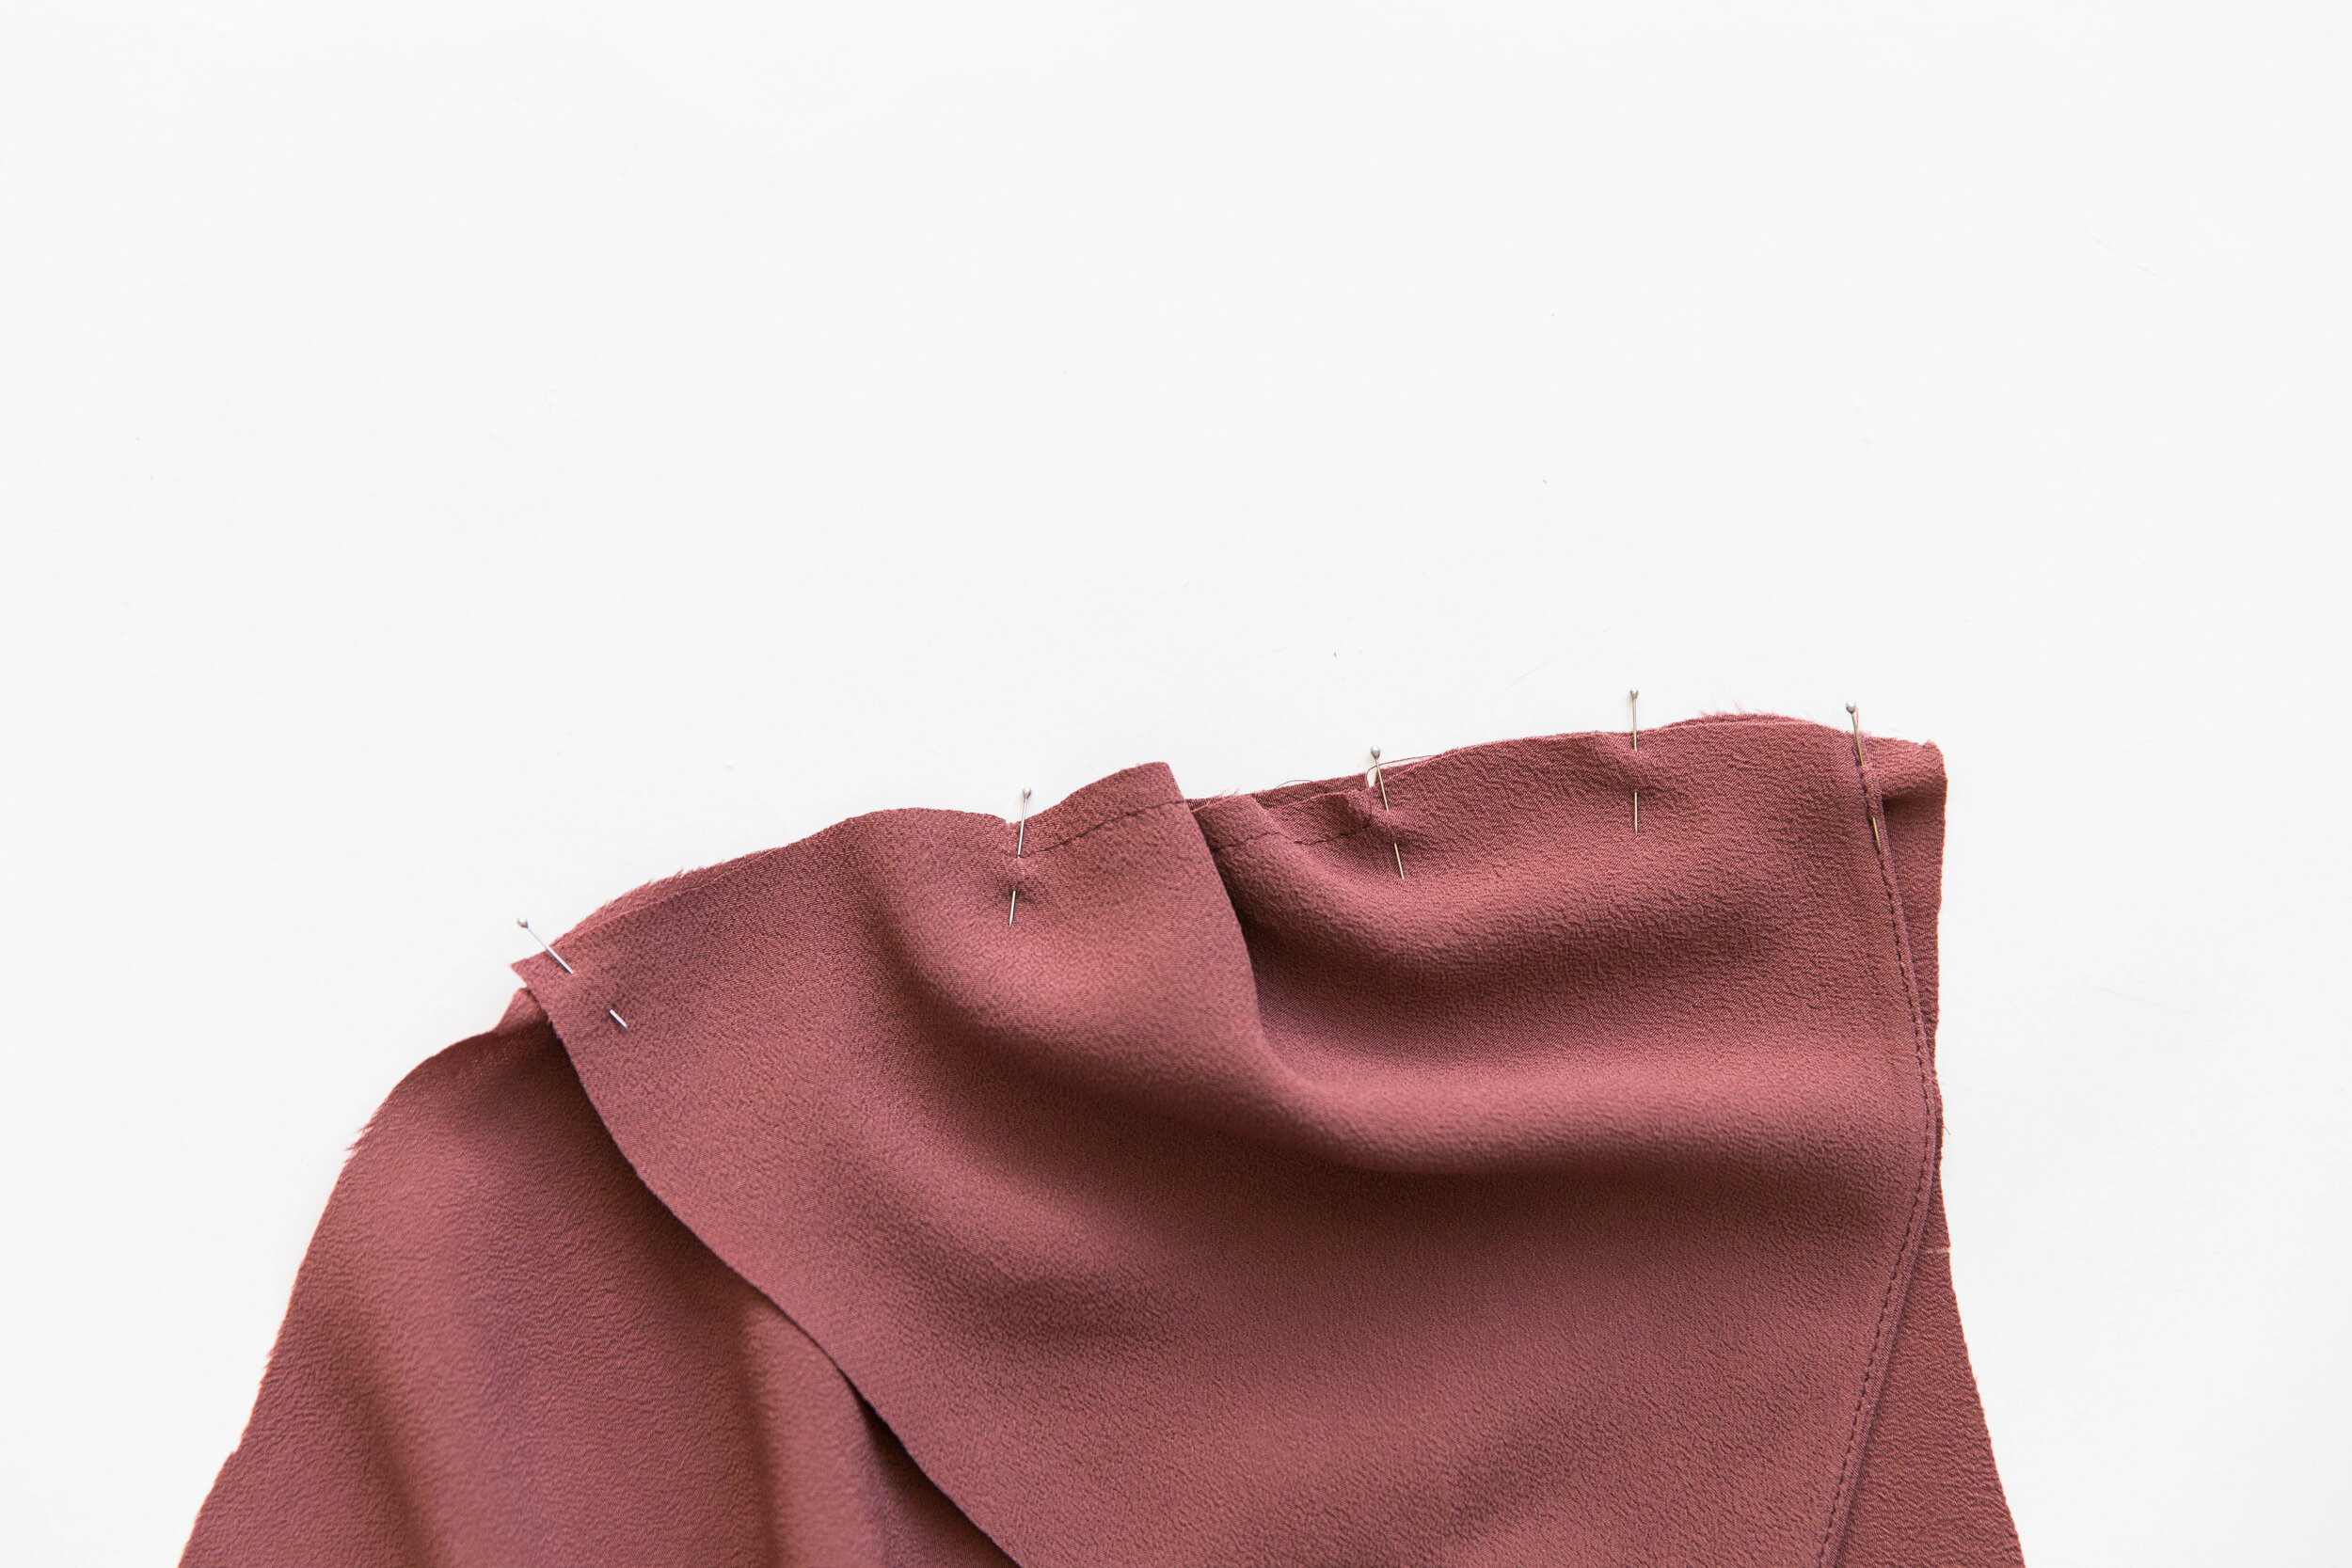
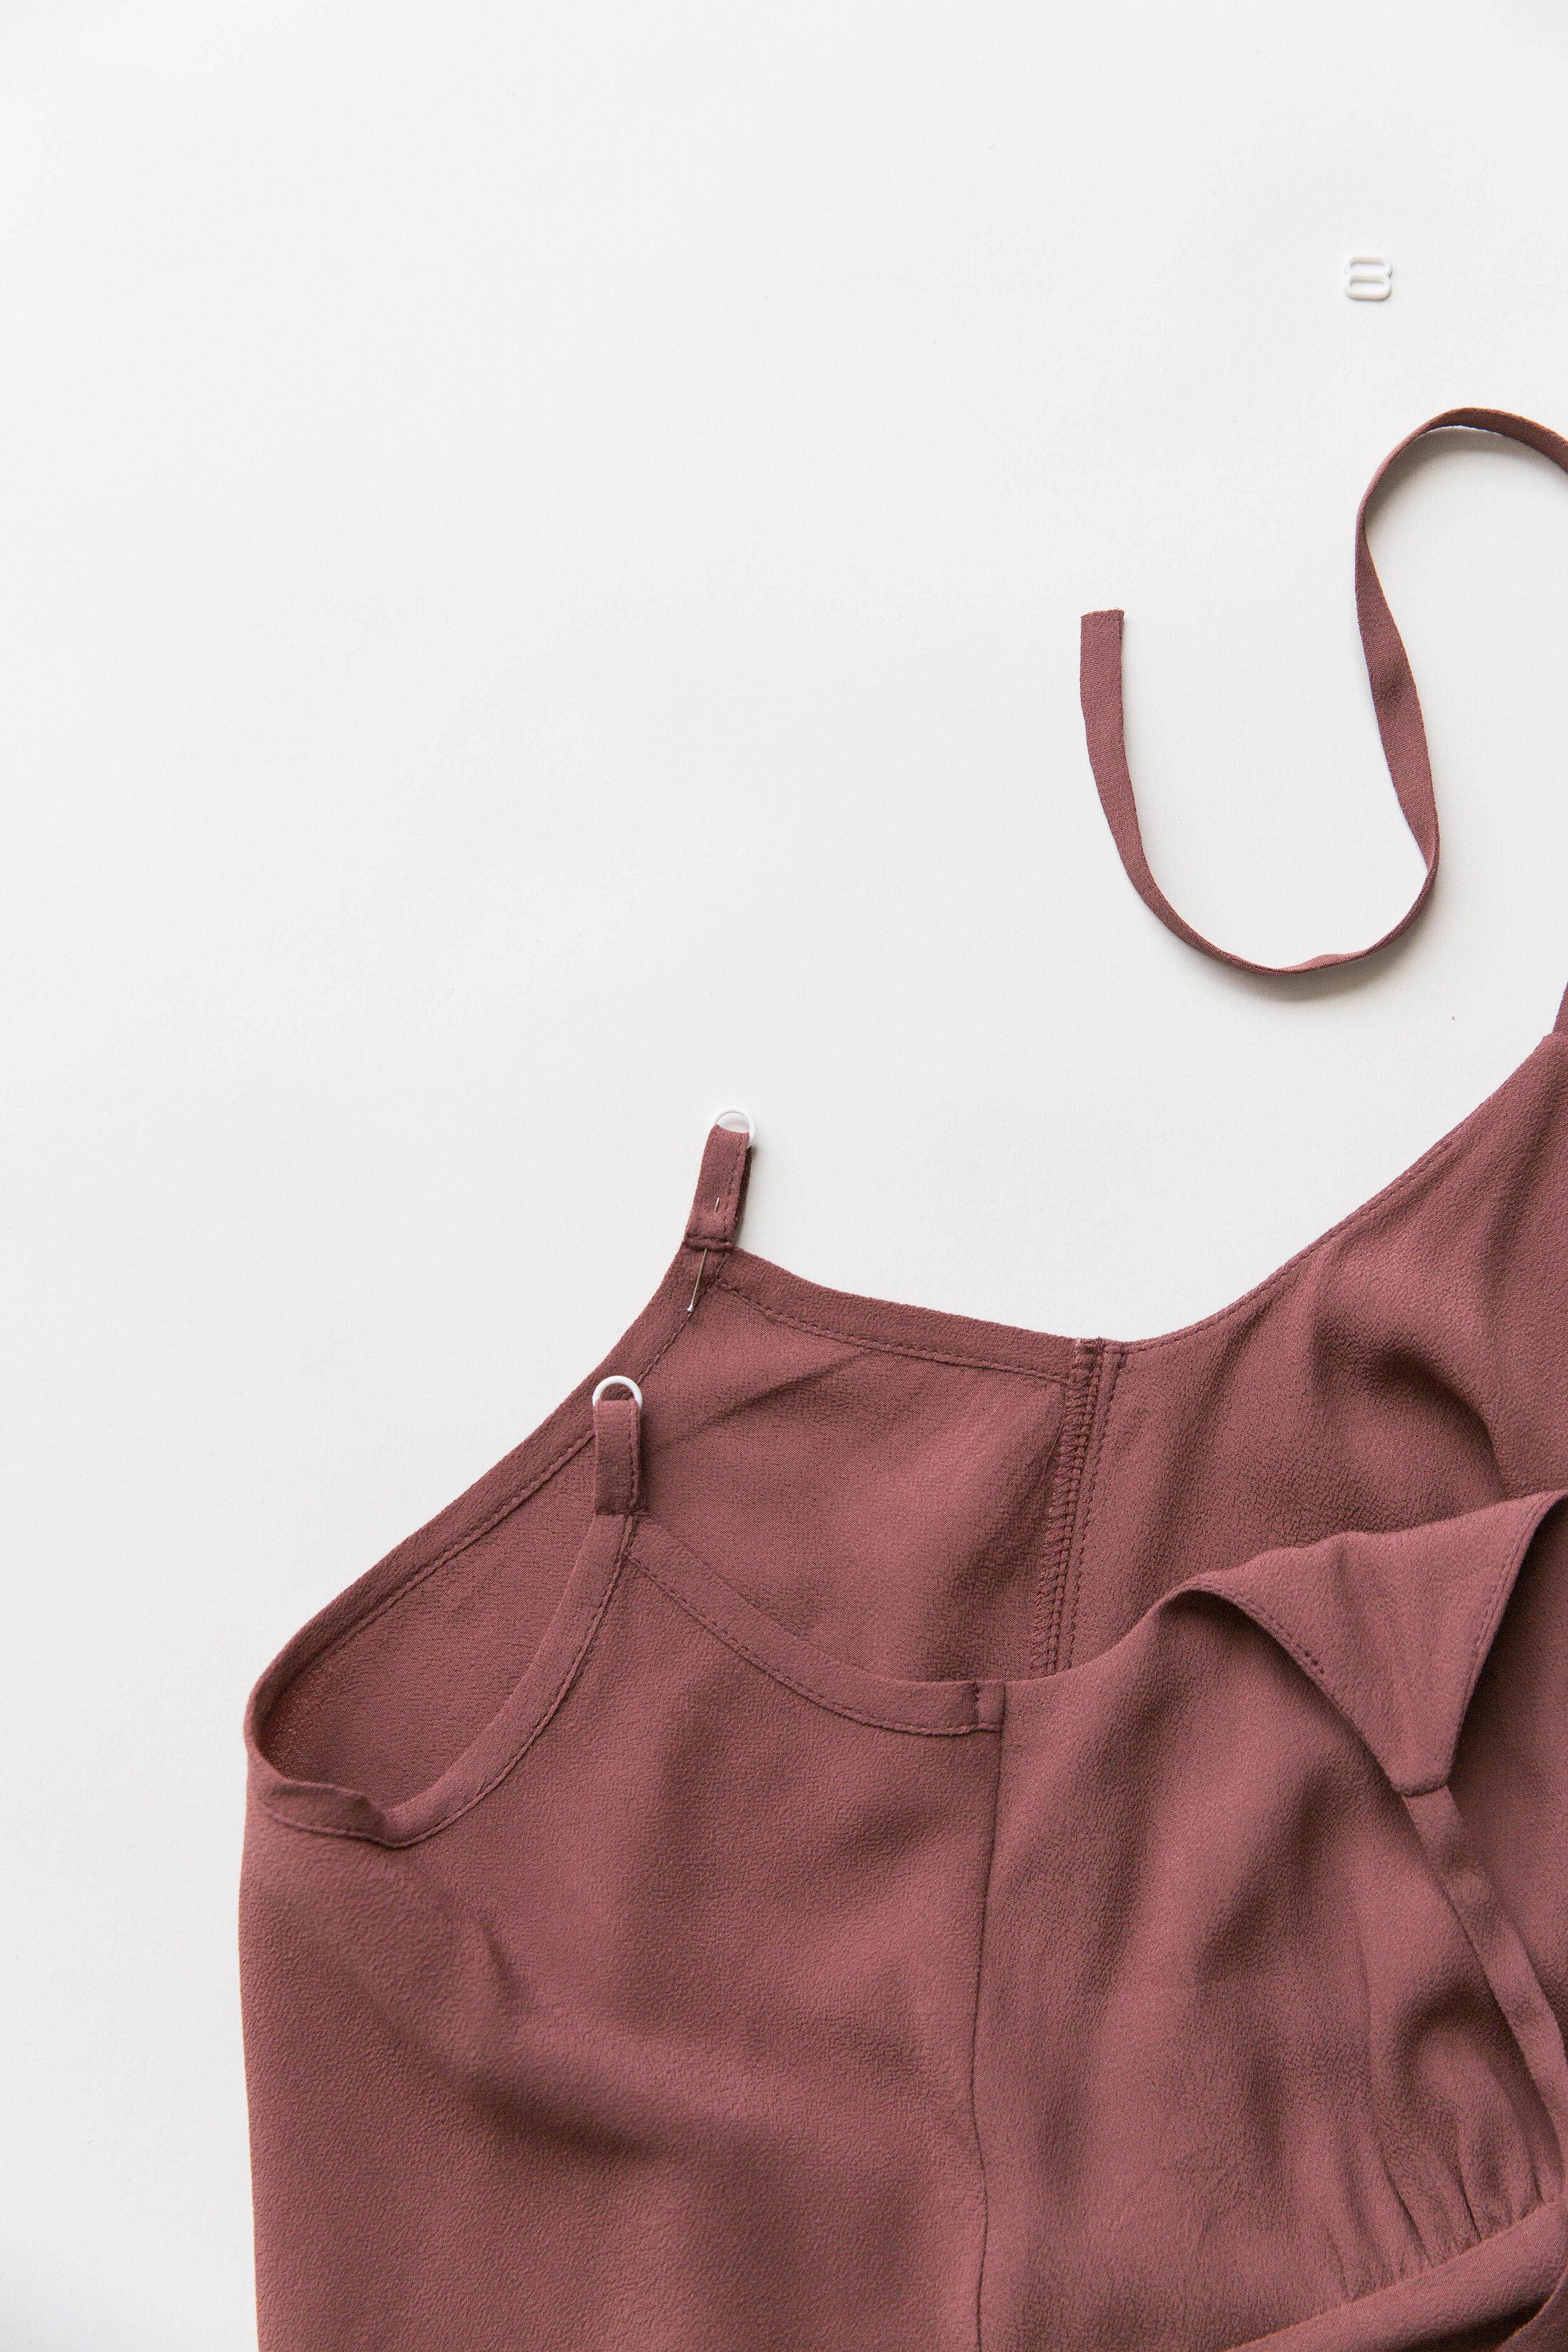
Step 3
Pin straps to top points of bust cups on the right side of fabric. Stitch strap in place, starting and stopping where the strap meets the guideline on each side of strap.
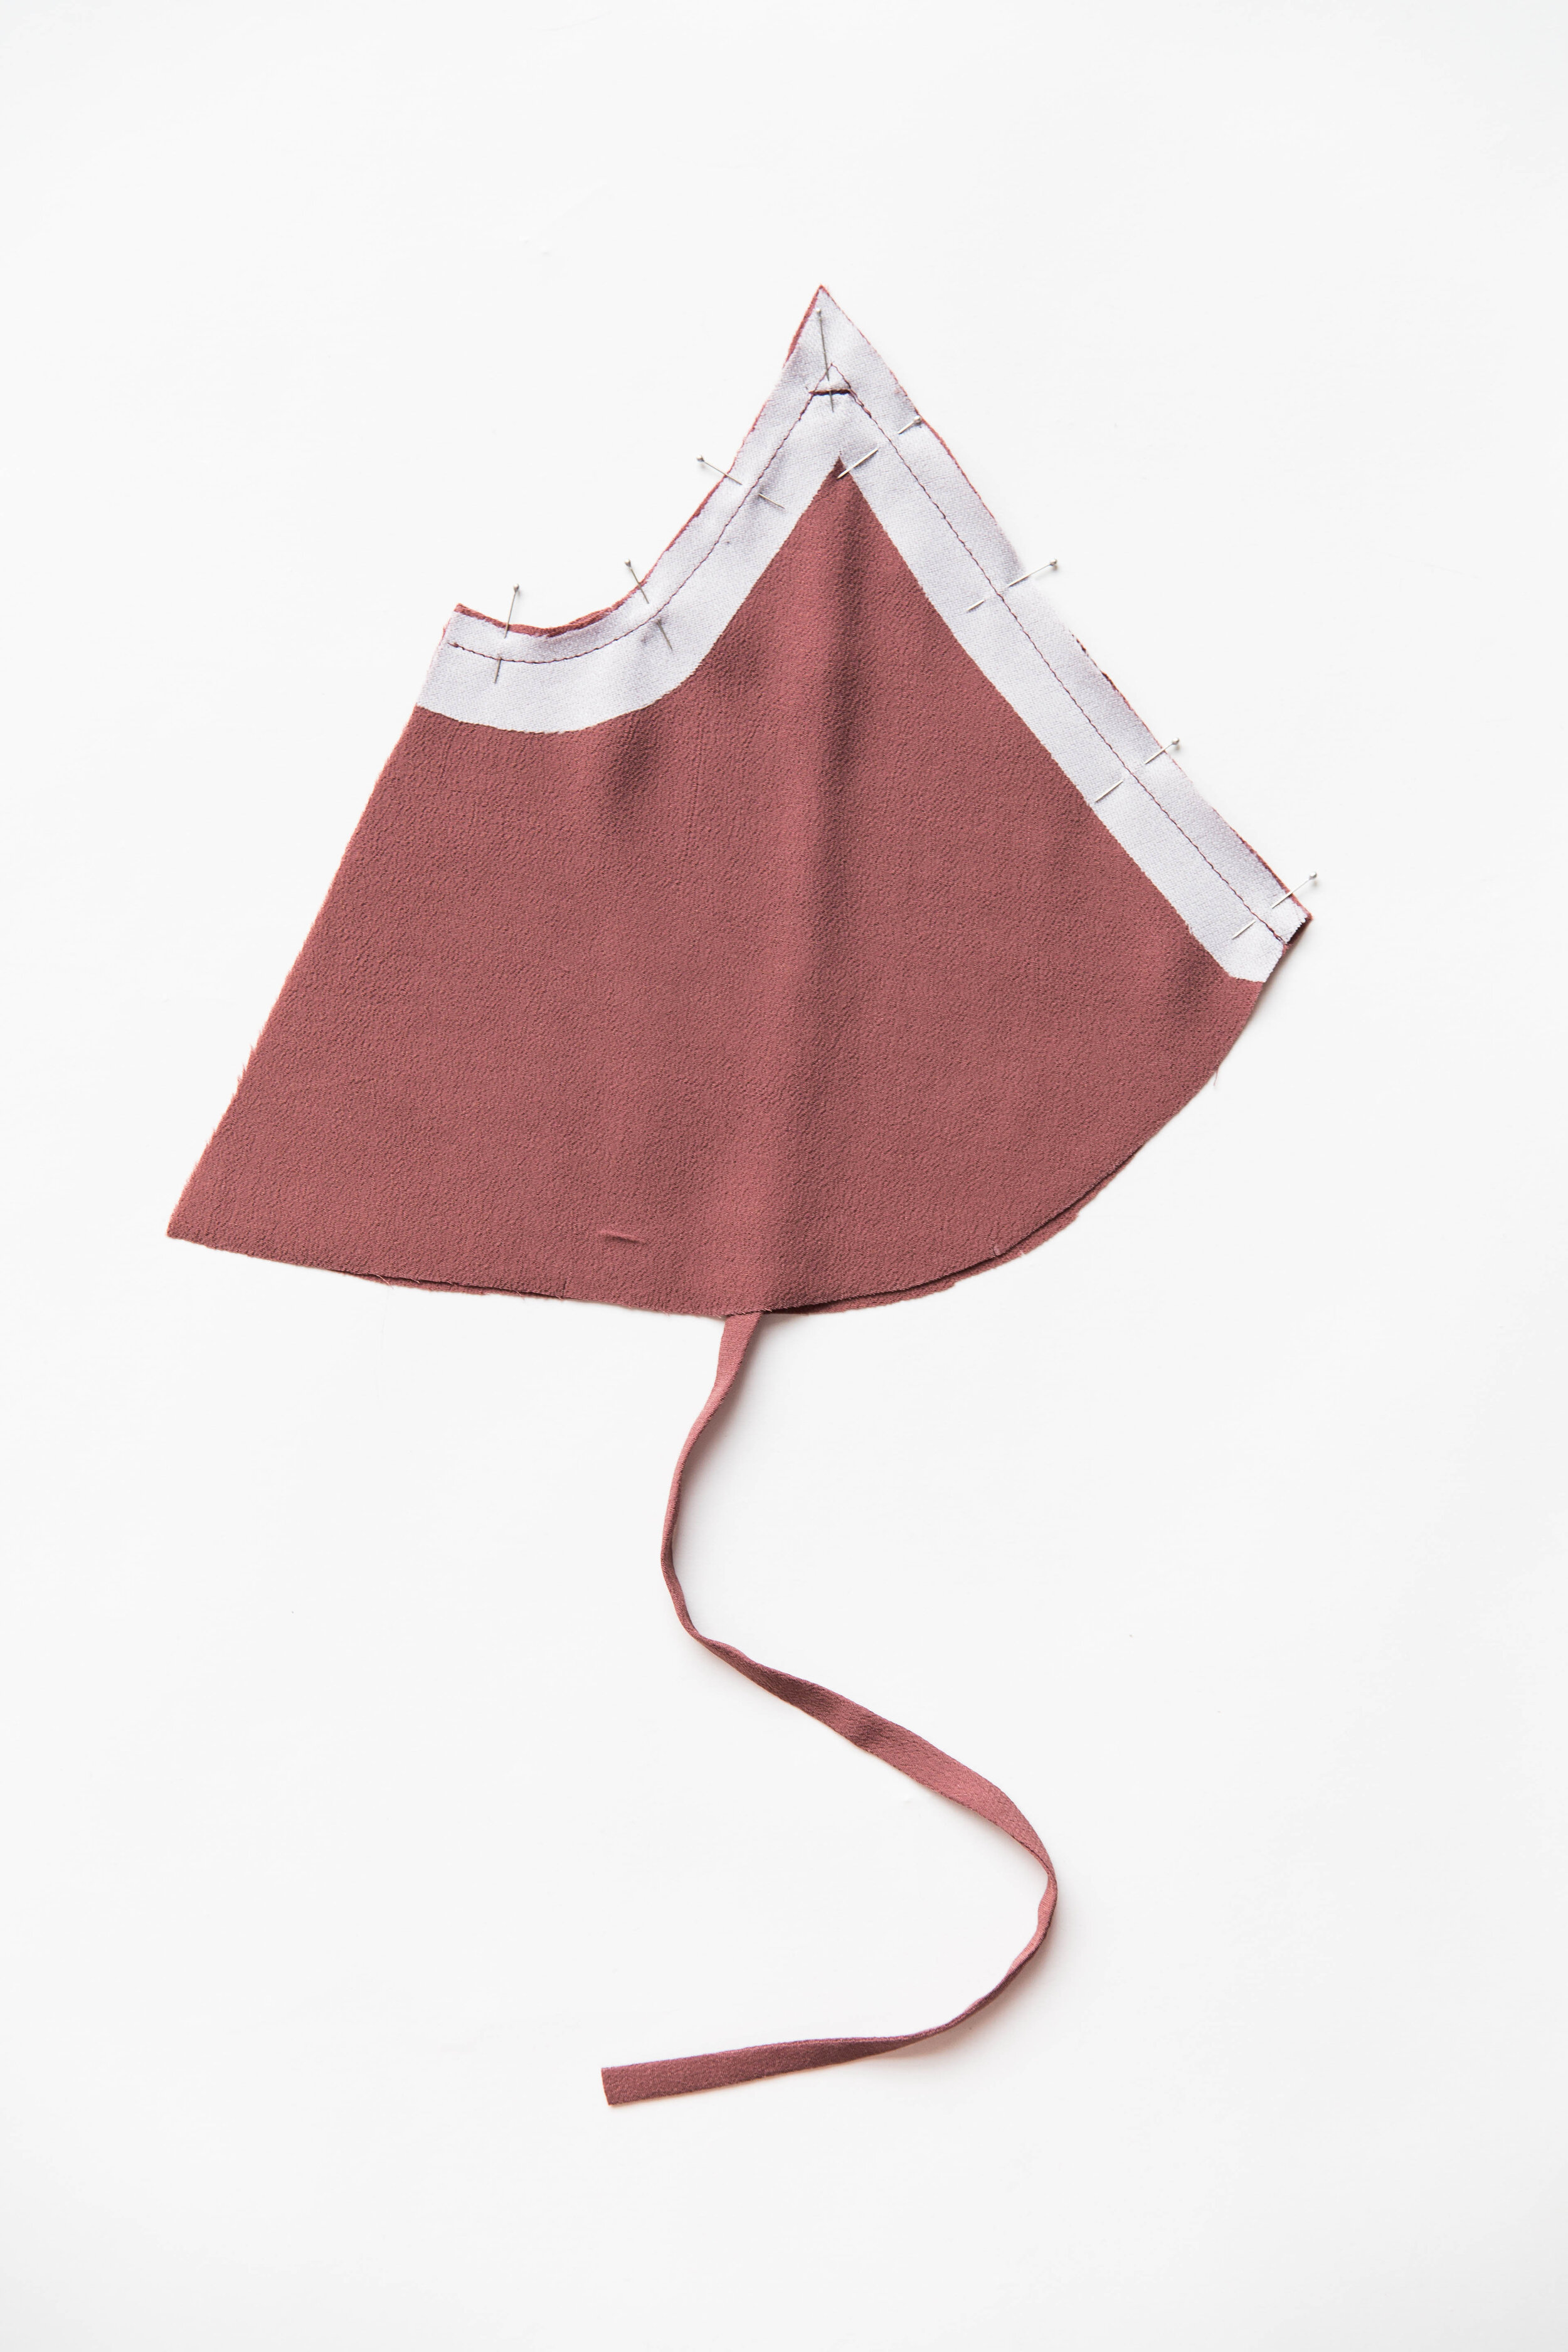
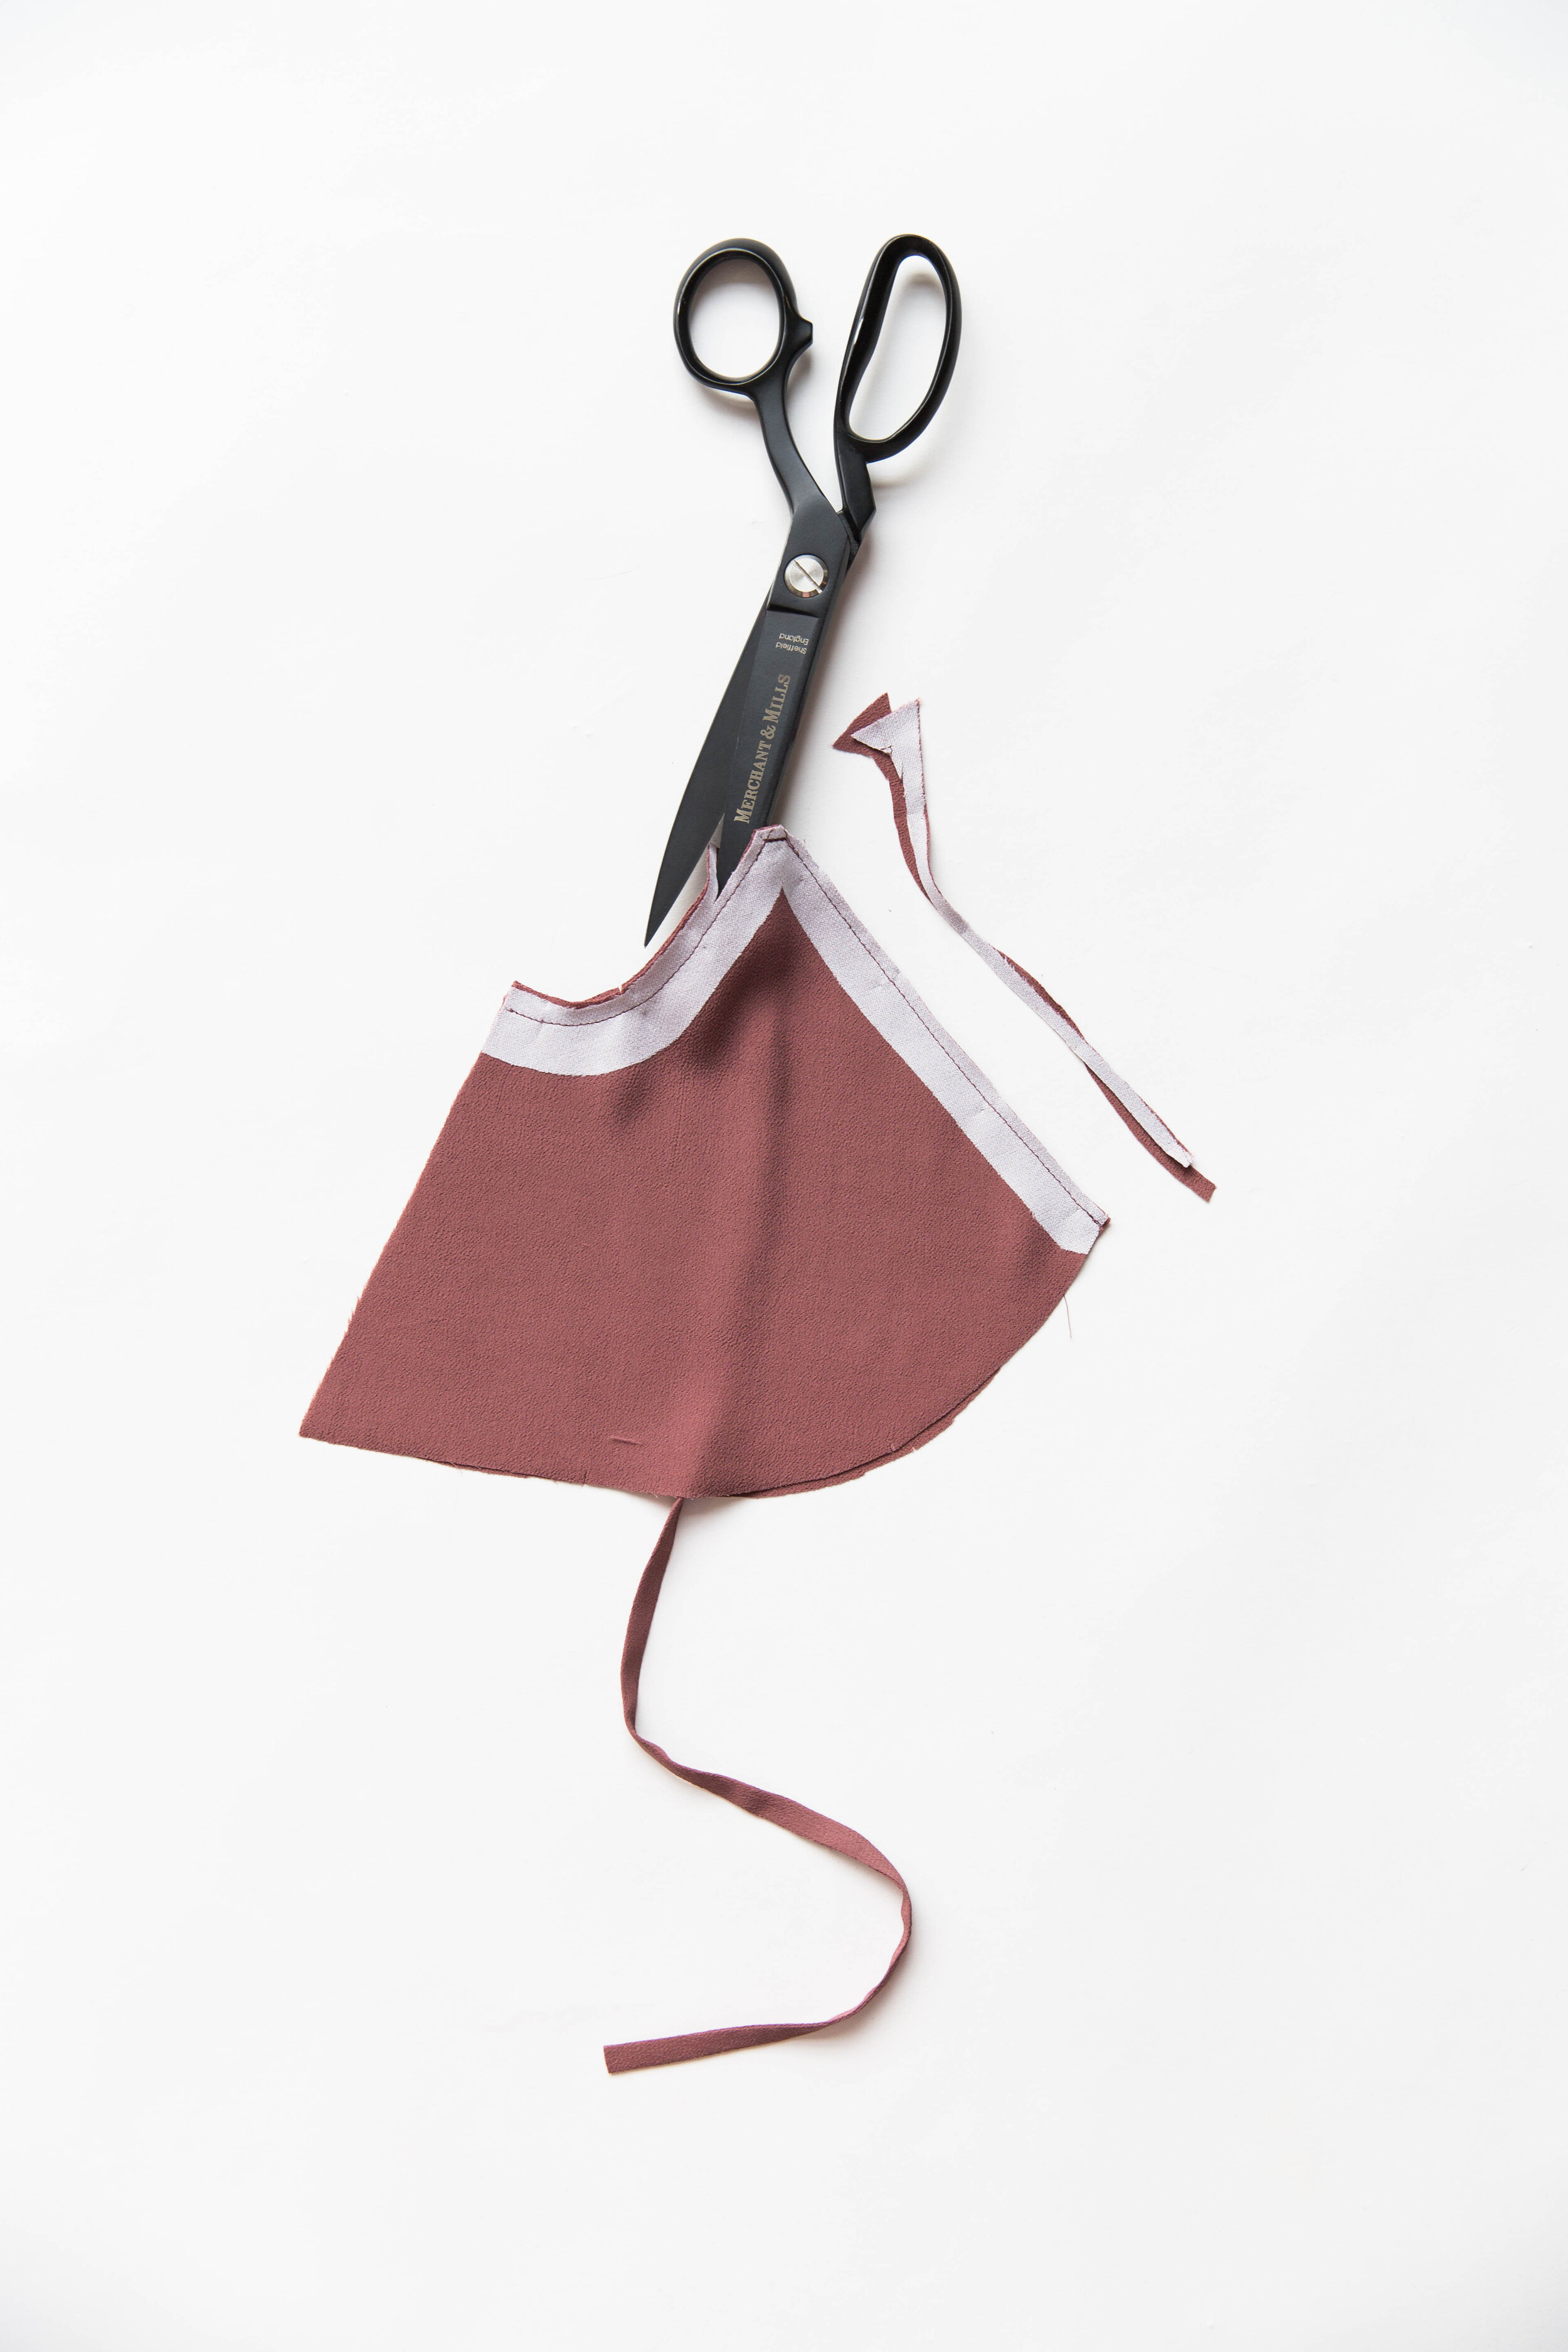
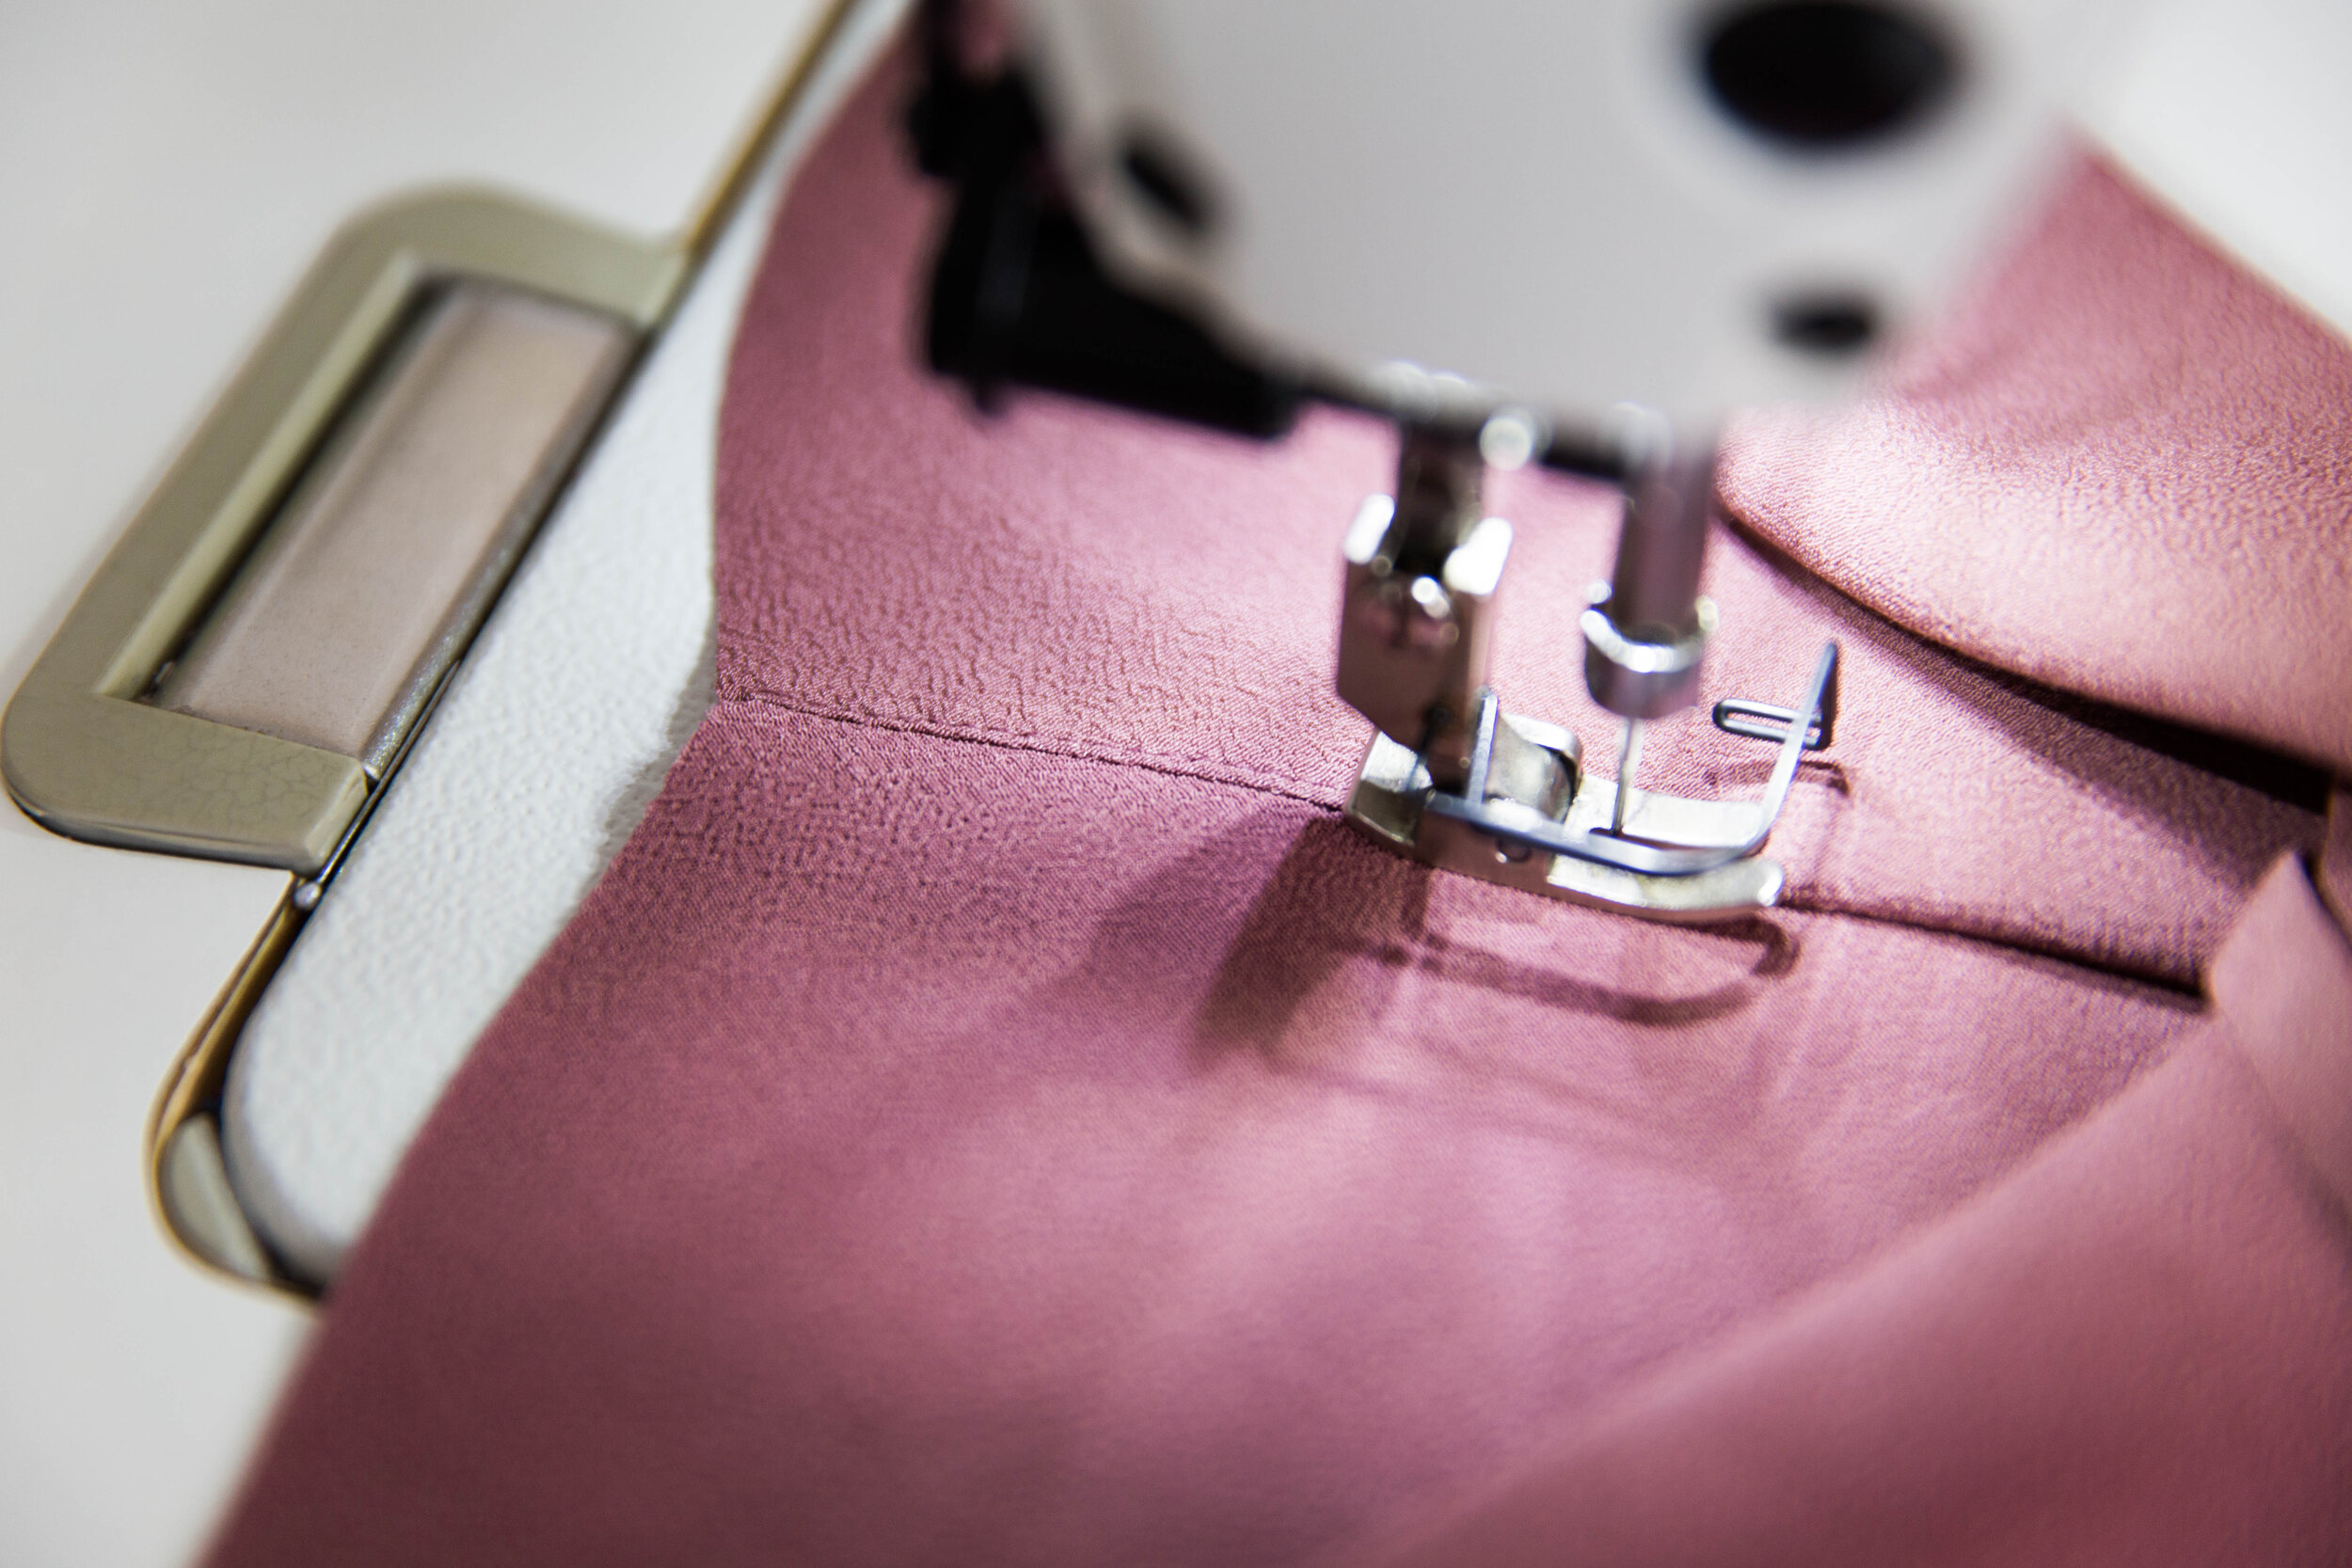
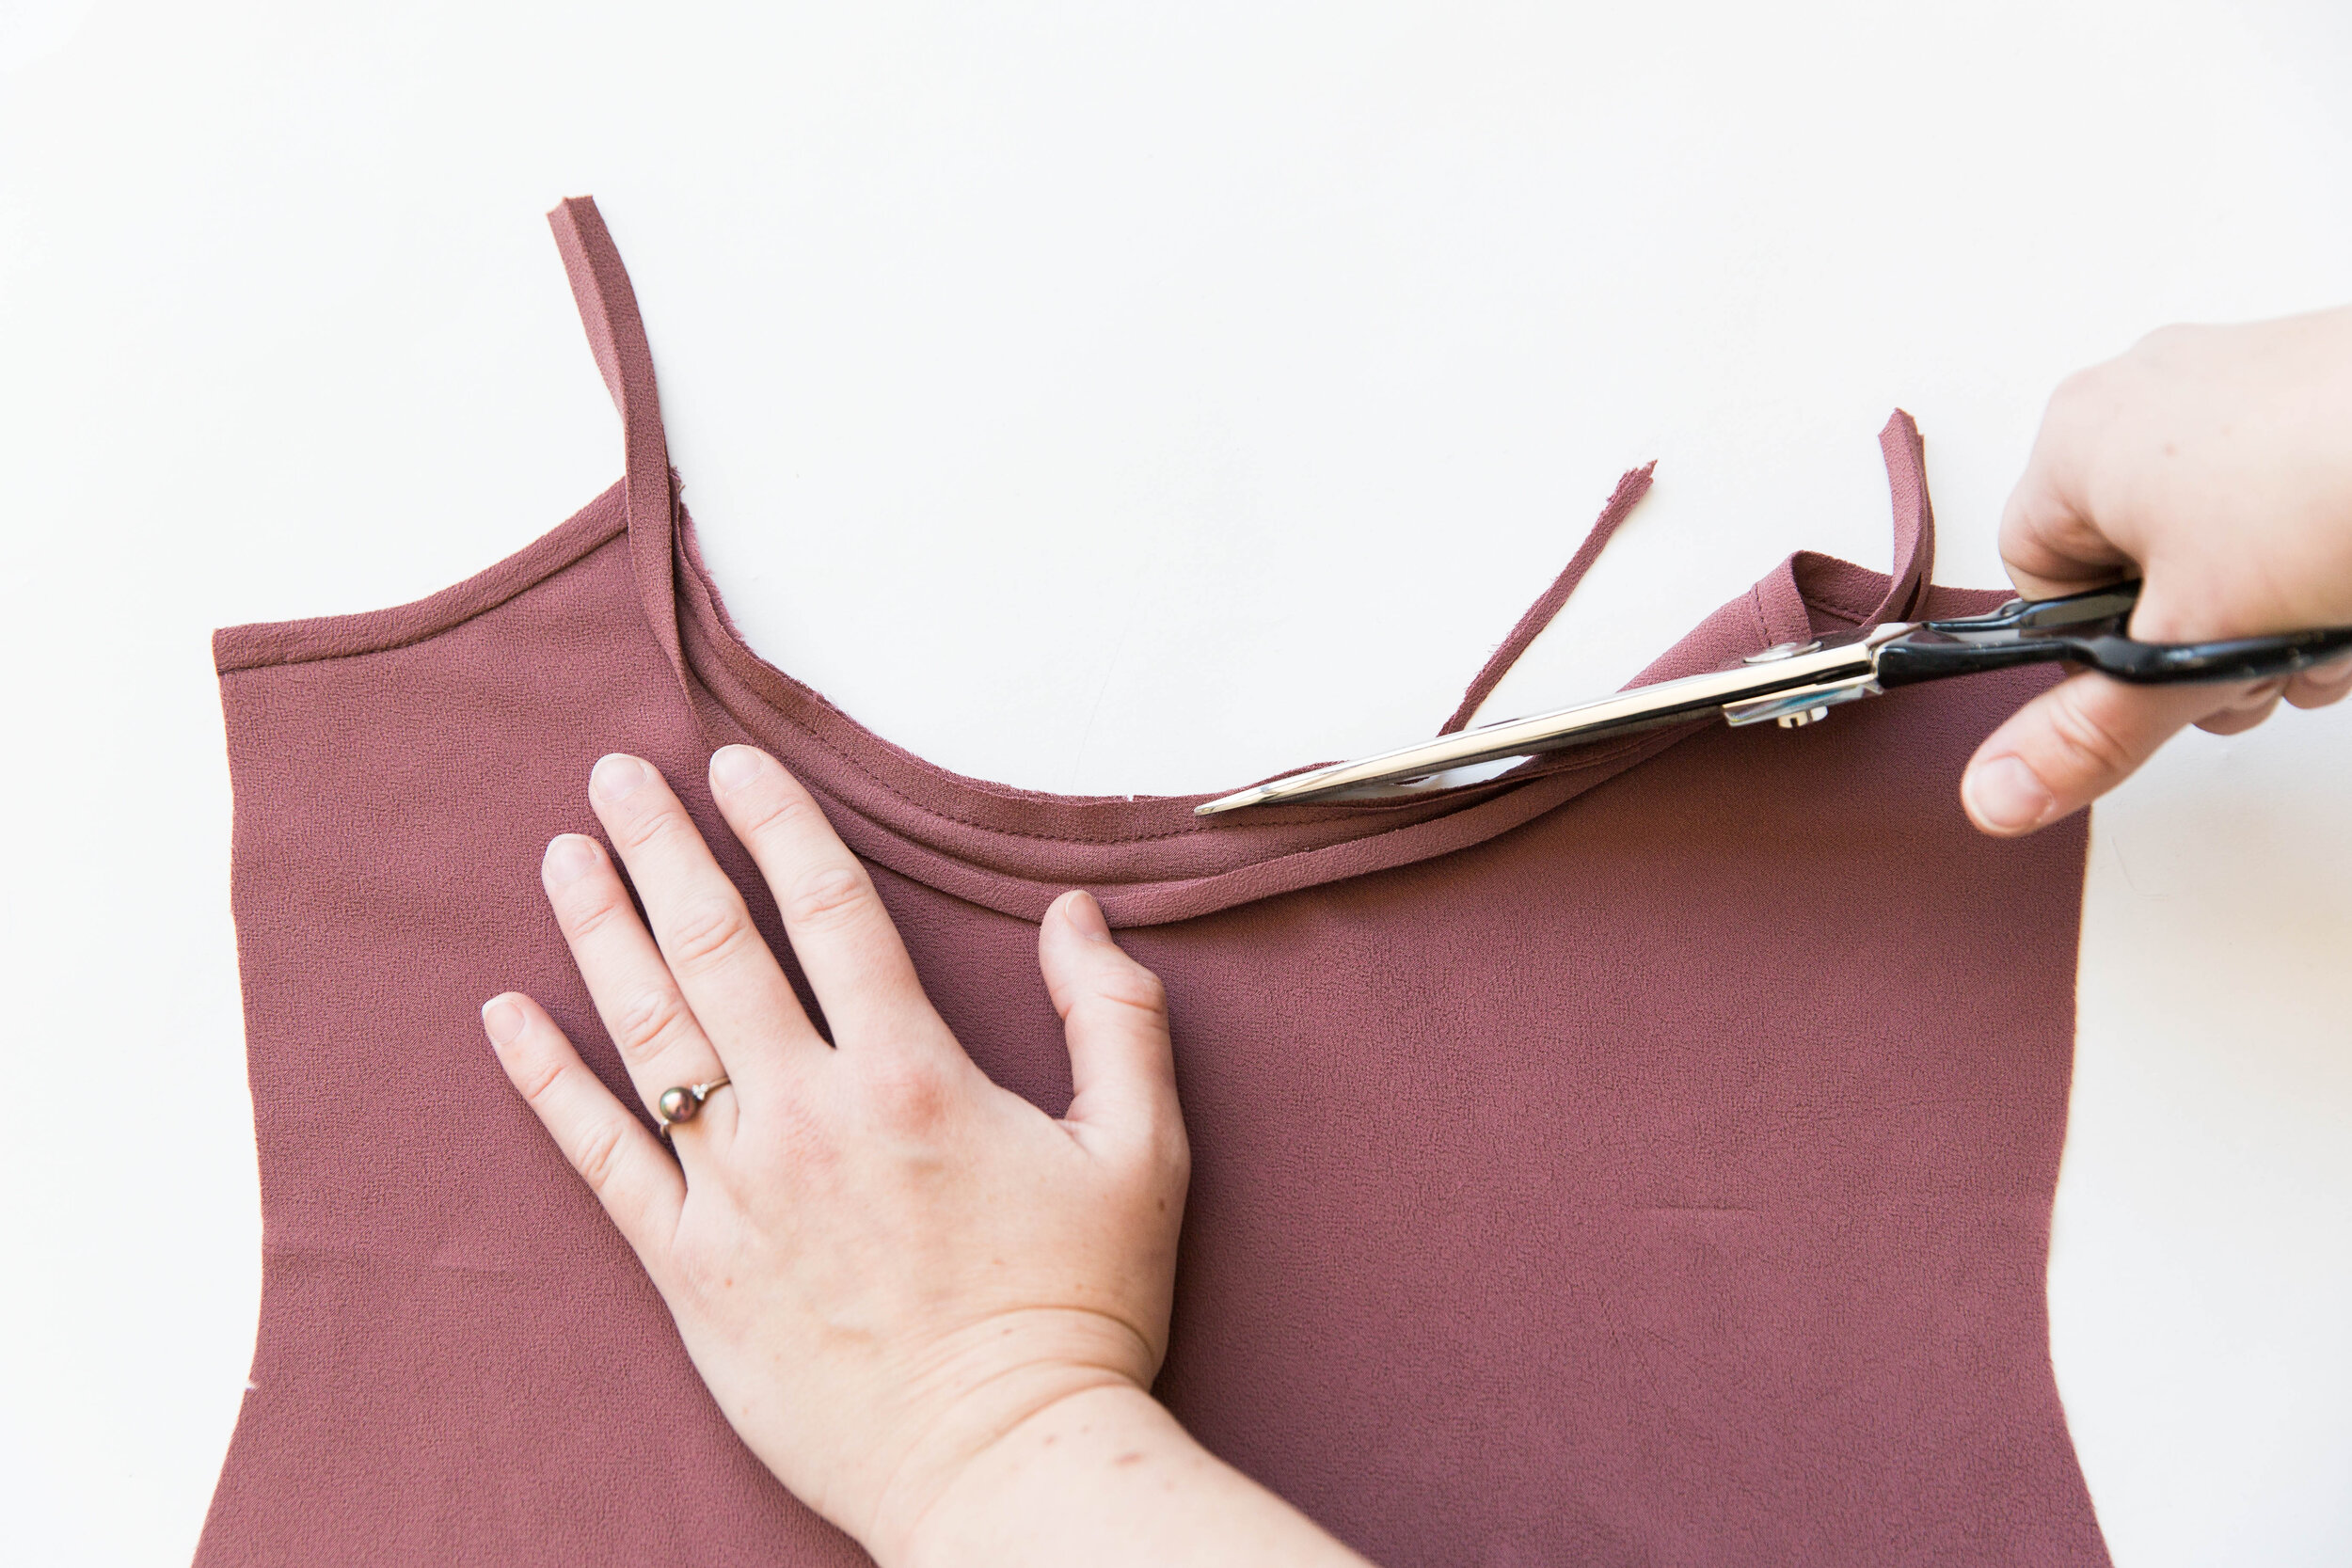
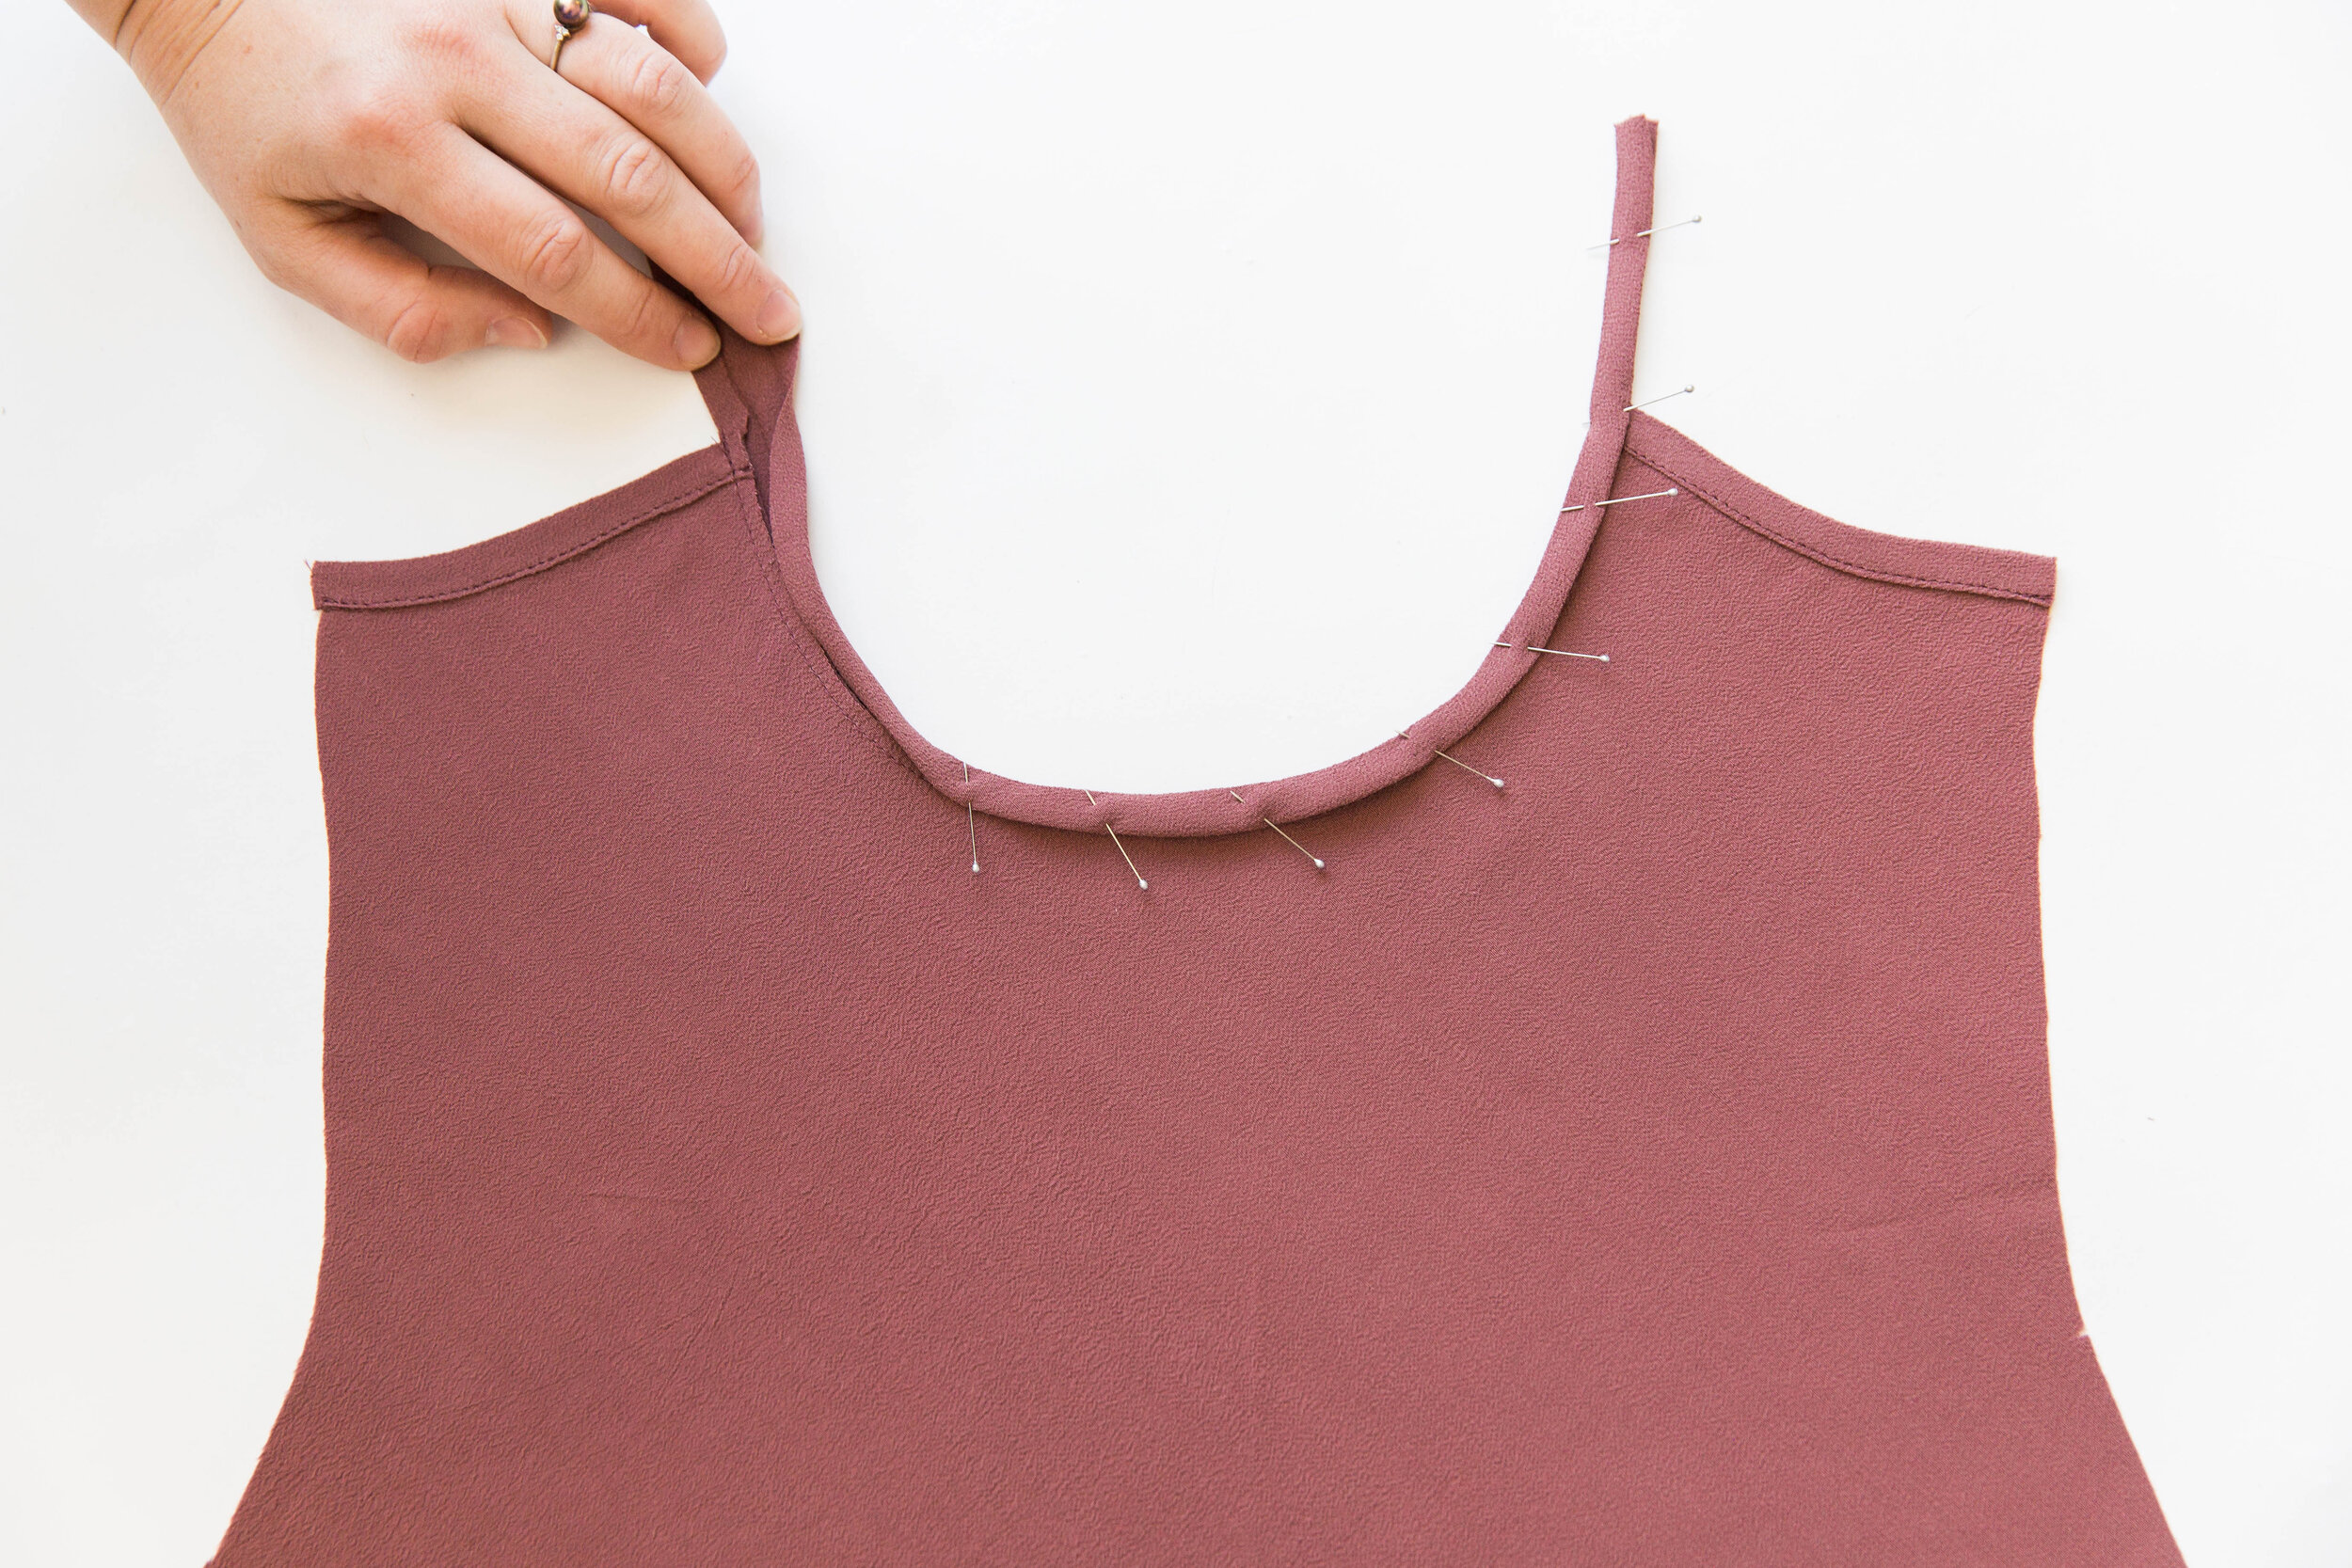
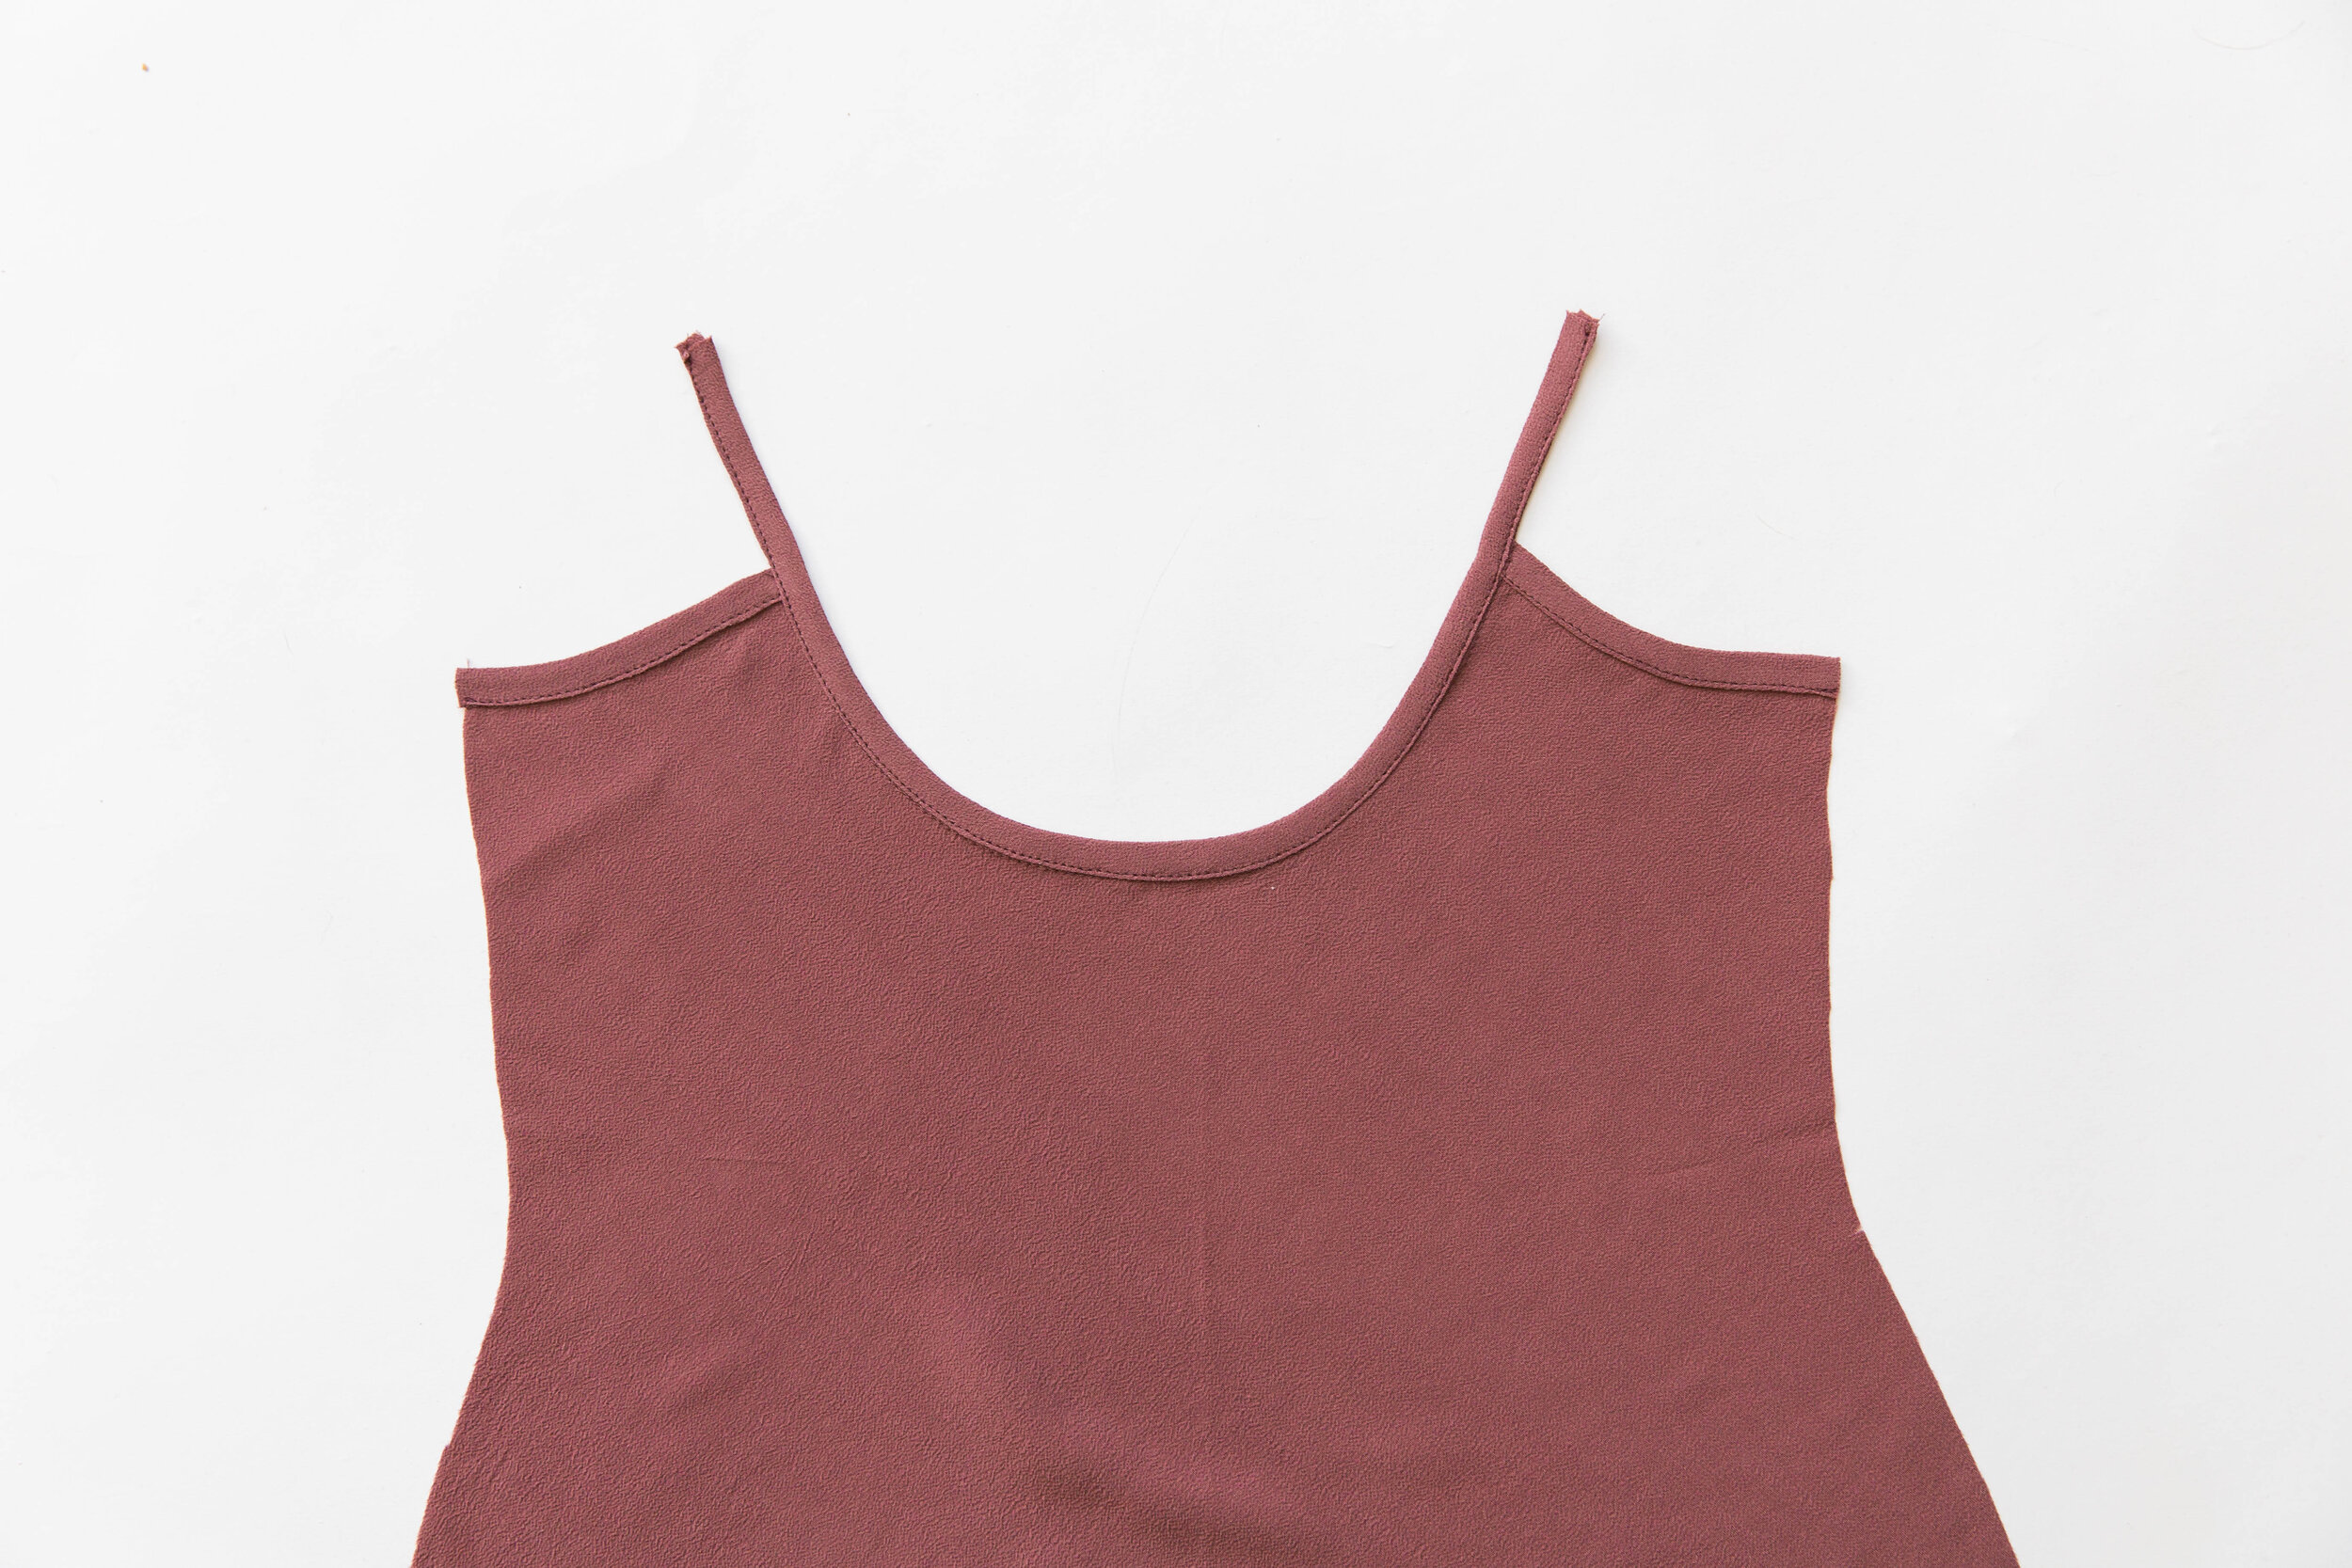
Step 4
With right sides facing pin the bust cup lining to the bust cup shell. Stitch together along edge of fusing. Trim seam allowance in half and clip at point and around underarm curve. Under stitch seam allowance toward the lining where you can. Turn through to the right side and press.
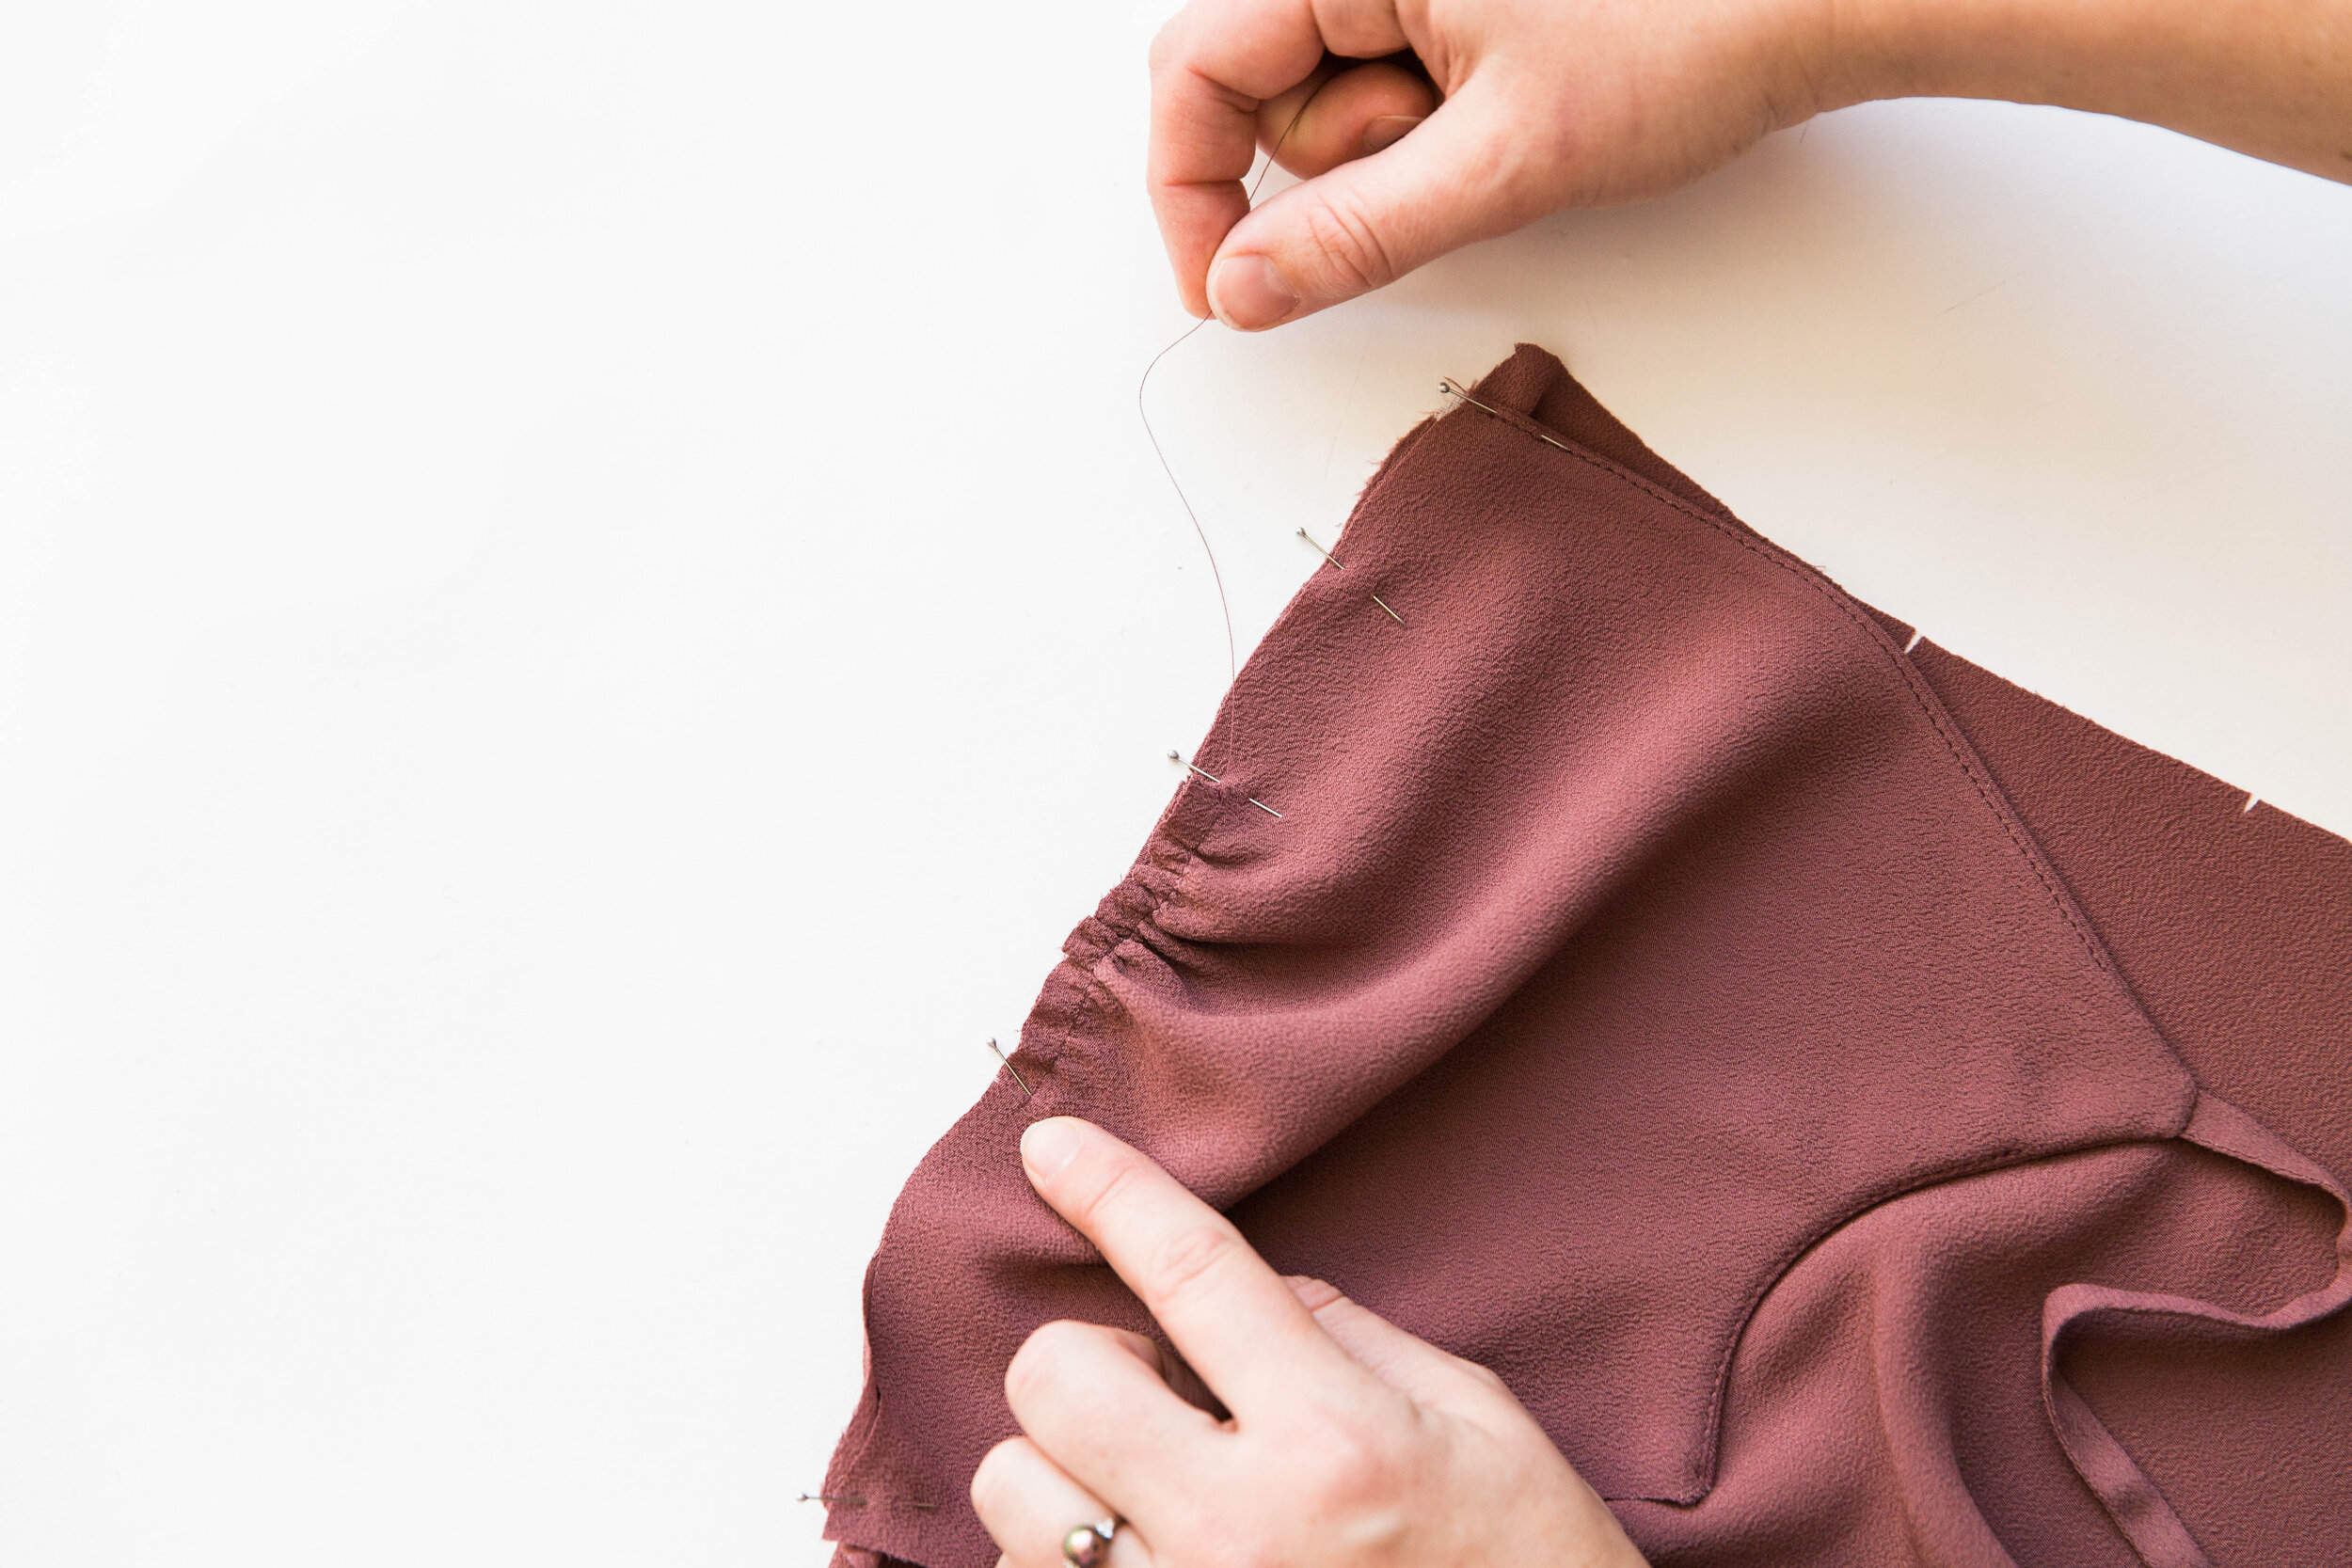
step 5
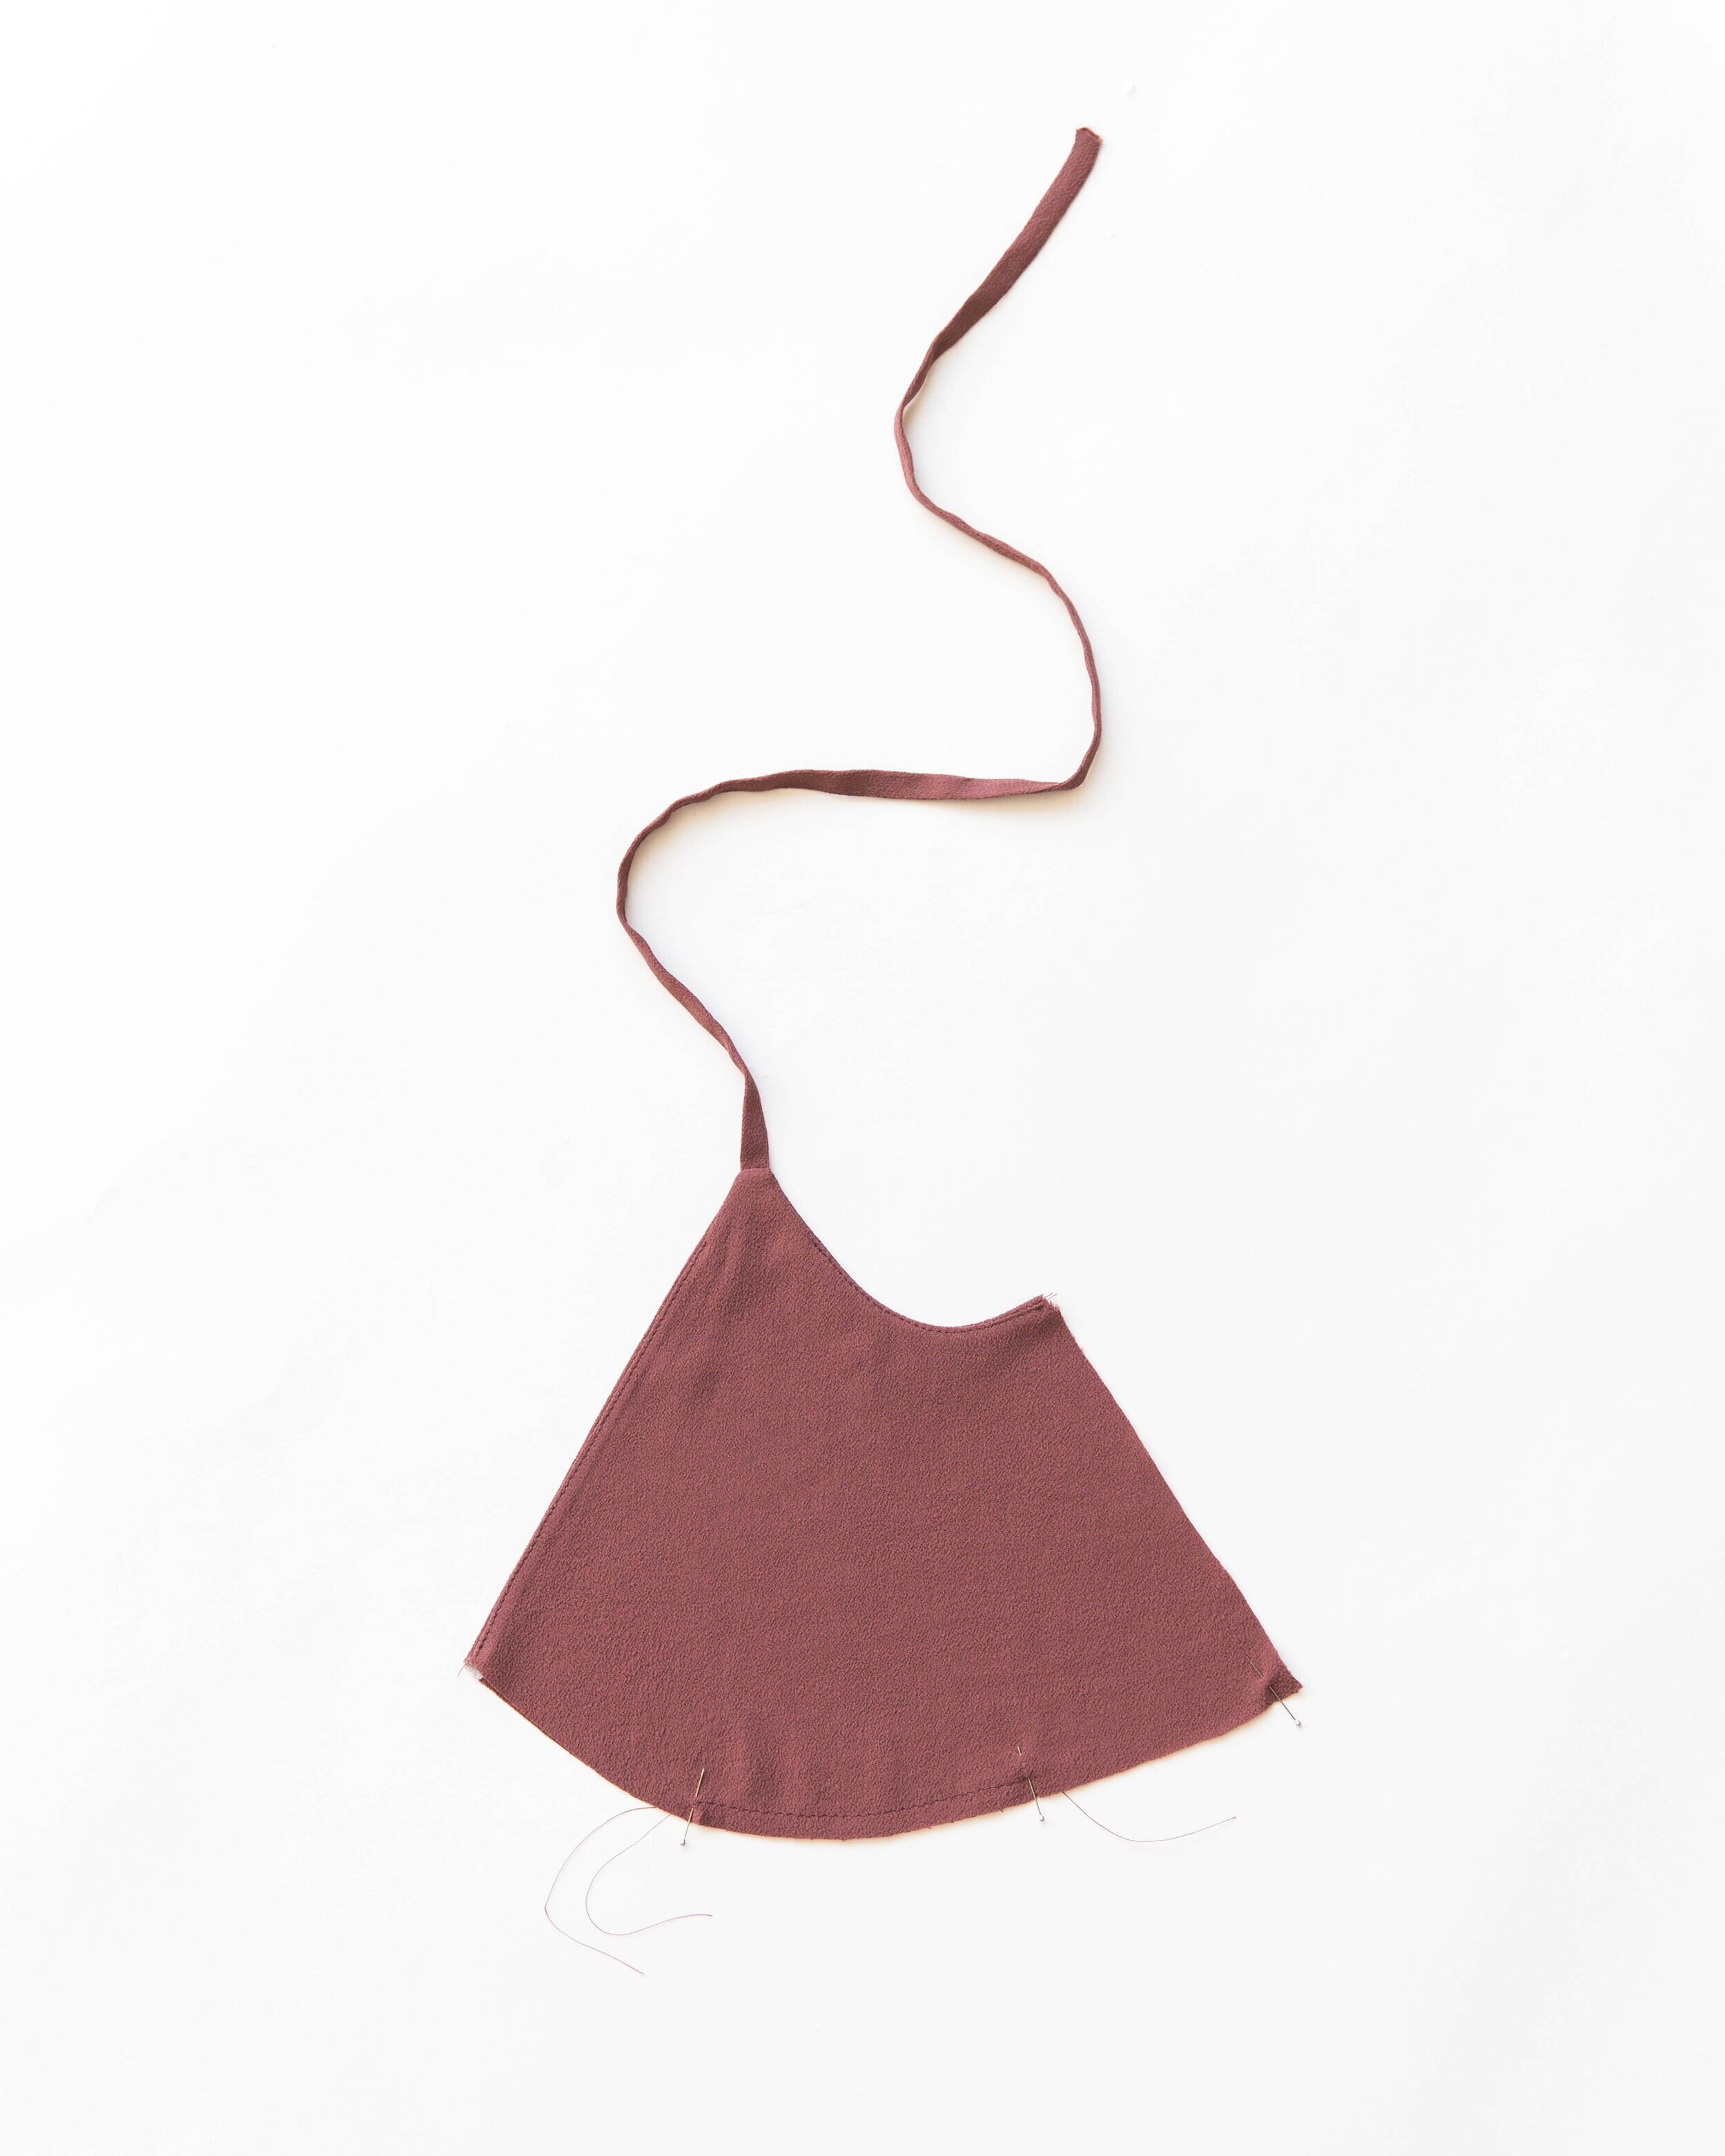
Using a long gathering stitch, stitch between the two notches along bottom edge of bust cups through both shell and lining, leaving long tails of thread.
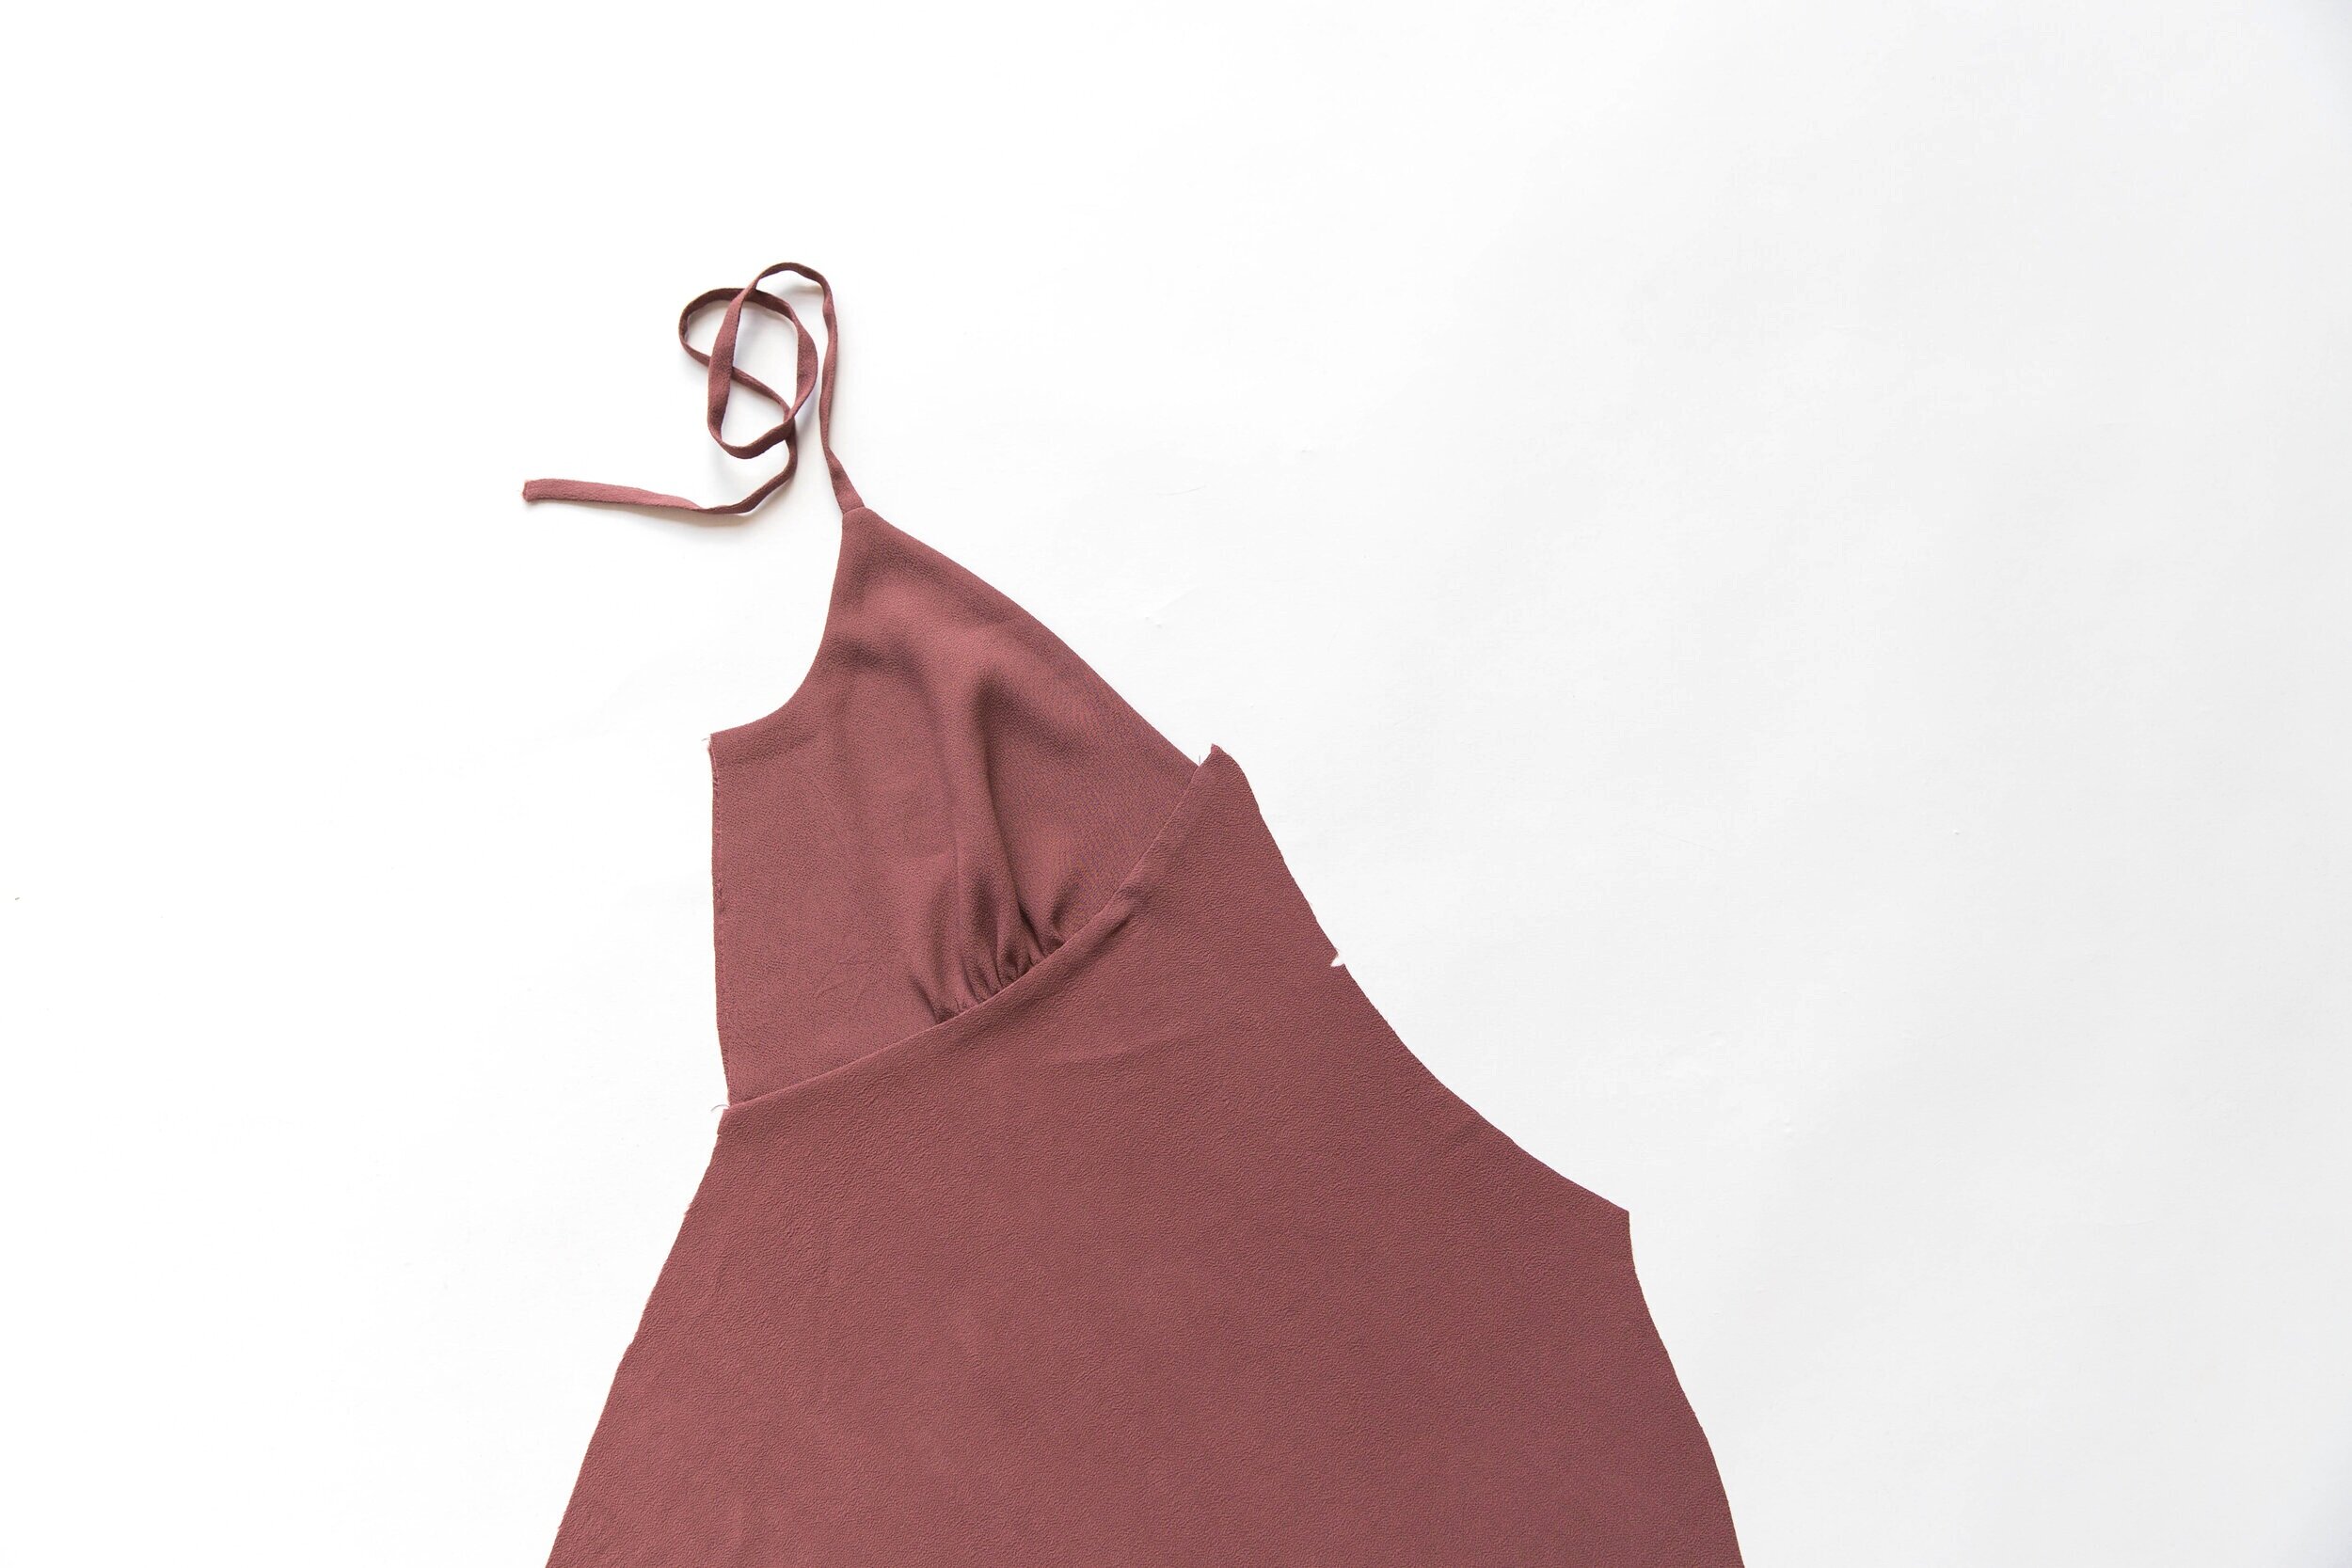
Step 6
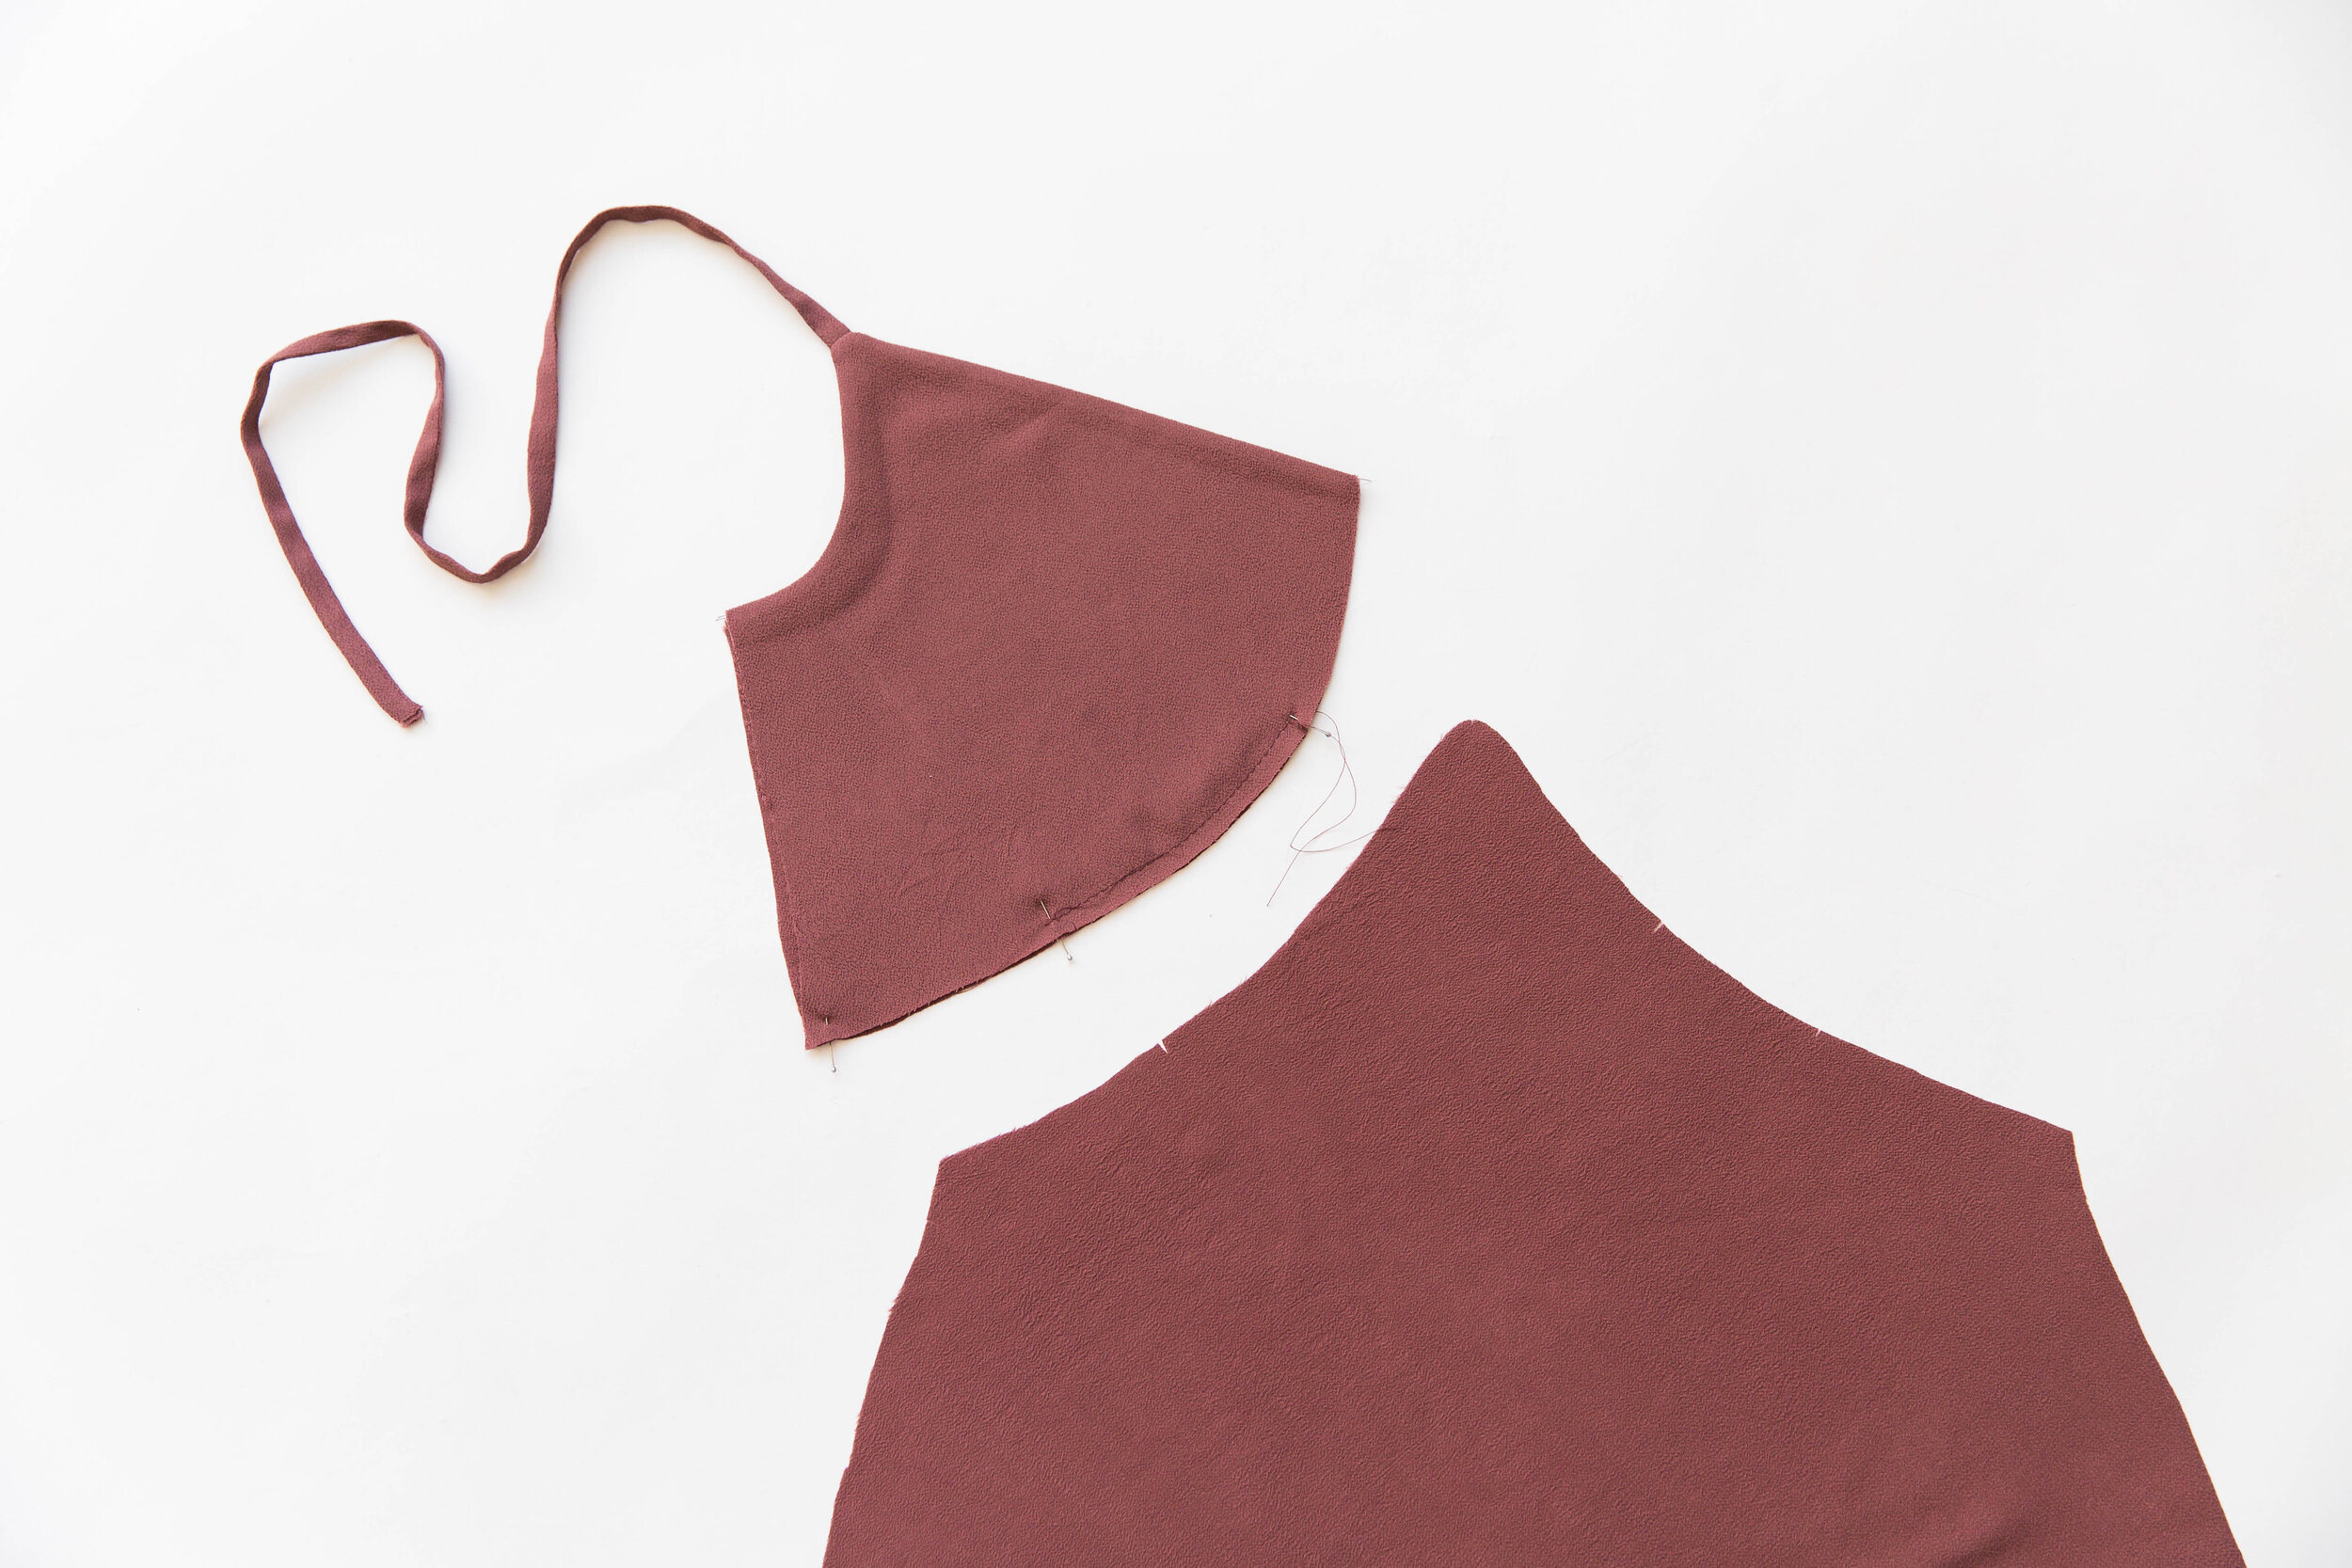
With right sides facing, pin the two gathering notches on the bust cup to the two notches on the top edge of front panel. Pin, matching the bust cup side seam with the front panel side seam, then pin out so that the center front edge of bust cup intersects with your centre front marking. Pull gathering stitch on bust panel taut so that it forms a nice even gather between the two gathering notches. Stitch together. Neaten seam. Press seam allowance downward toward front panel. Repeat on other side.

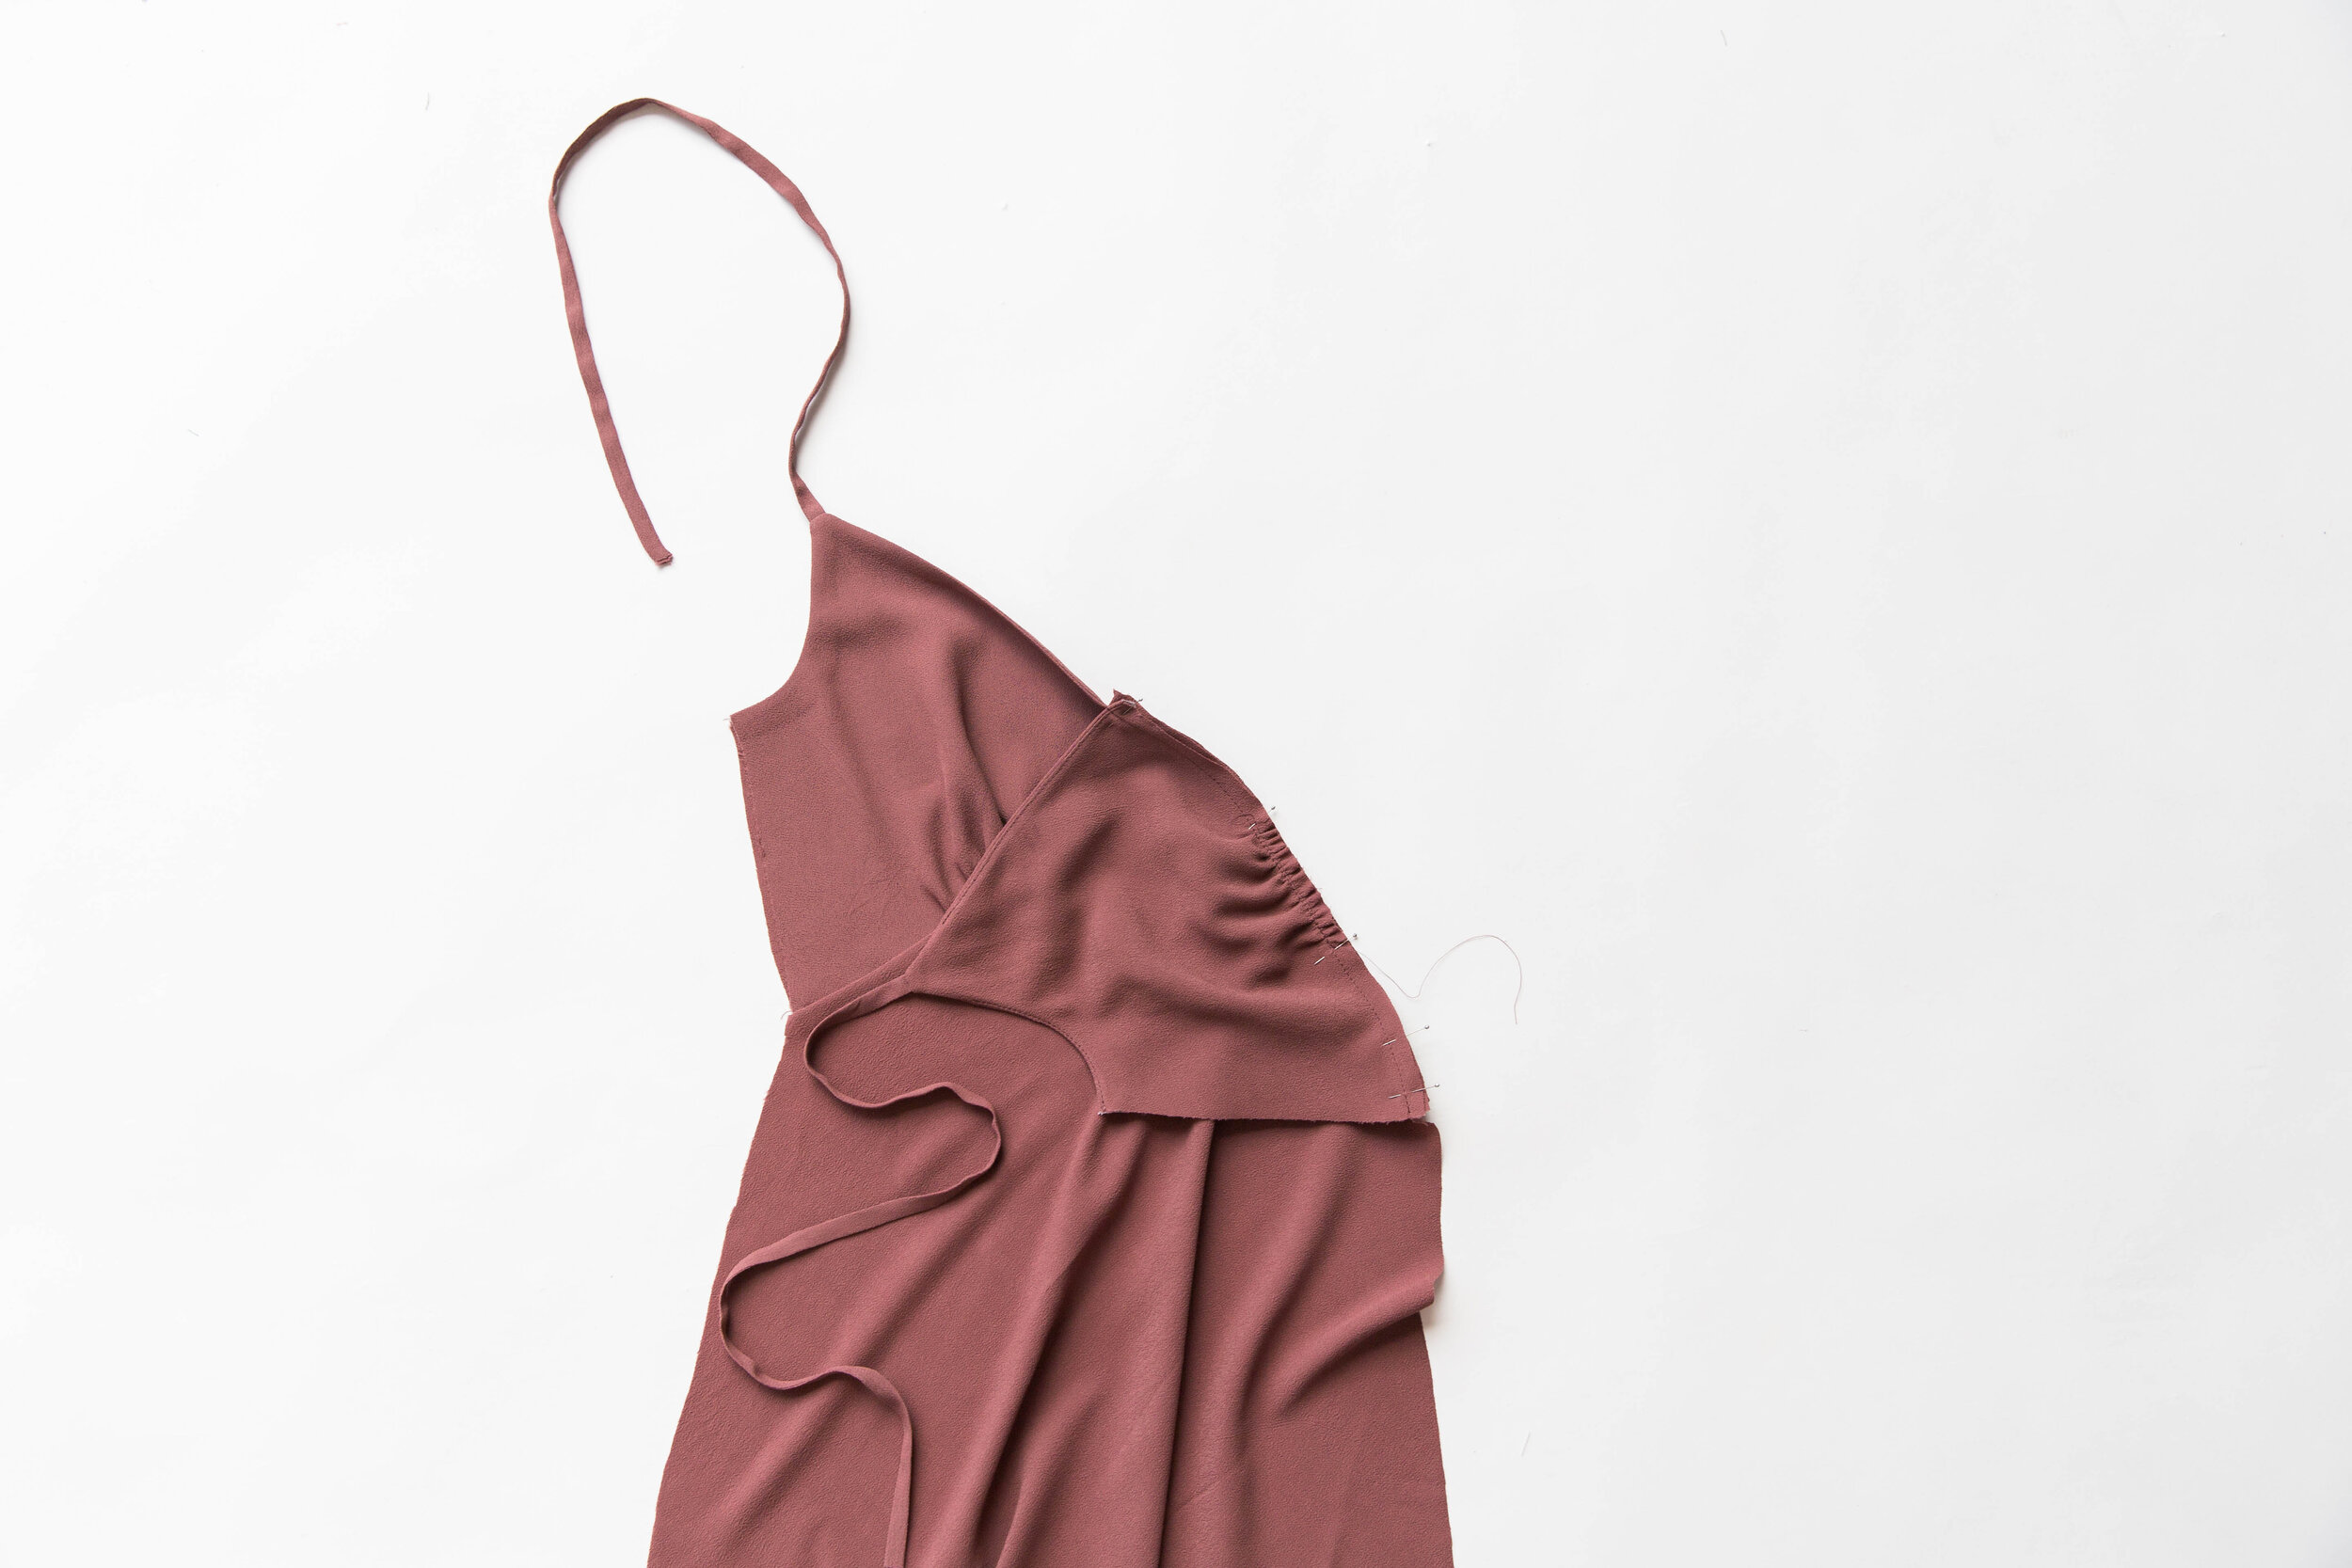
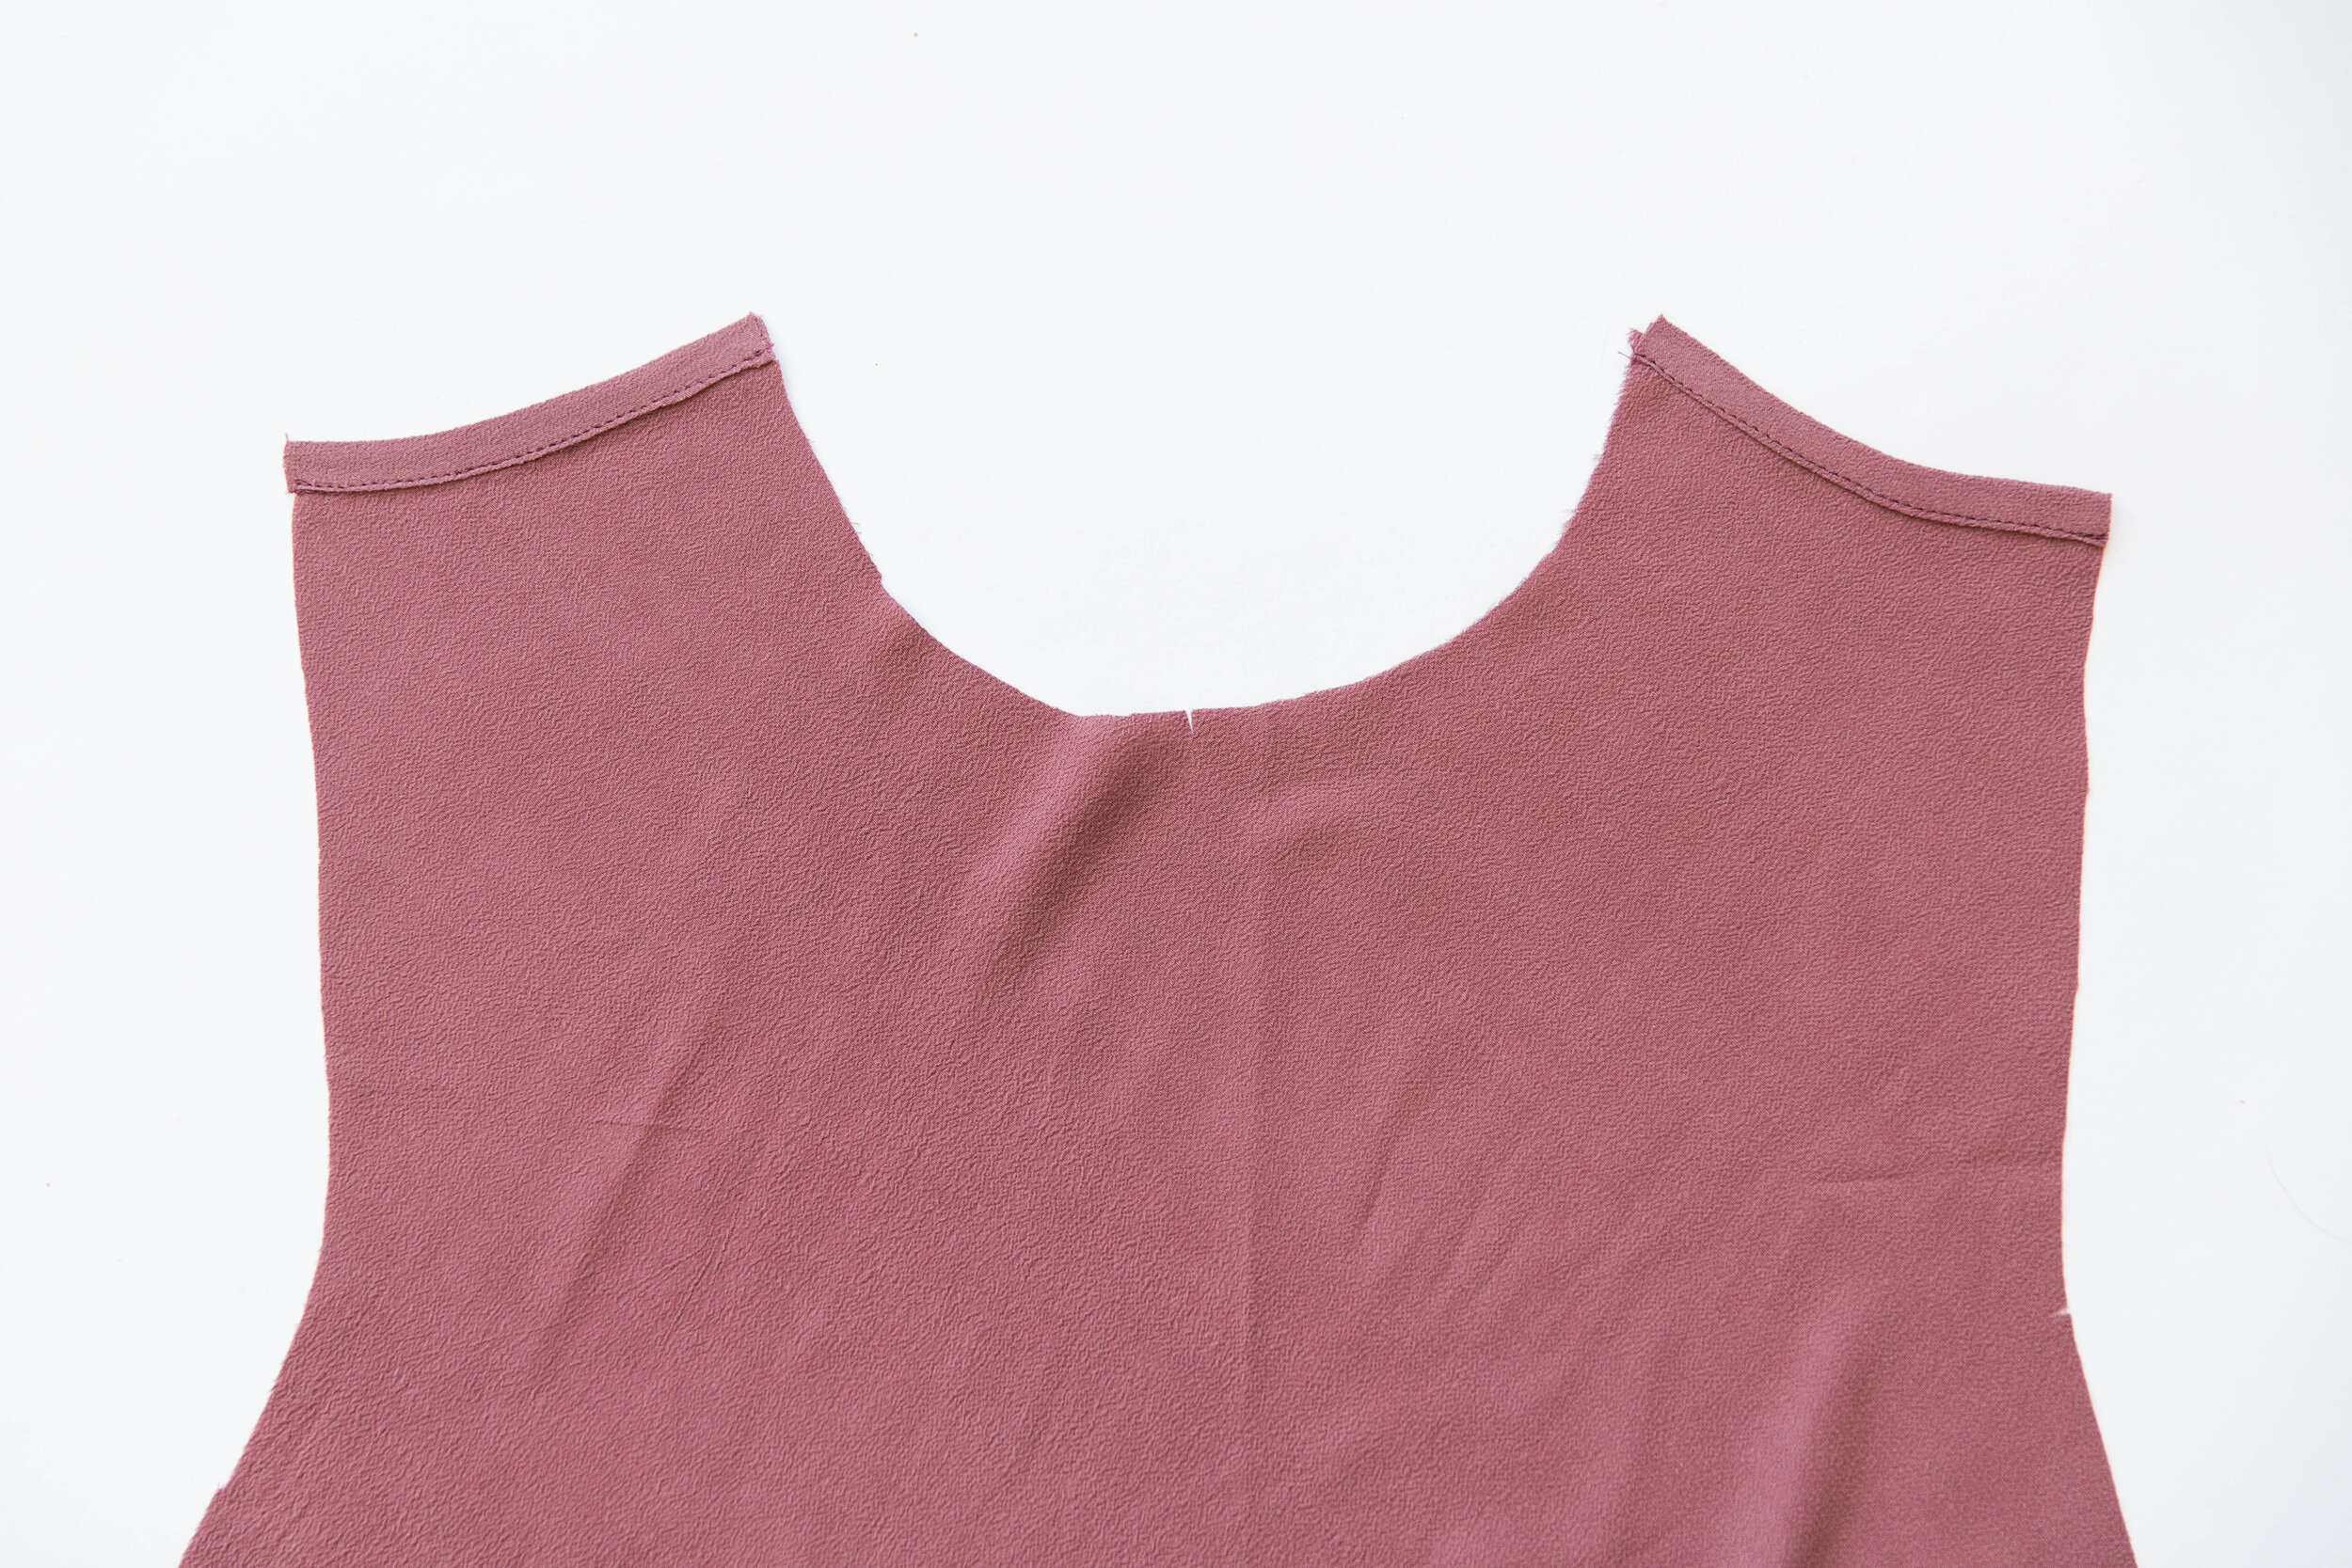
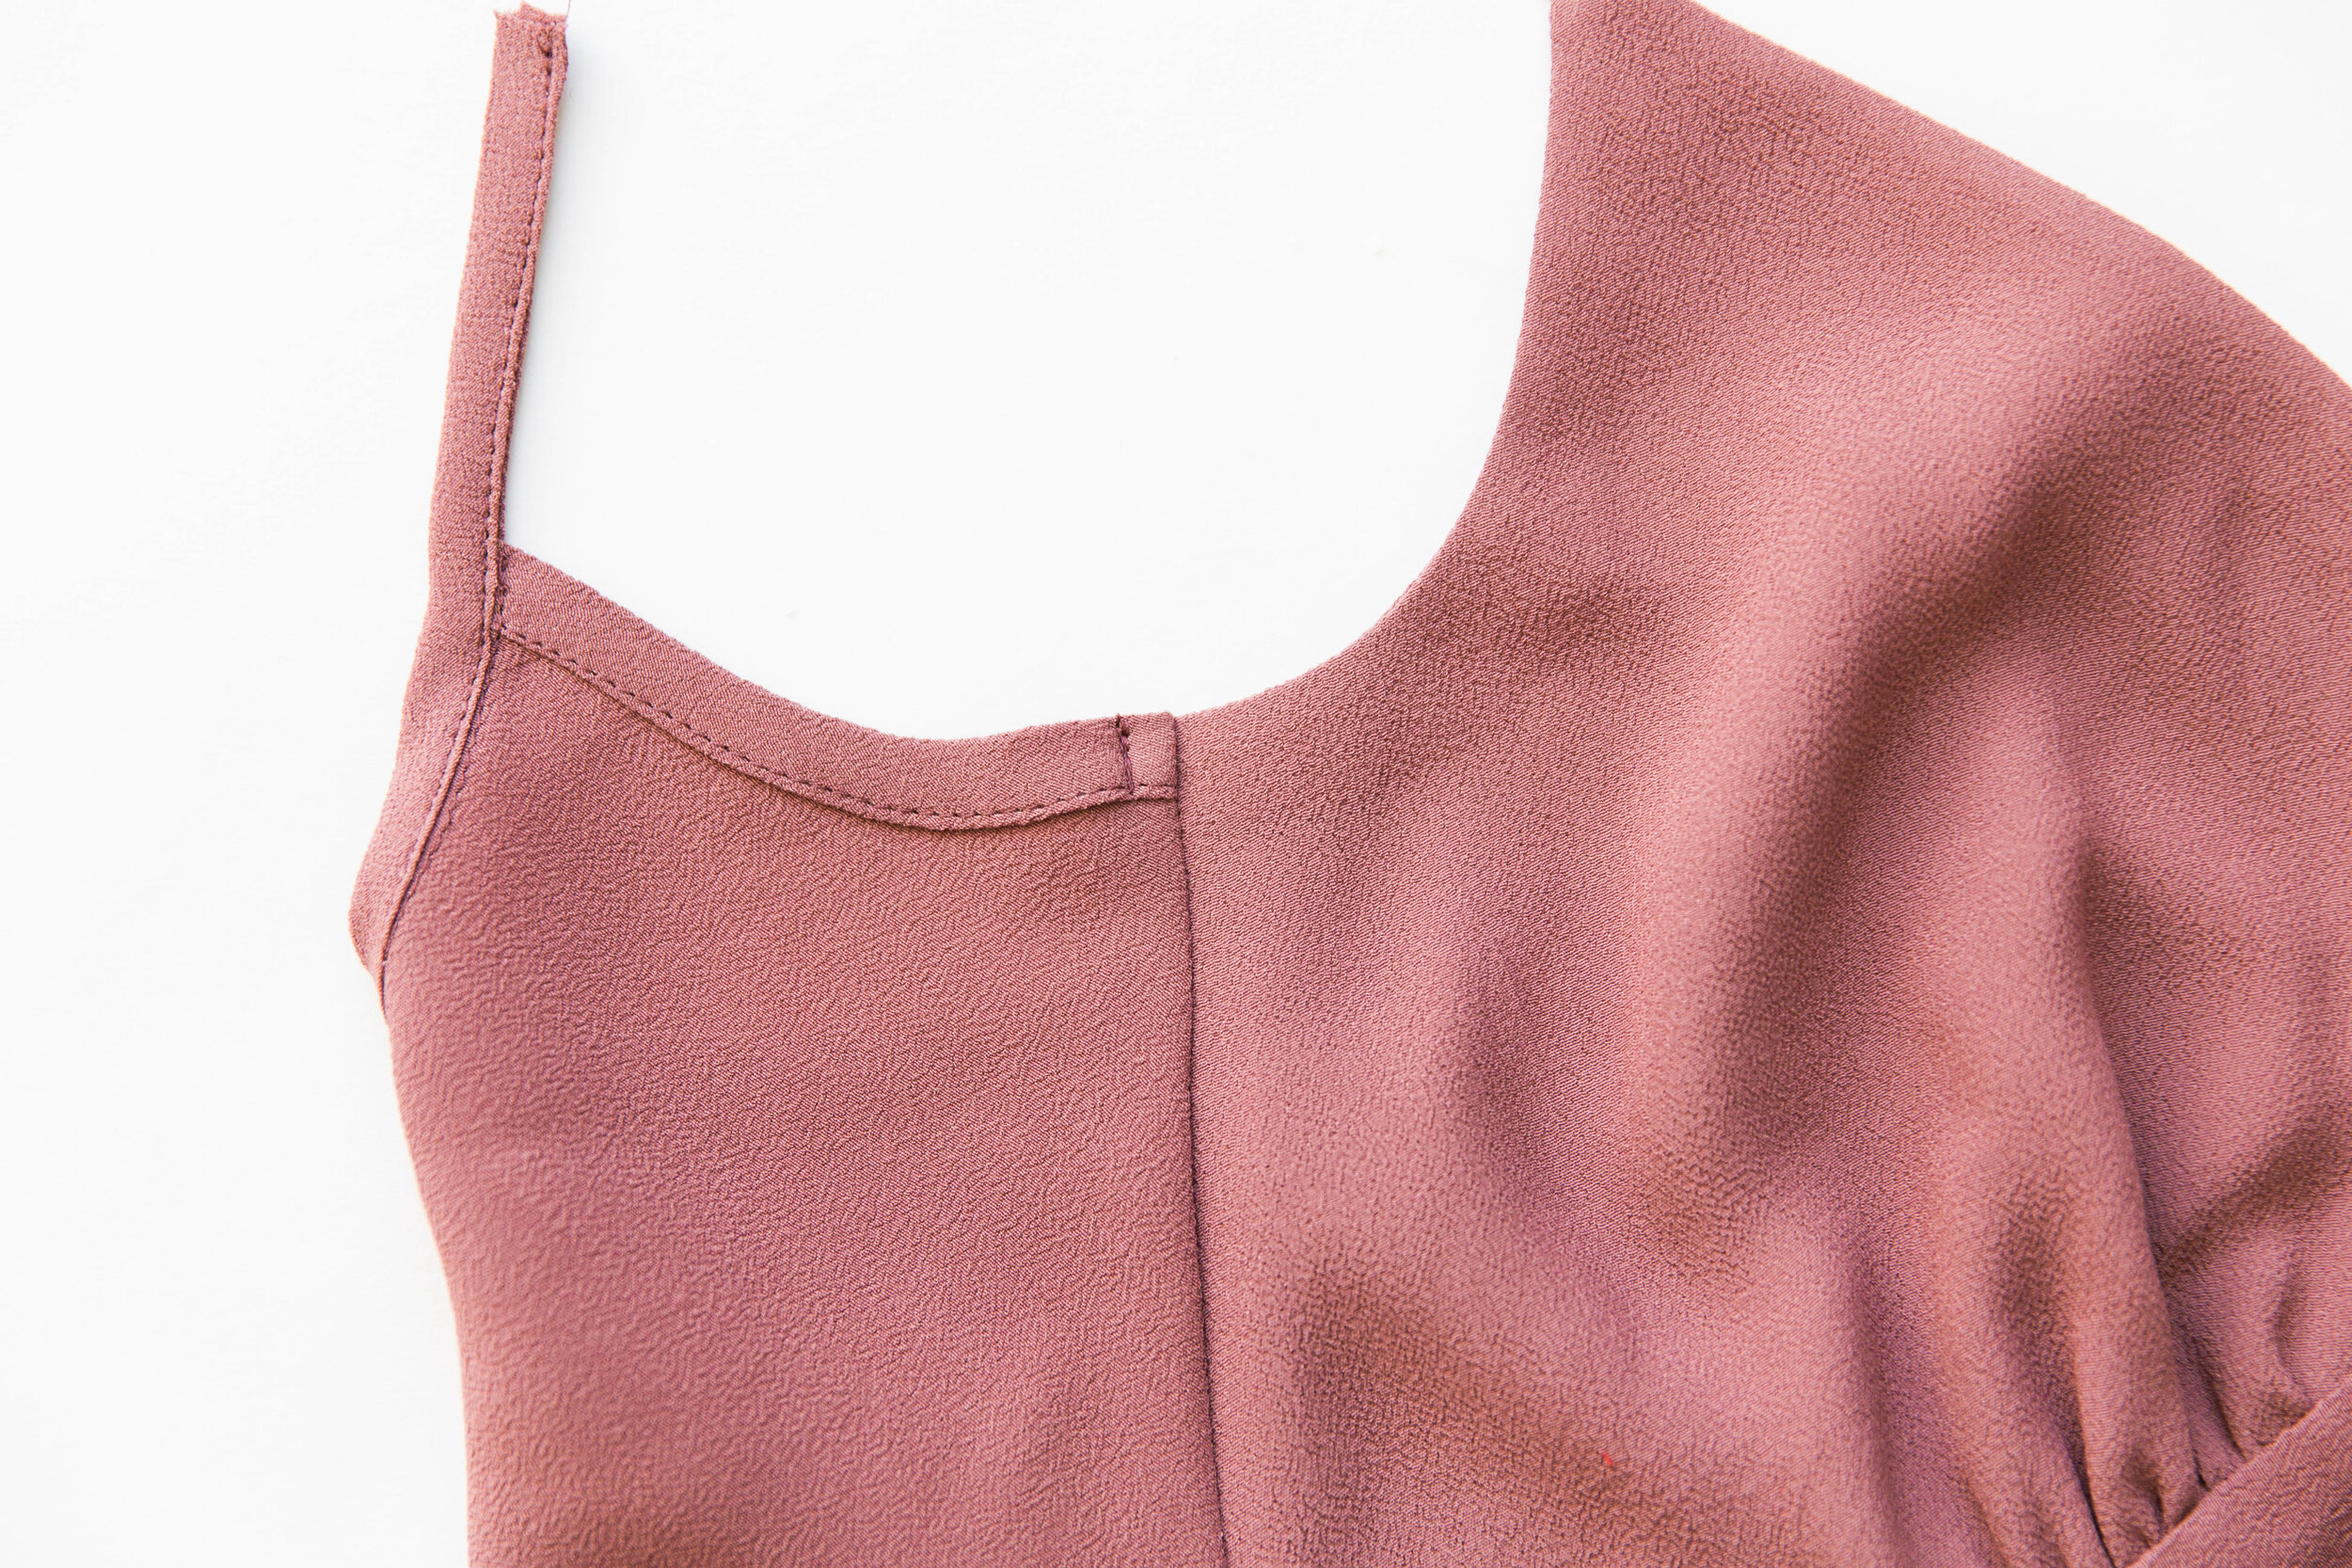
step 7
Hand stitch the two seam allowances together at the centre front of dress to hold in place.
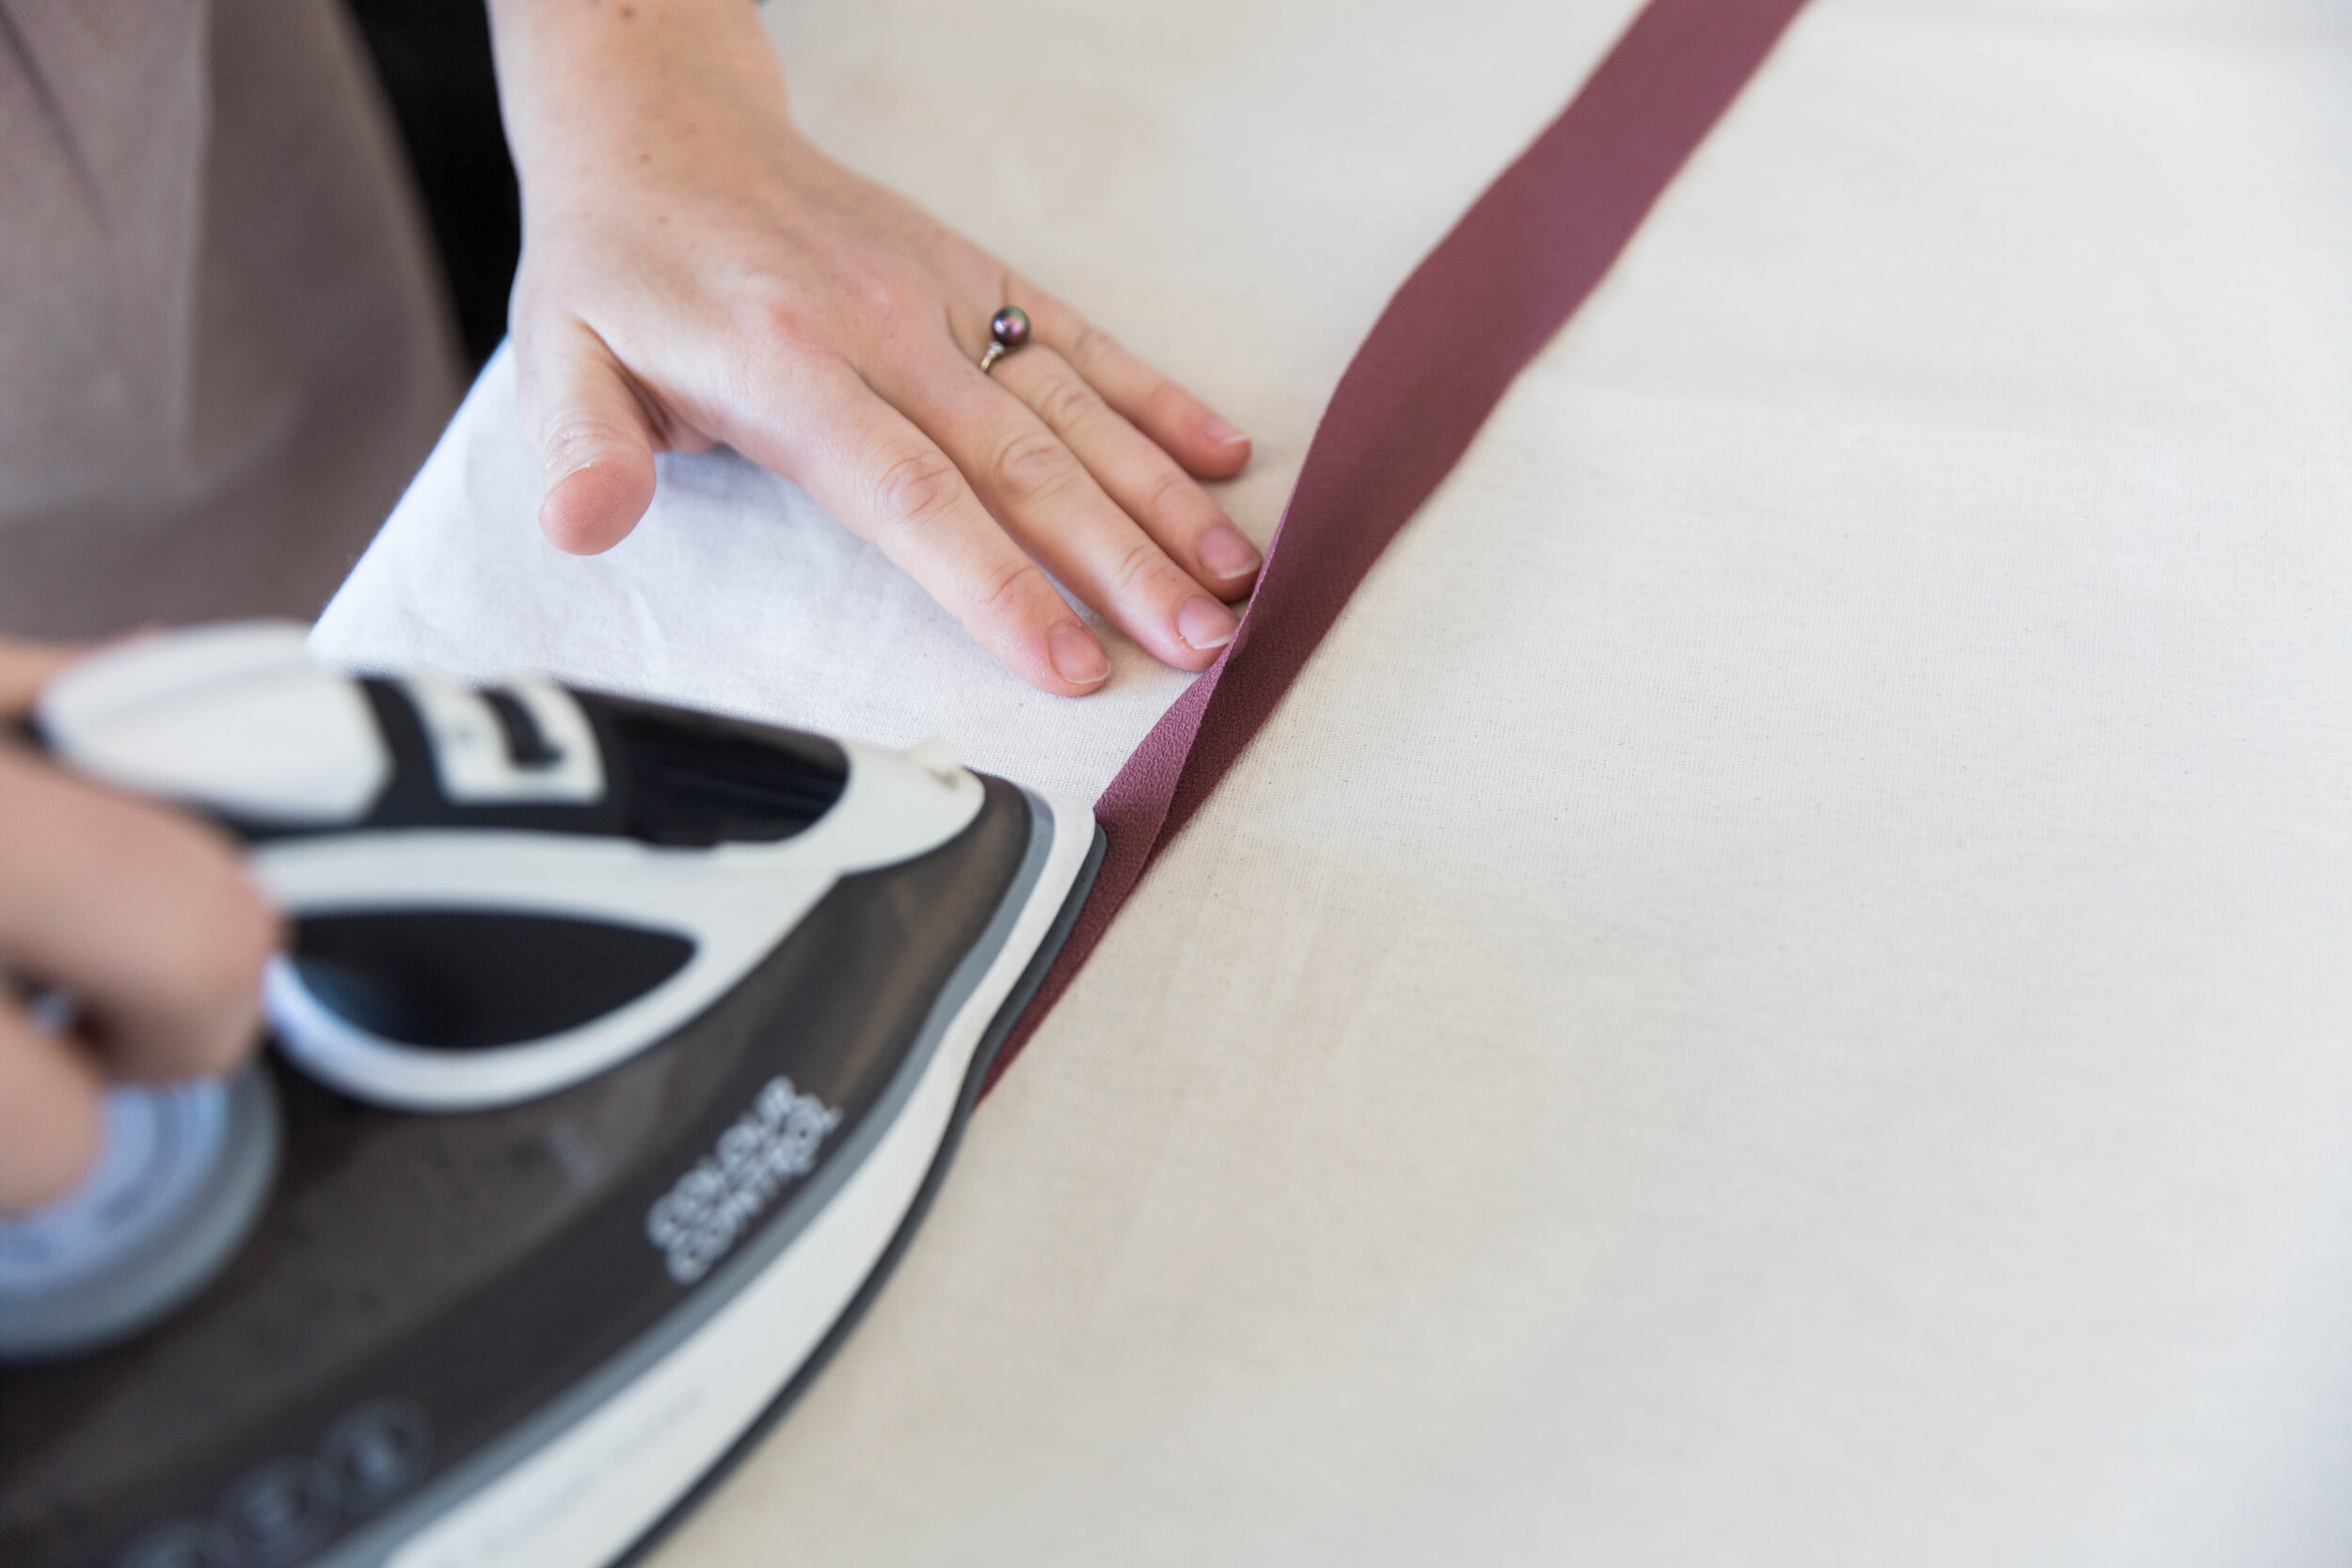
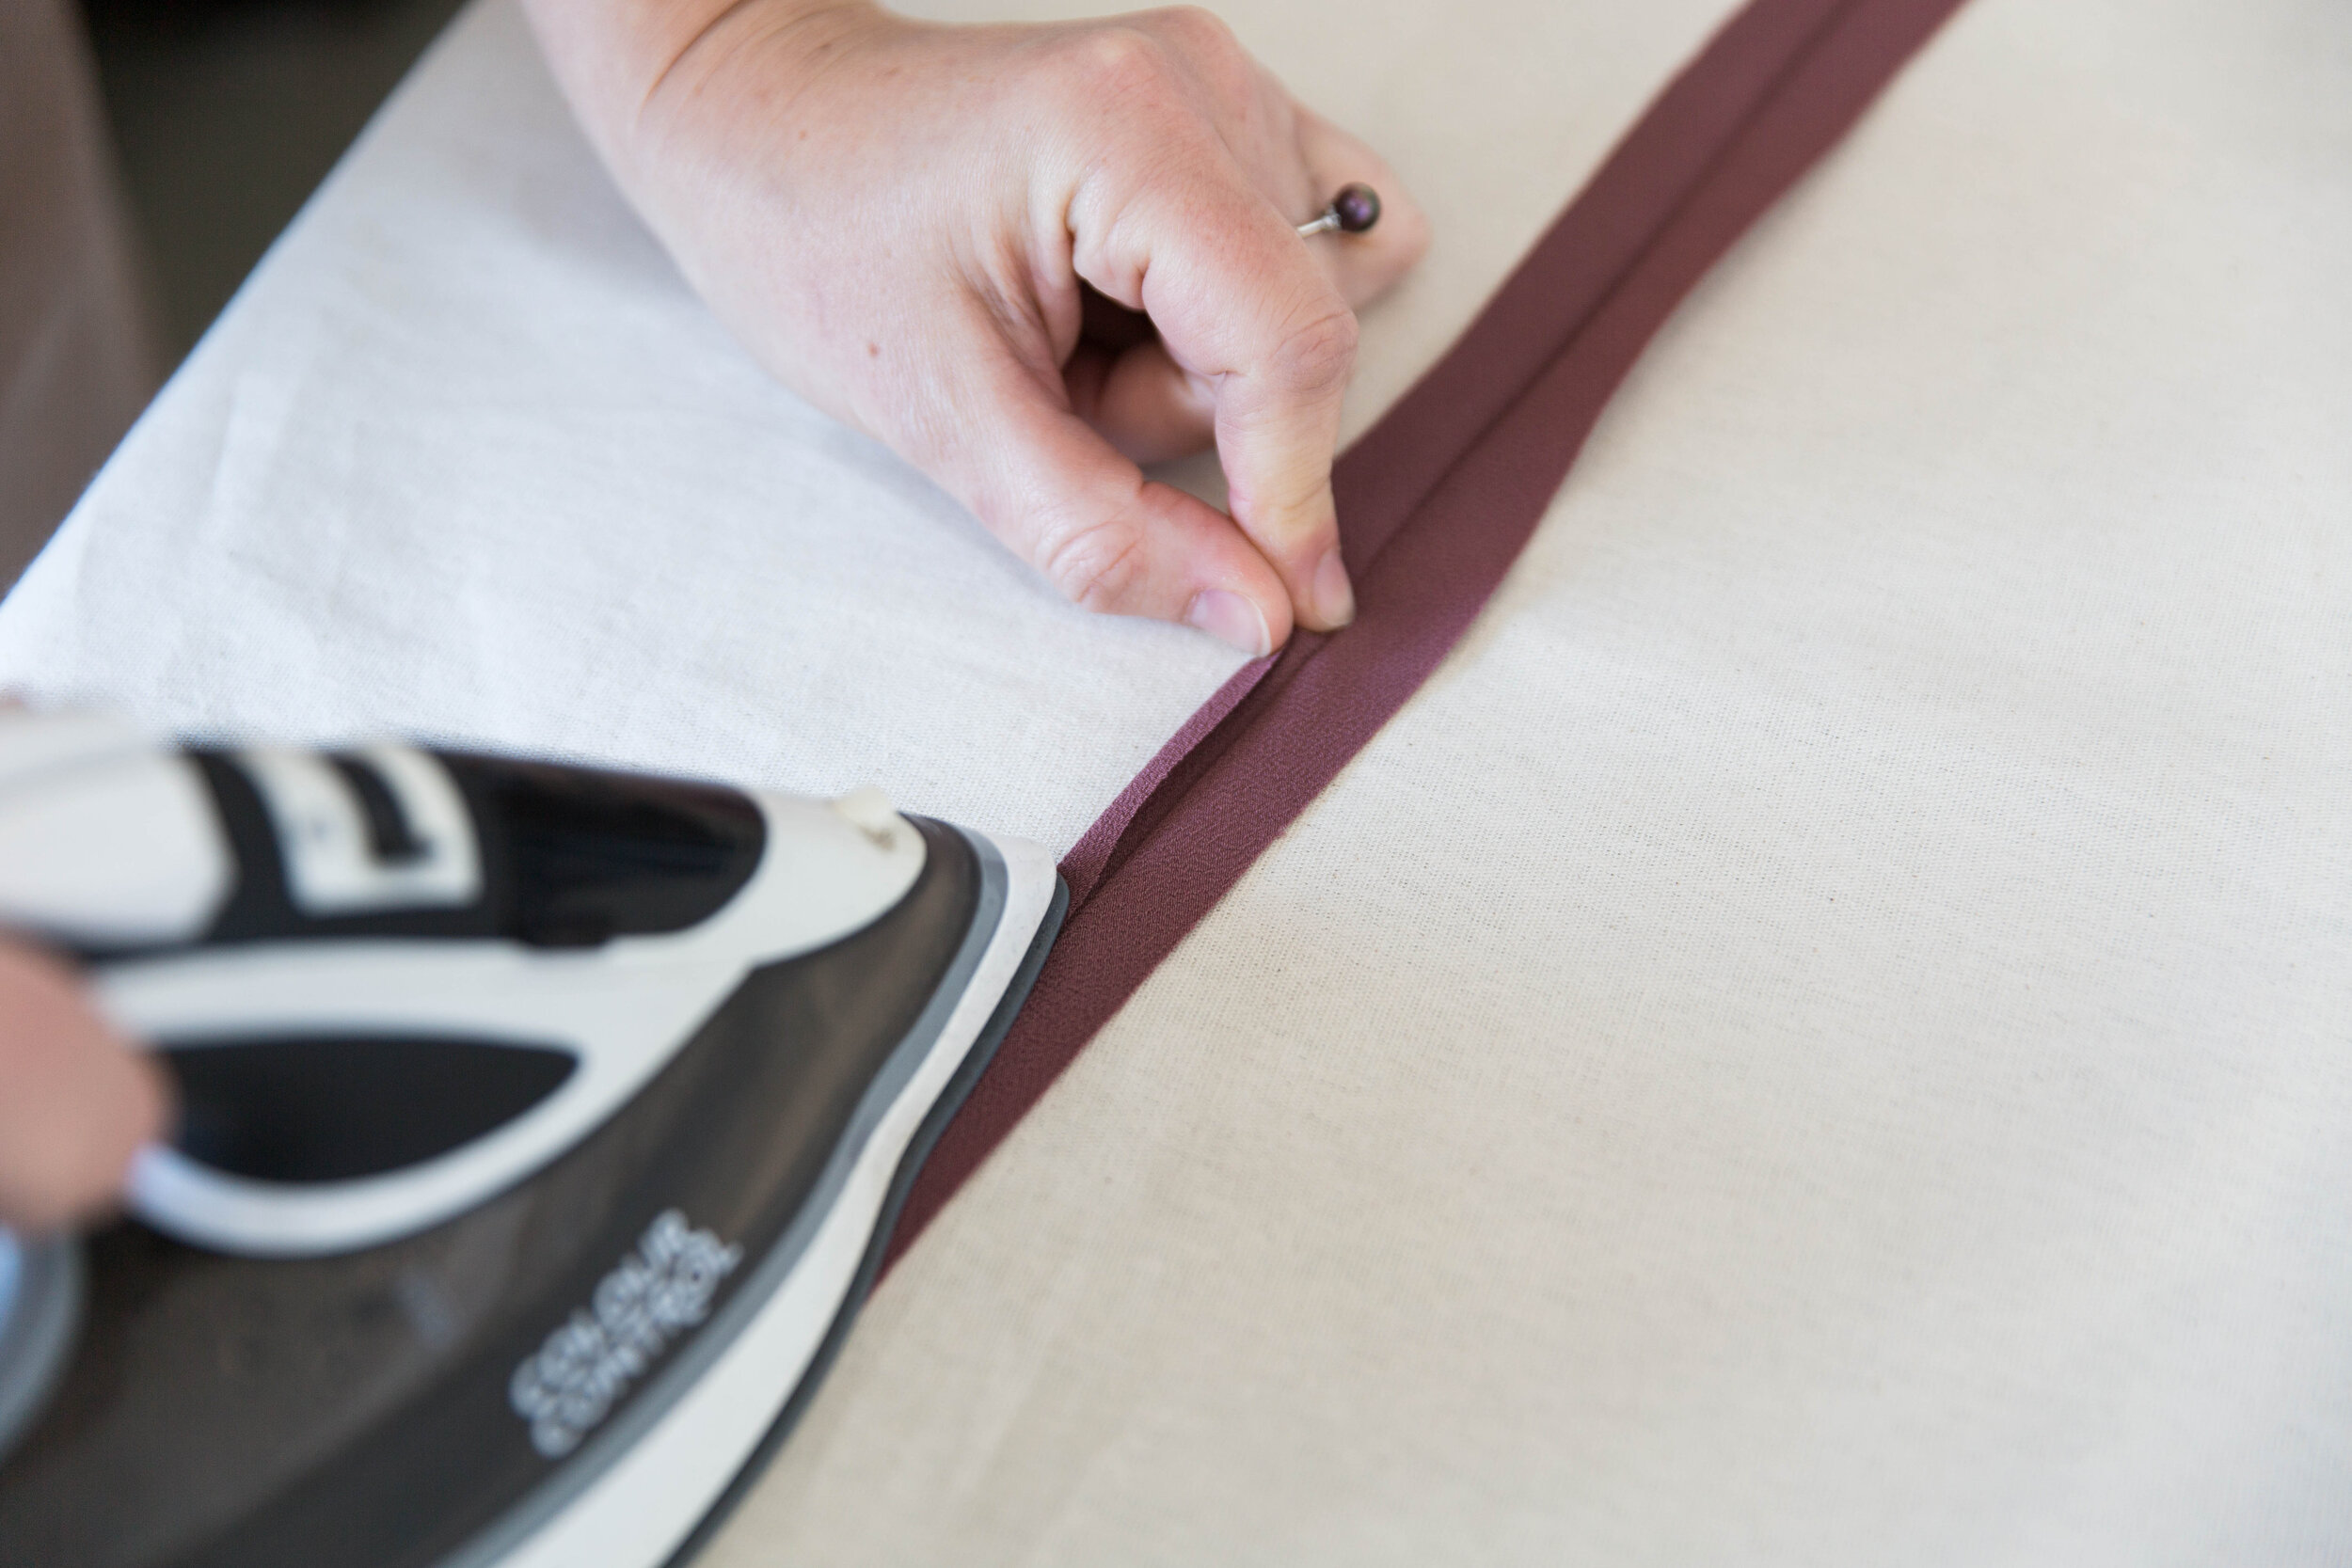
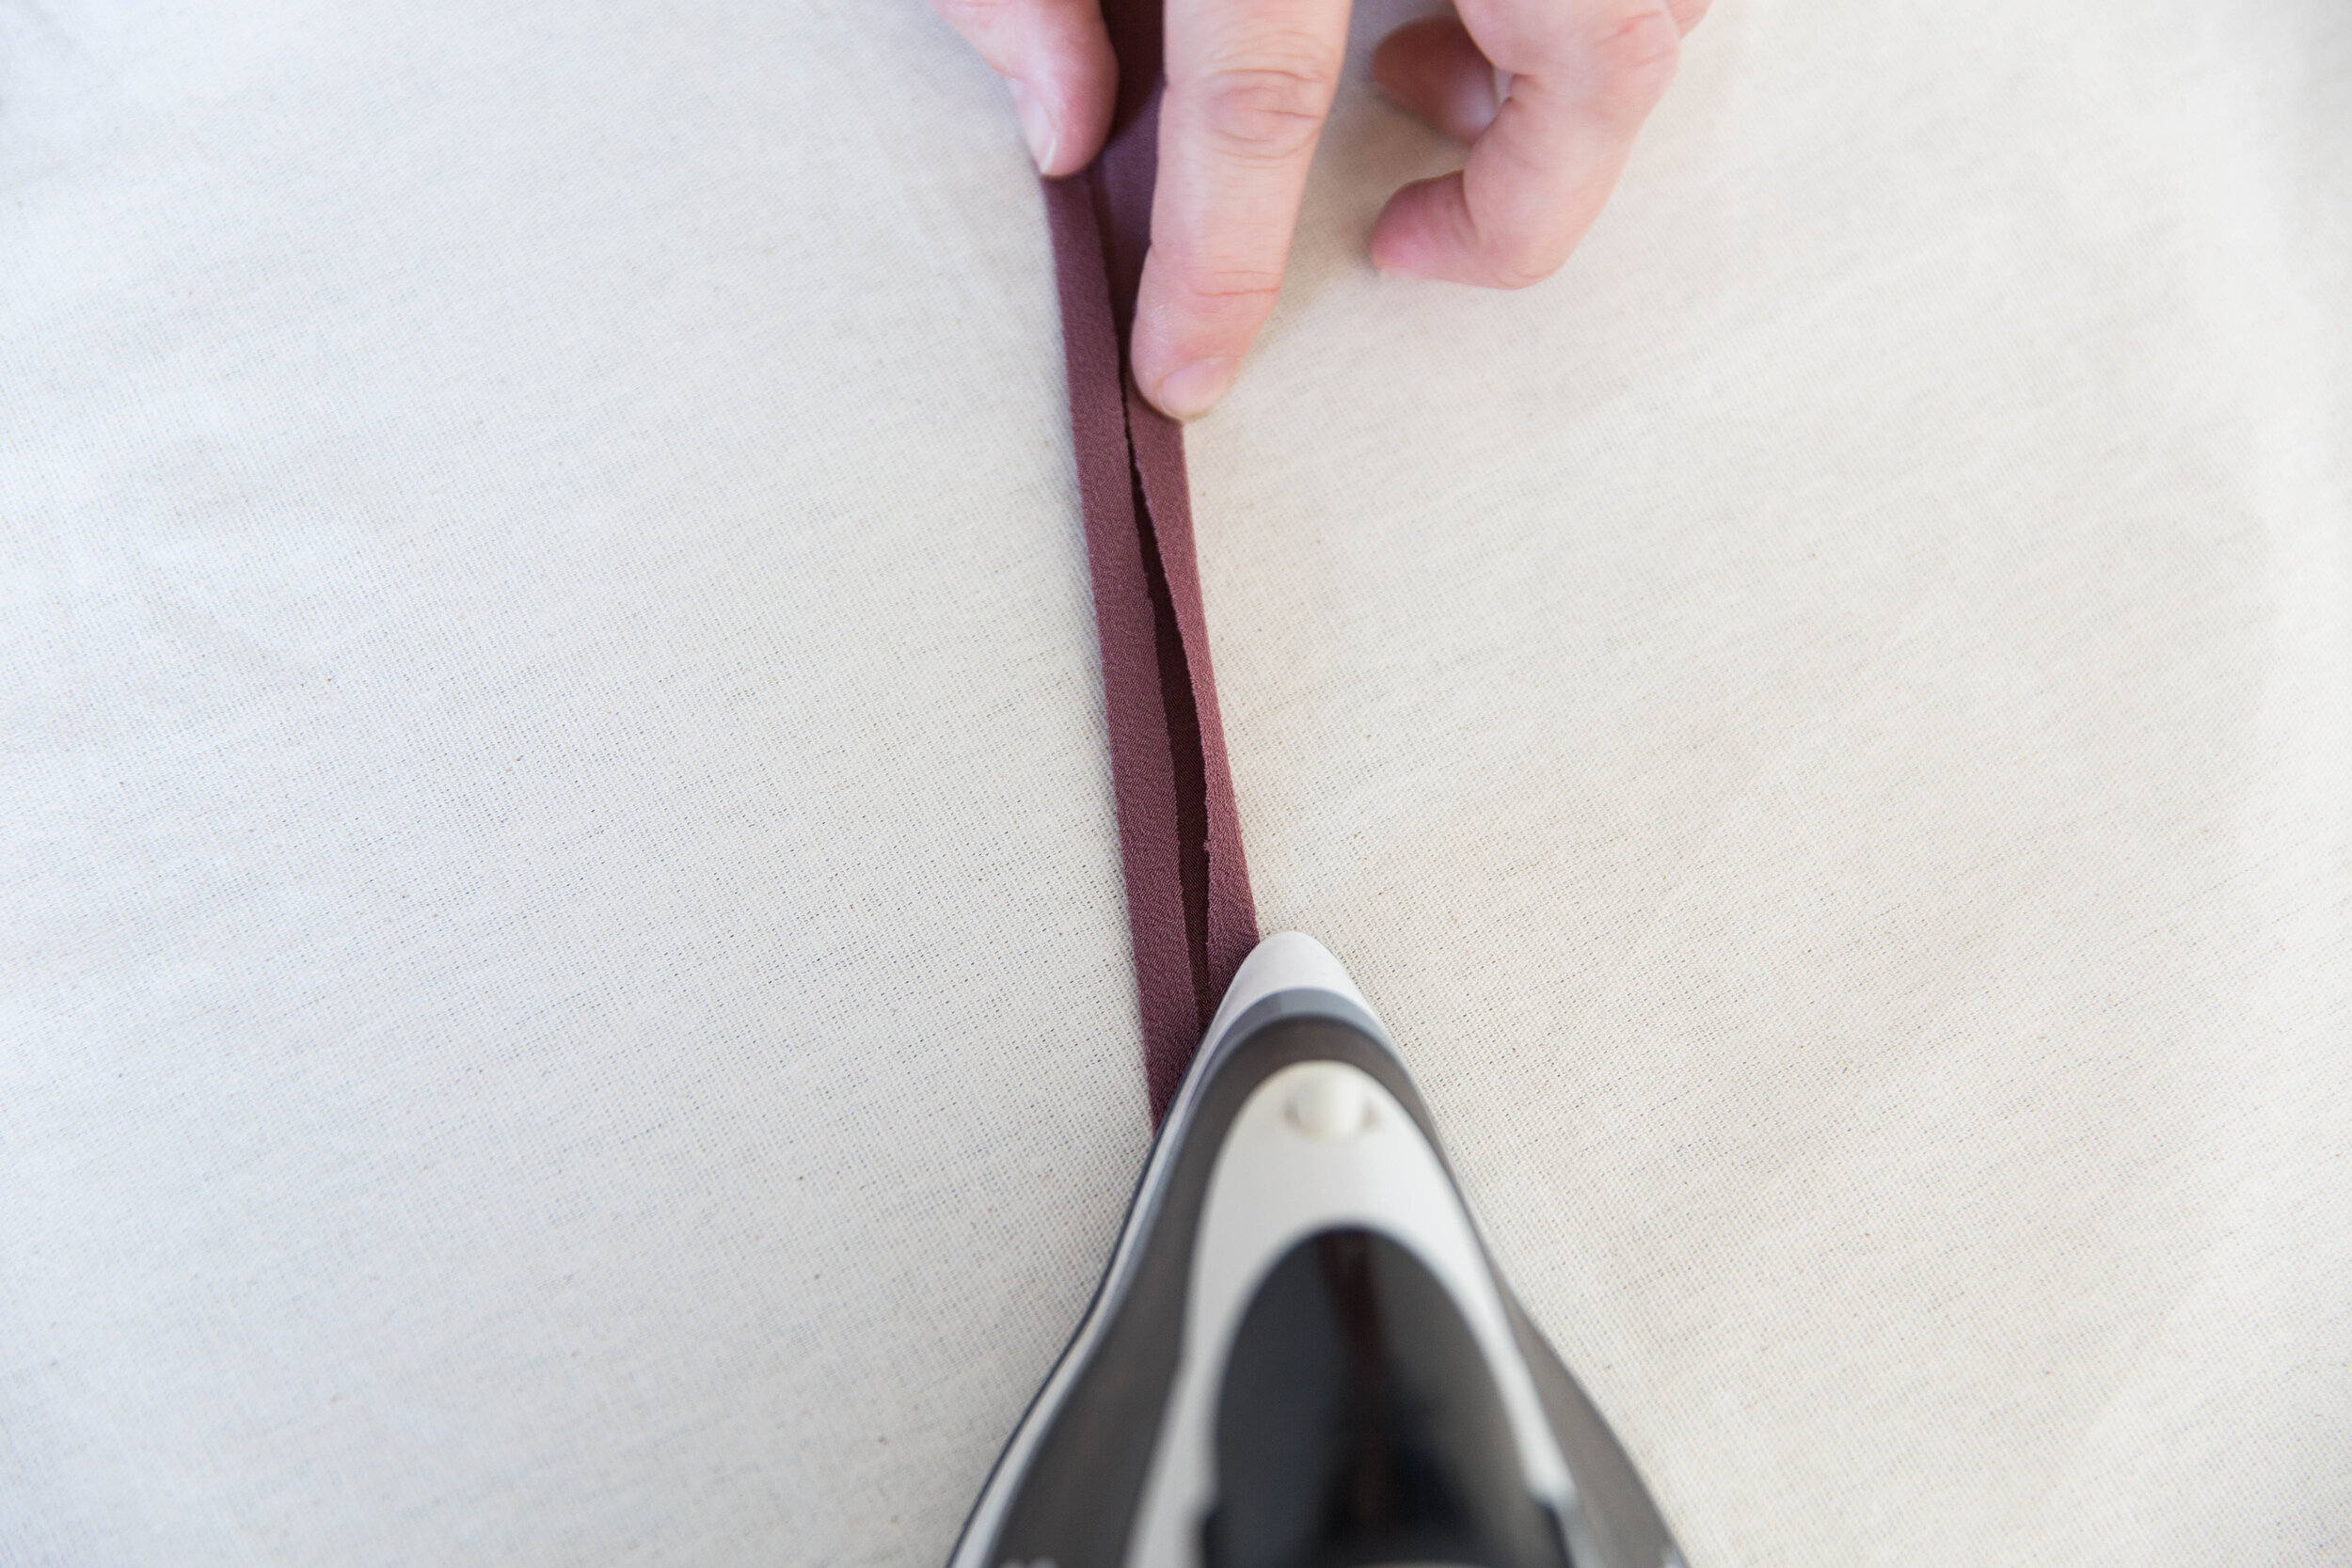
Step 8
Press the side binding pieces in half lengthwise with right sides out and press to create a centre line. Open back out then press the two long edges of binding towards the centre line, but not quite touching, with right sides out.
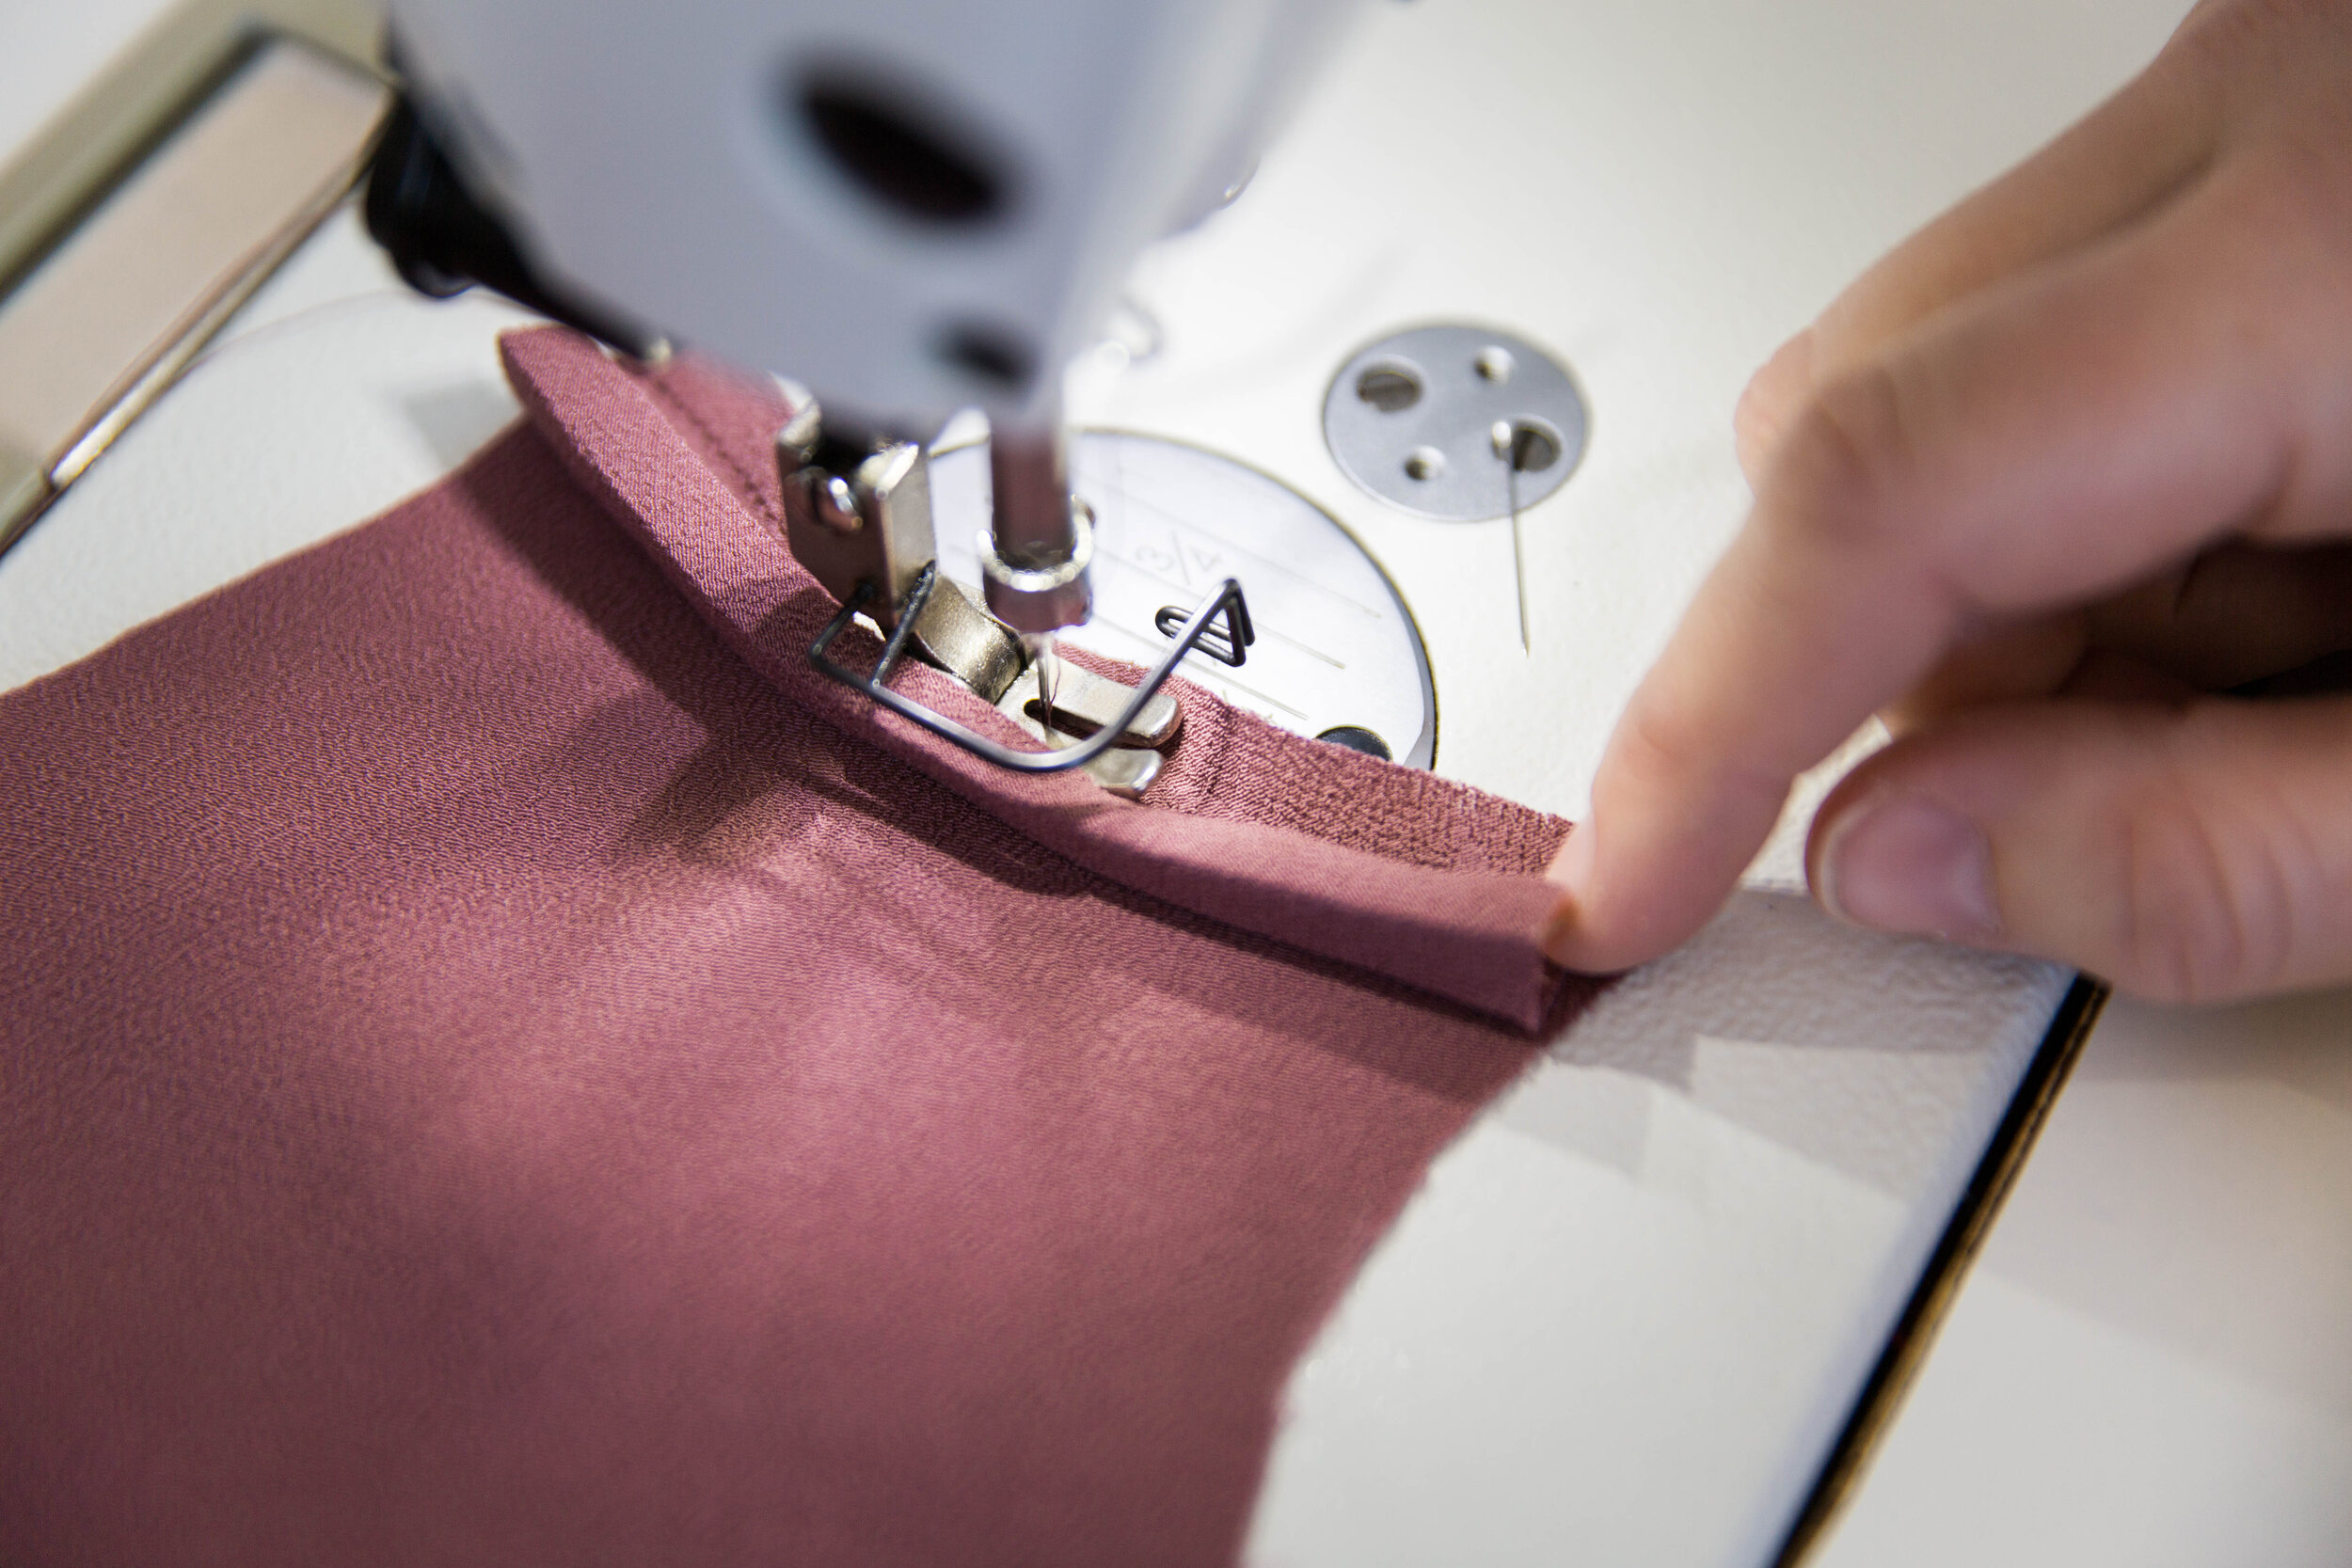
Step 9
Unfold your binding piece. The fold line closest to one of the raw edges is going to be your first stitch line. Pin the binding along armhole on the wrong side of back panel. Stitch together along fold line of binding. Trim seam allowance in half then press up toward binding. Turn over to the right side of armhole and fold the folded edge of binding over top of your stitch line enclosing the raw edge. Pin in place all the way around armhole slightly overlapping your stitch line. Stitch together on the very edge of binding. Press. Repeat for other side.

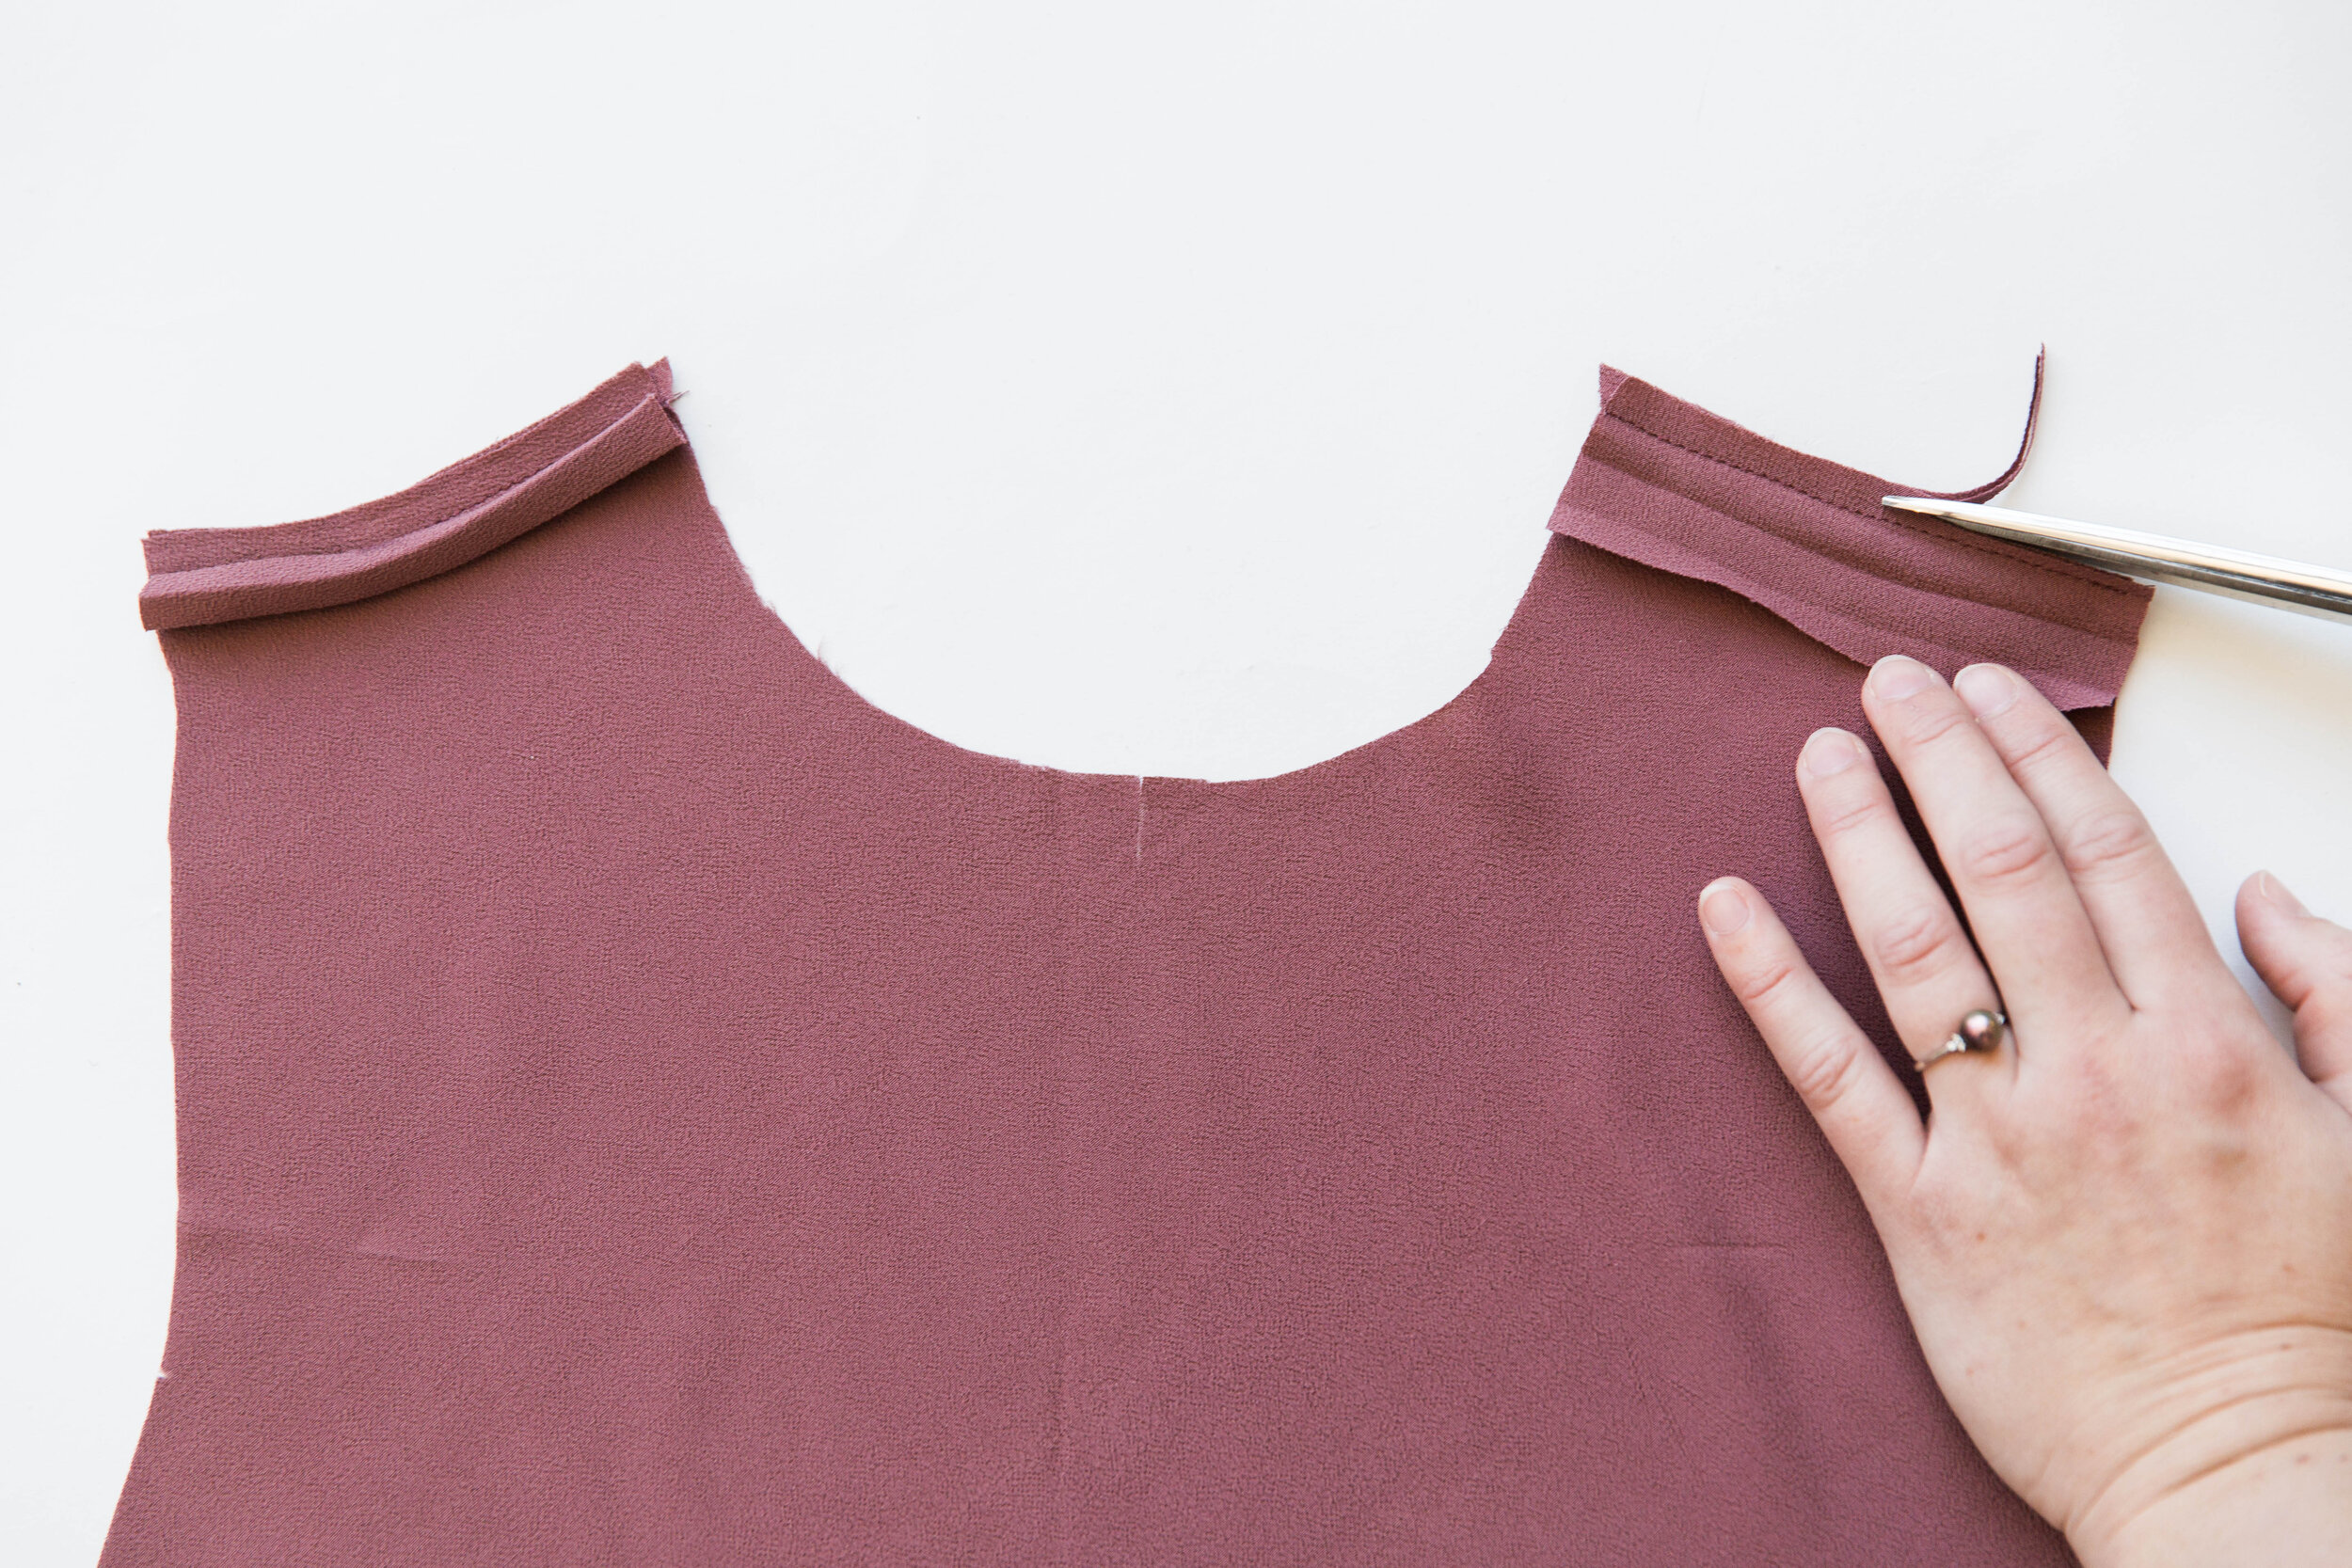
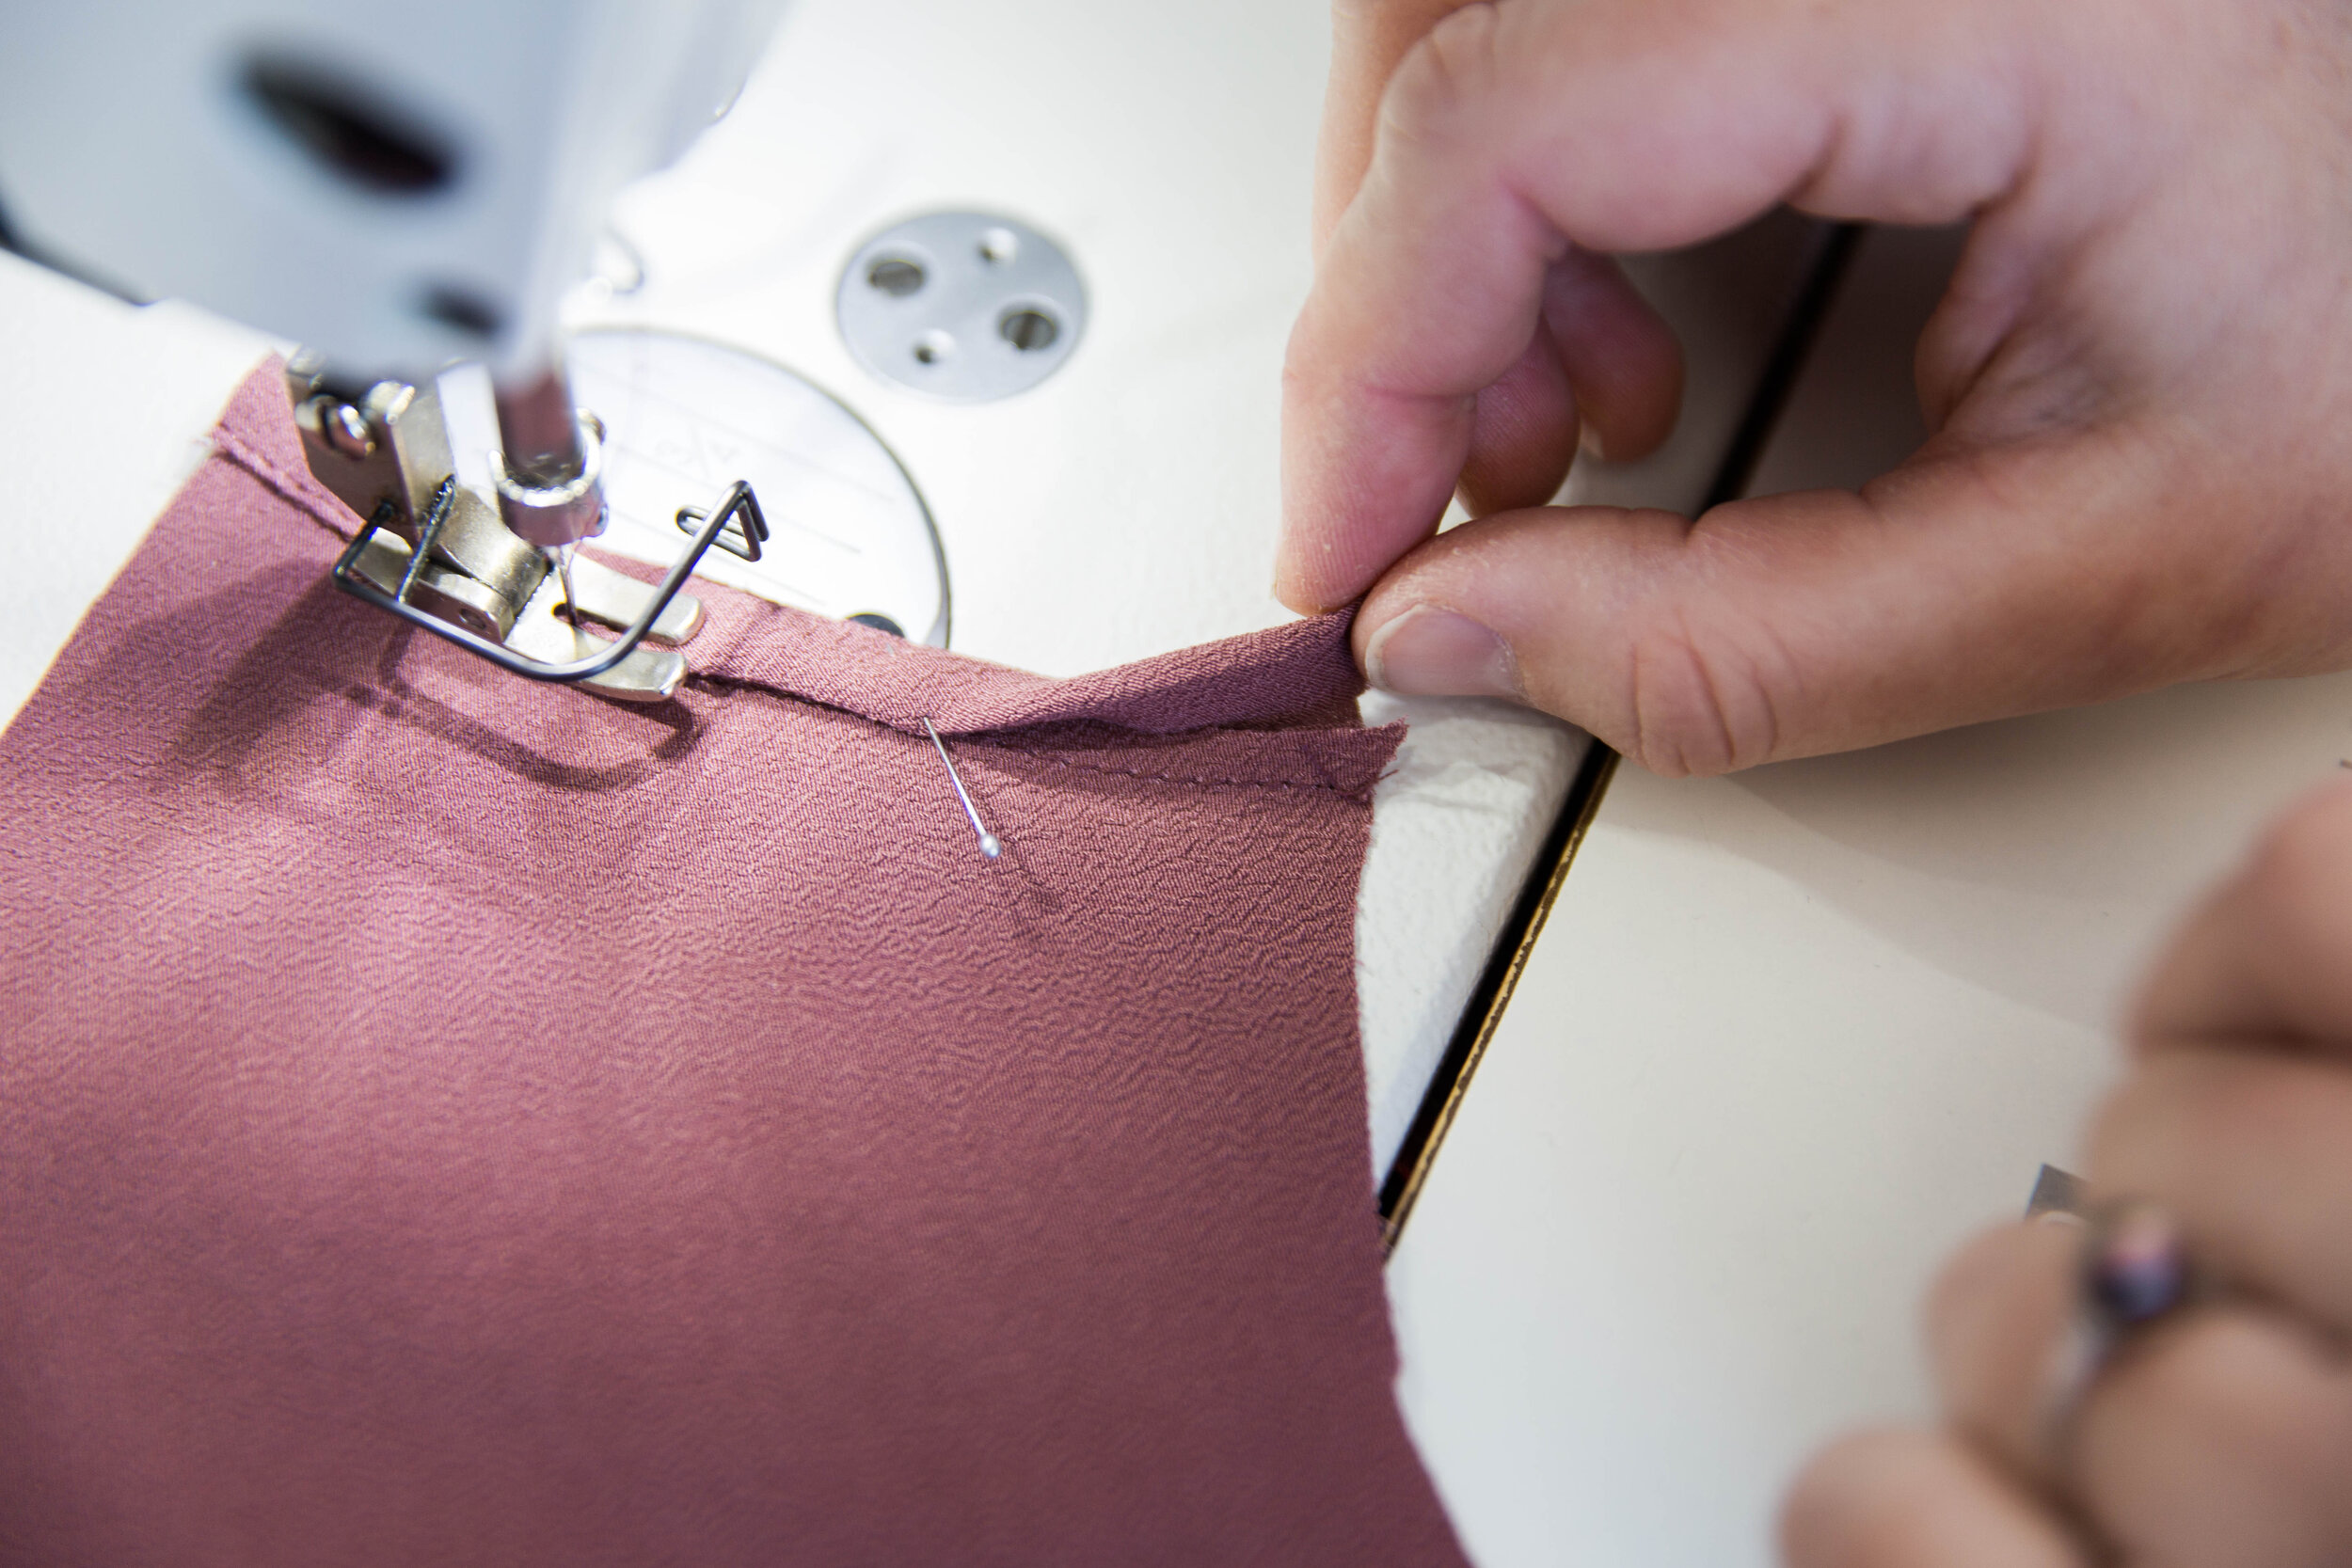
Step 10
Fold and press your back binding piece as you did in step 8. Find the centre point of the length of your binding and place a pin to mark it. Now find the centre point of your back neckline and place a pin to mark it. Match up the two points and pin your binding along the first fold line, with the right side of binding facing the wrong side of back panel. Stitch together along fold line of binding. Apply binding with same method as step 9, this time also pinning together binding edges where it extends past neckline to become the strap loops. Stitch together all the way around on the very edge of binding. Press.

Step 11
With right sides facing, pin front and back side seams together, matching notches. Stitch. Neaten, then press seam allowances towards the back.

Step 12
Neaten hem edge. Turn up 1cm/0.4”, press and stitch hem in place.

Step 13
You may want to topstitch the side seam allowance toward the back of dress to hold in place.
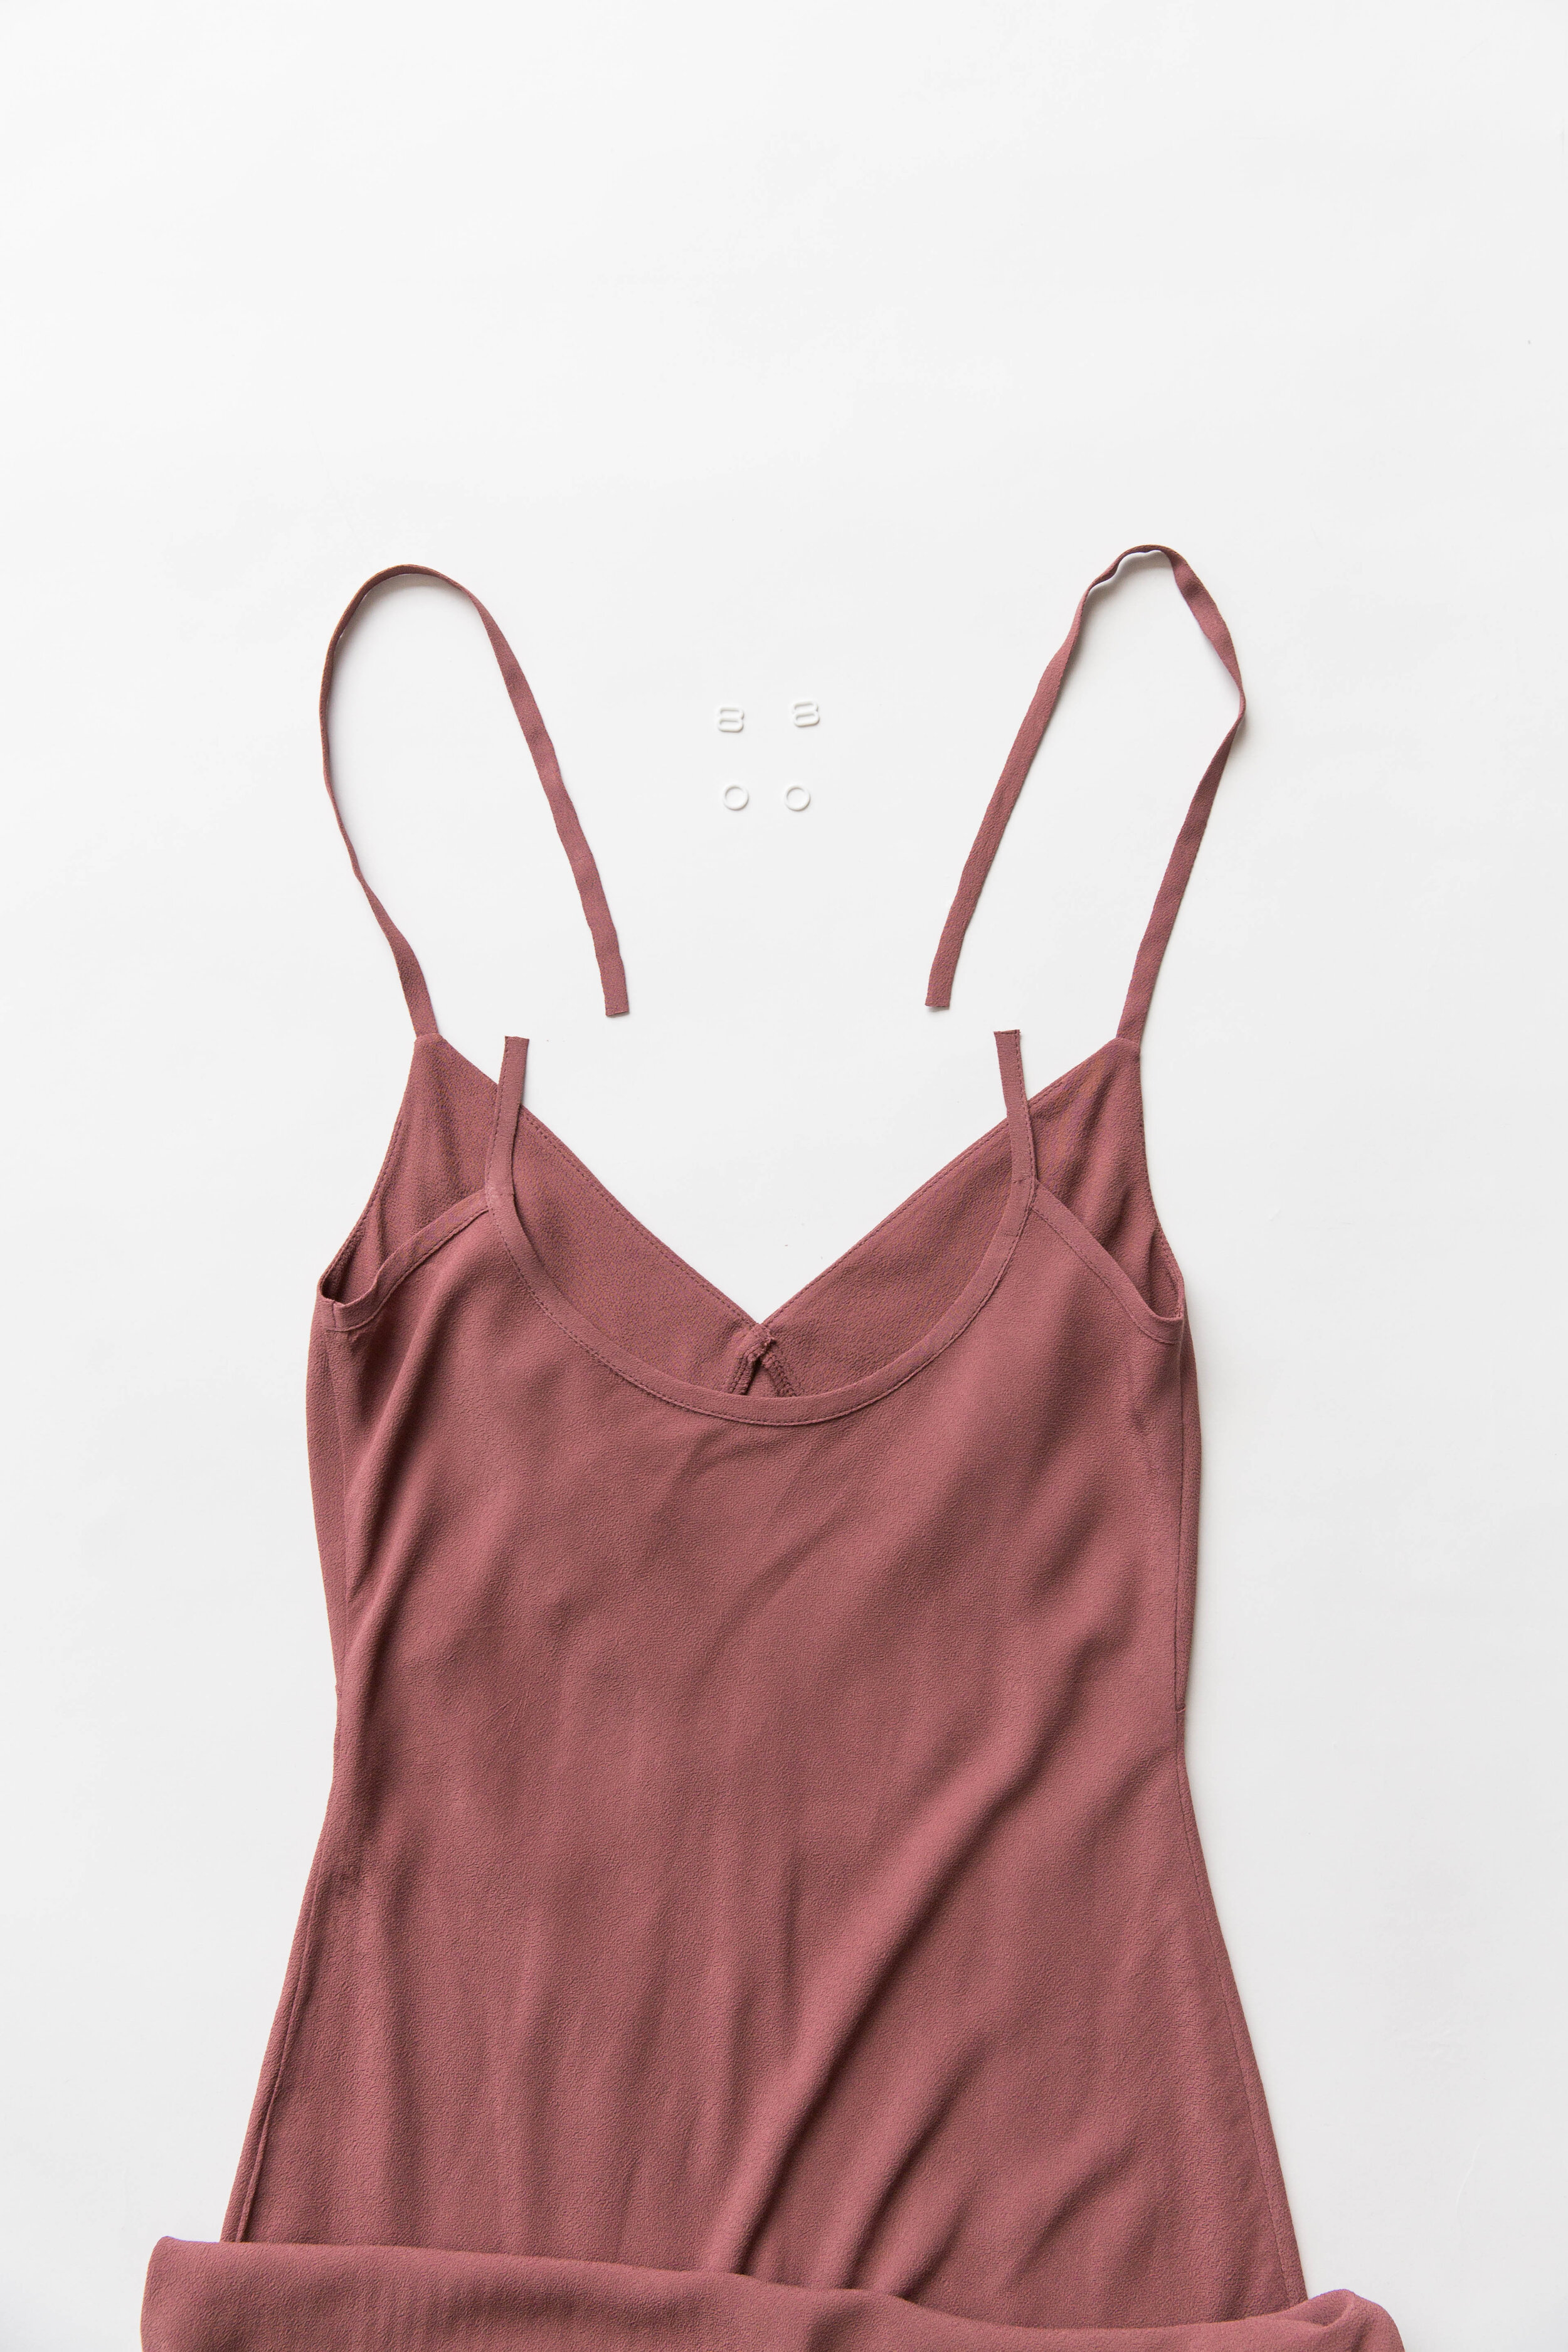

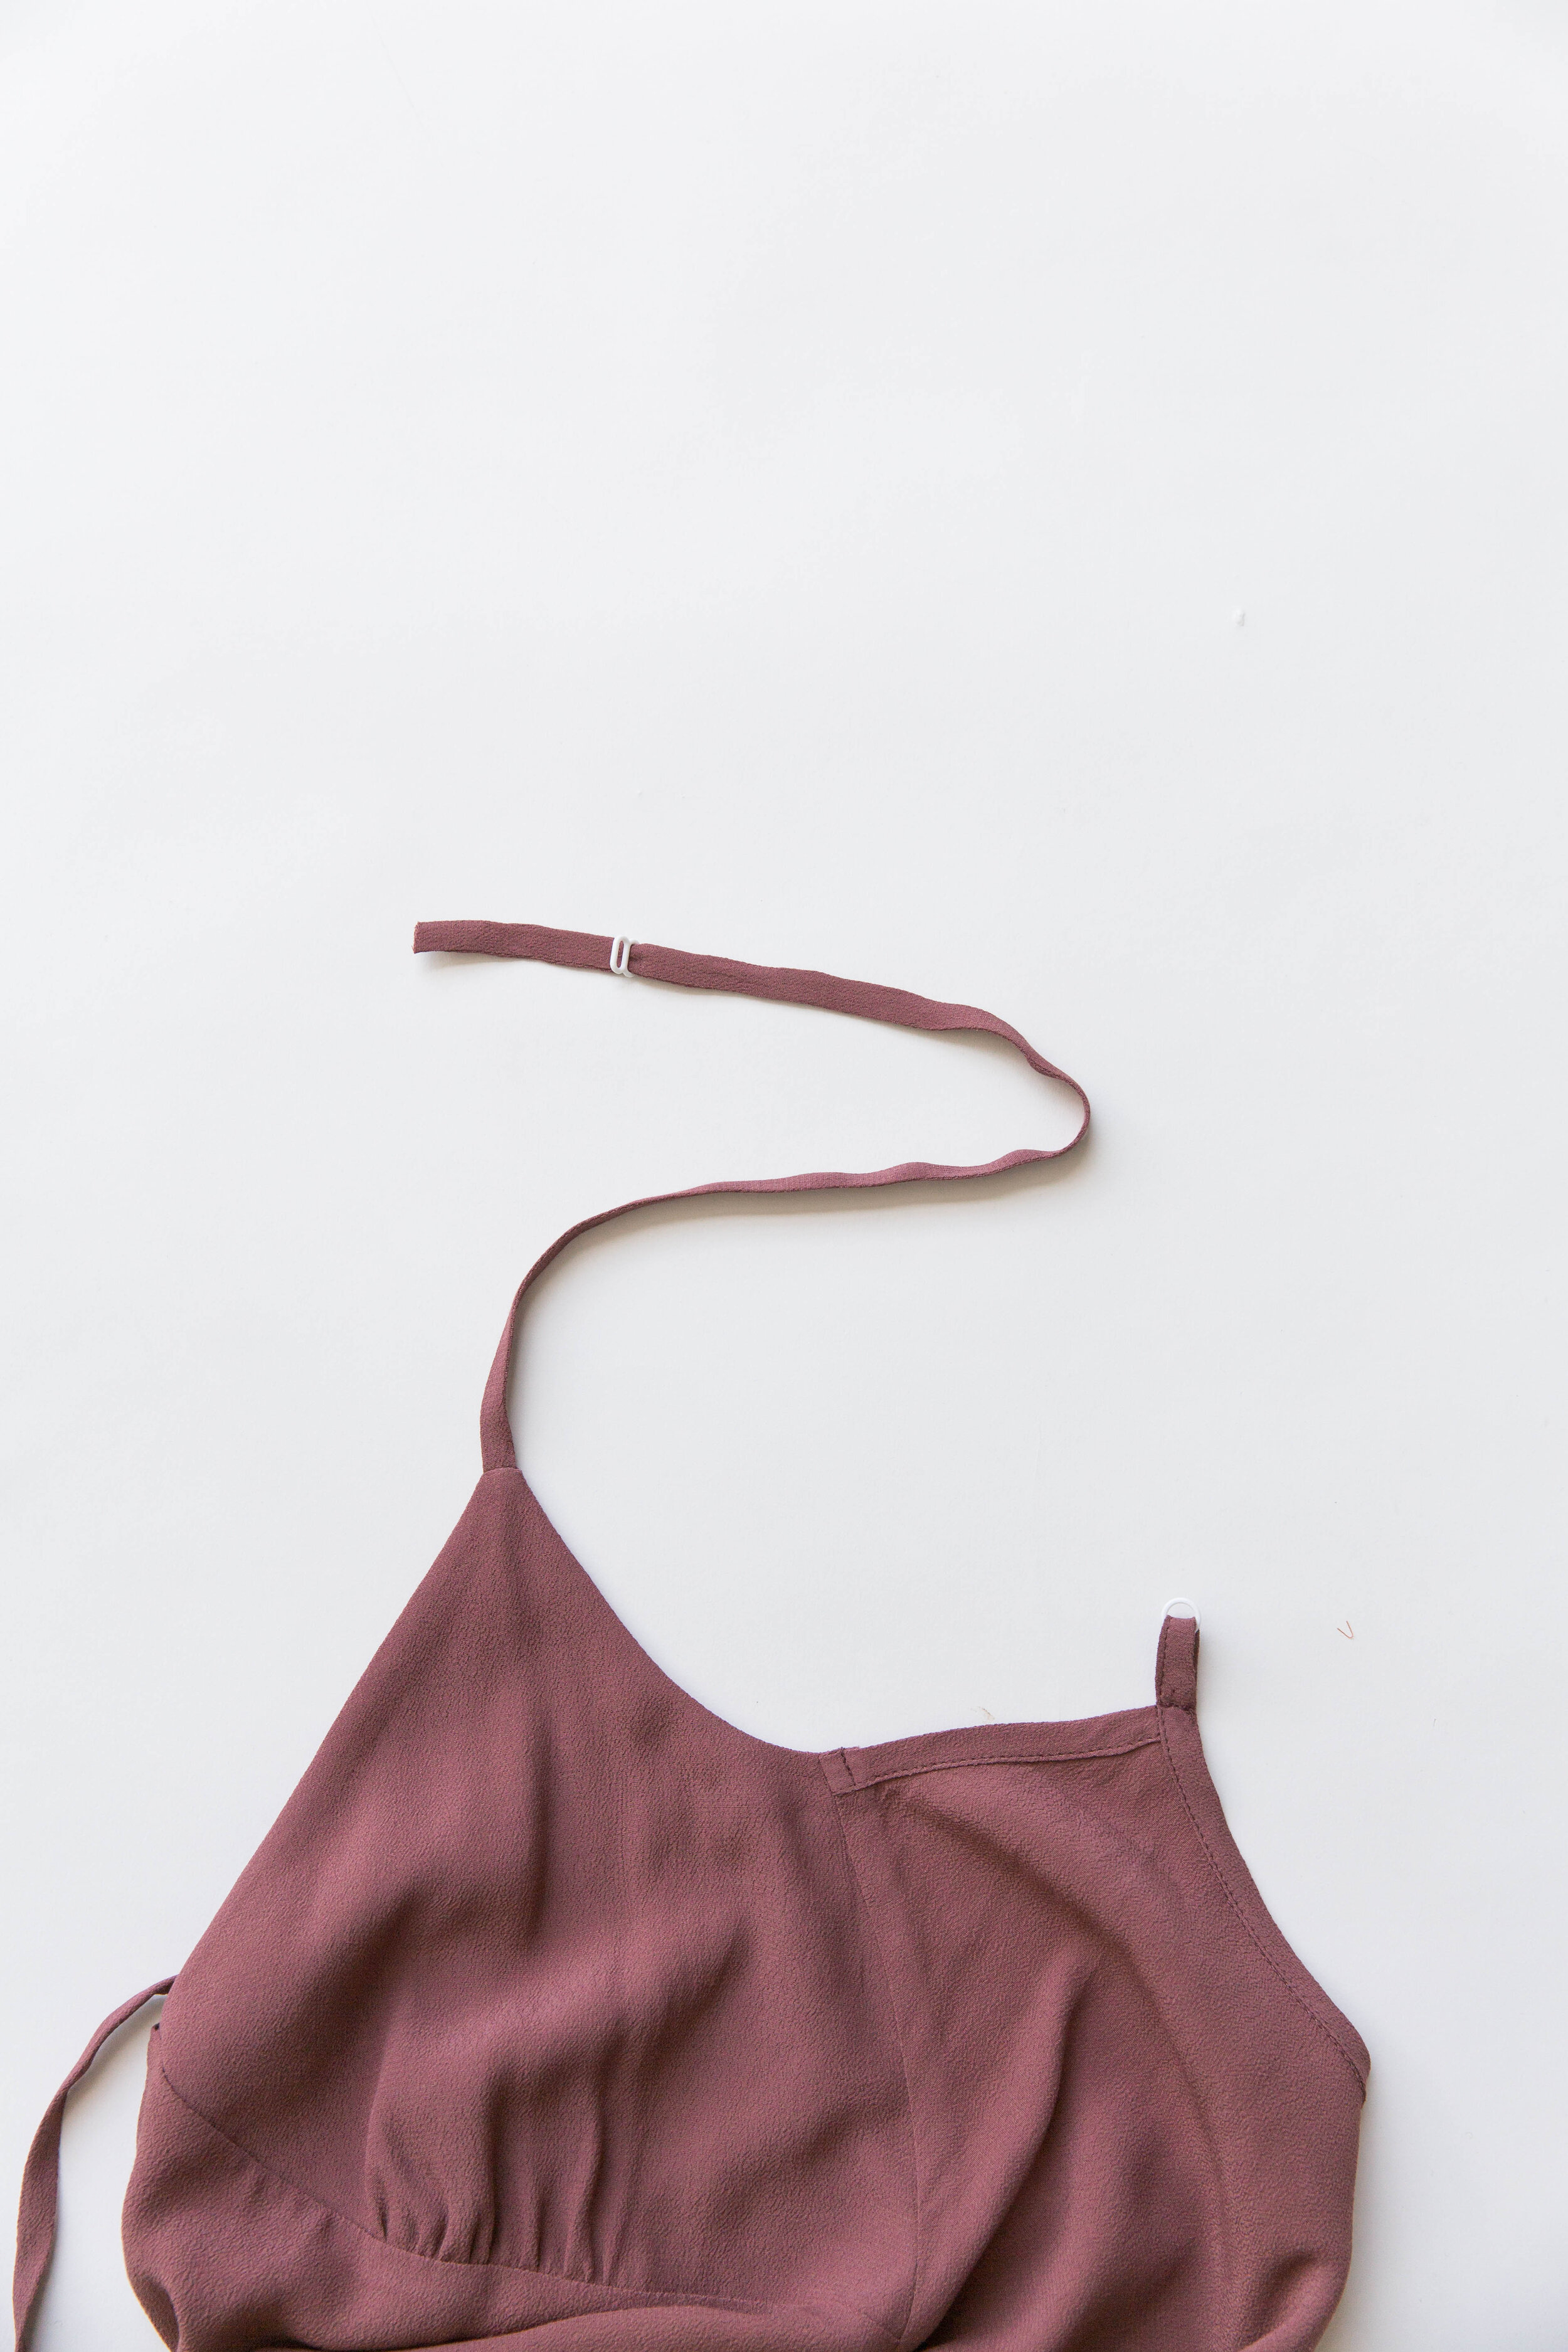
Step 14
Thread the short strap through a ring. Turn the end of the short strap in 1cm toward the inside. Fold the short strap in half and pin in place on binding edge. Stitch and repeat on other side.

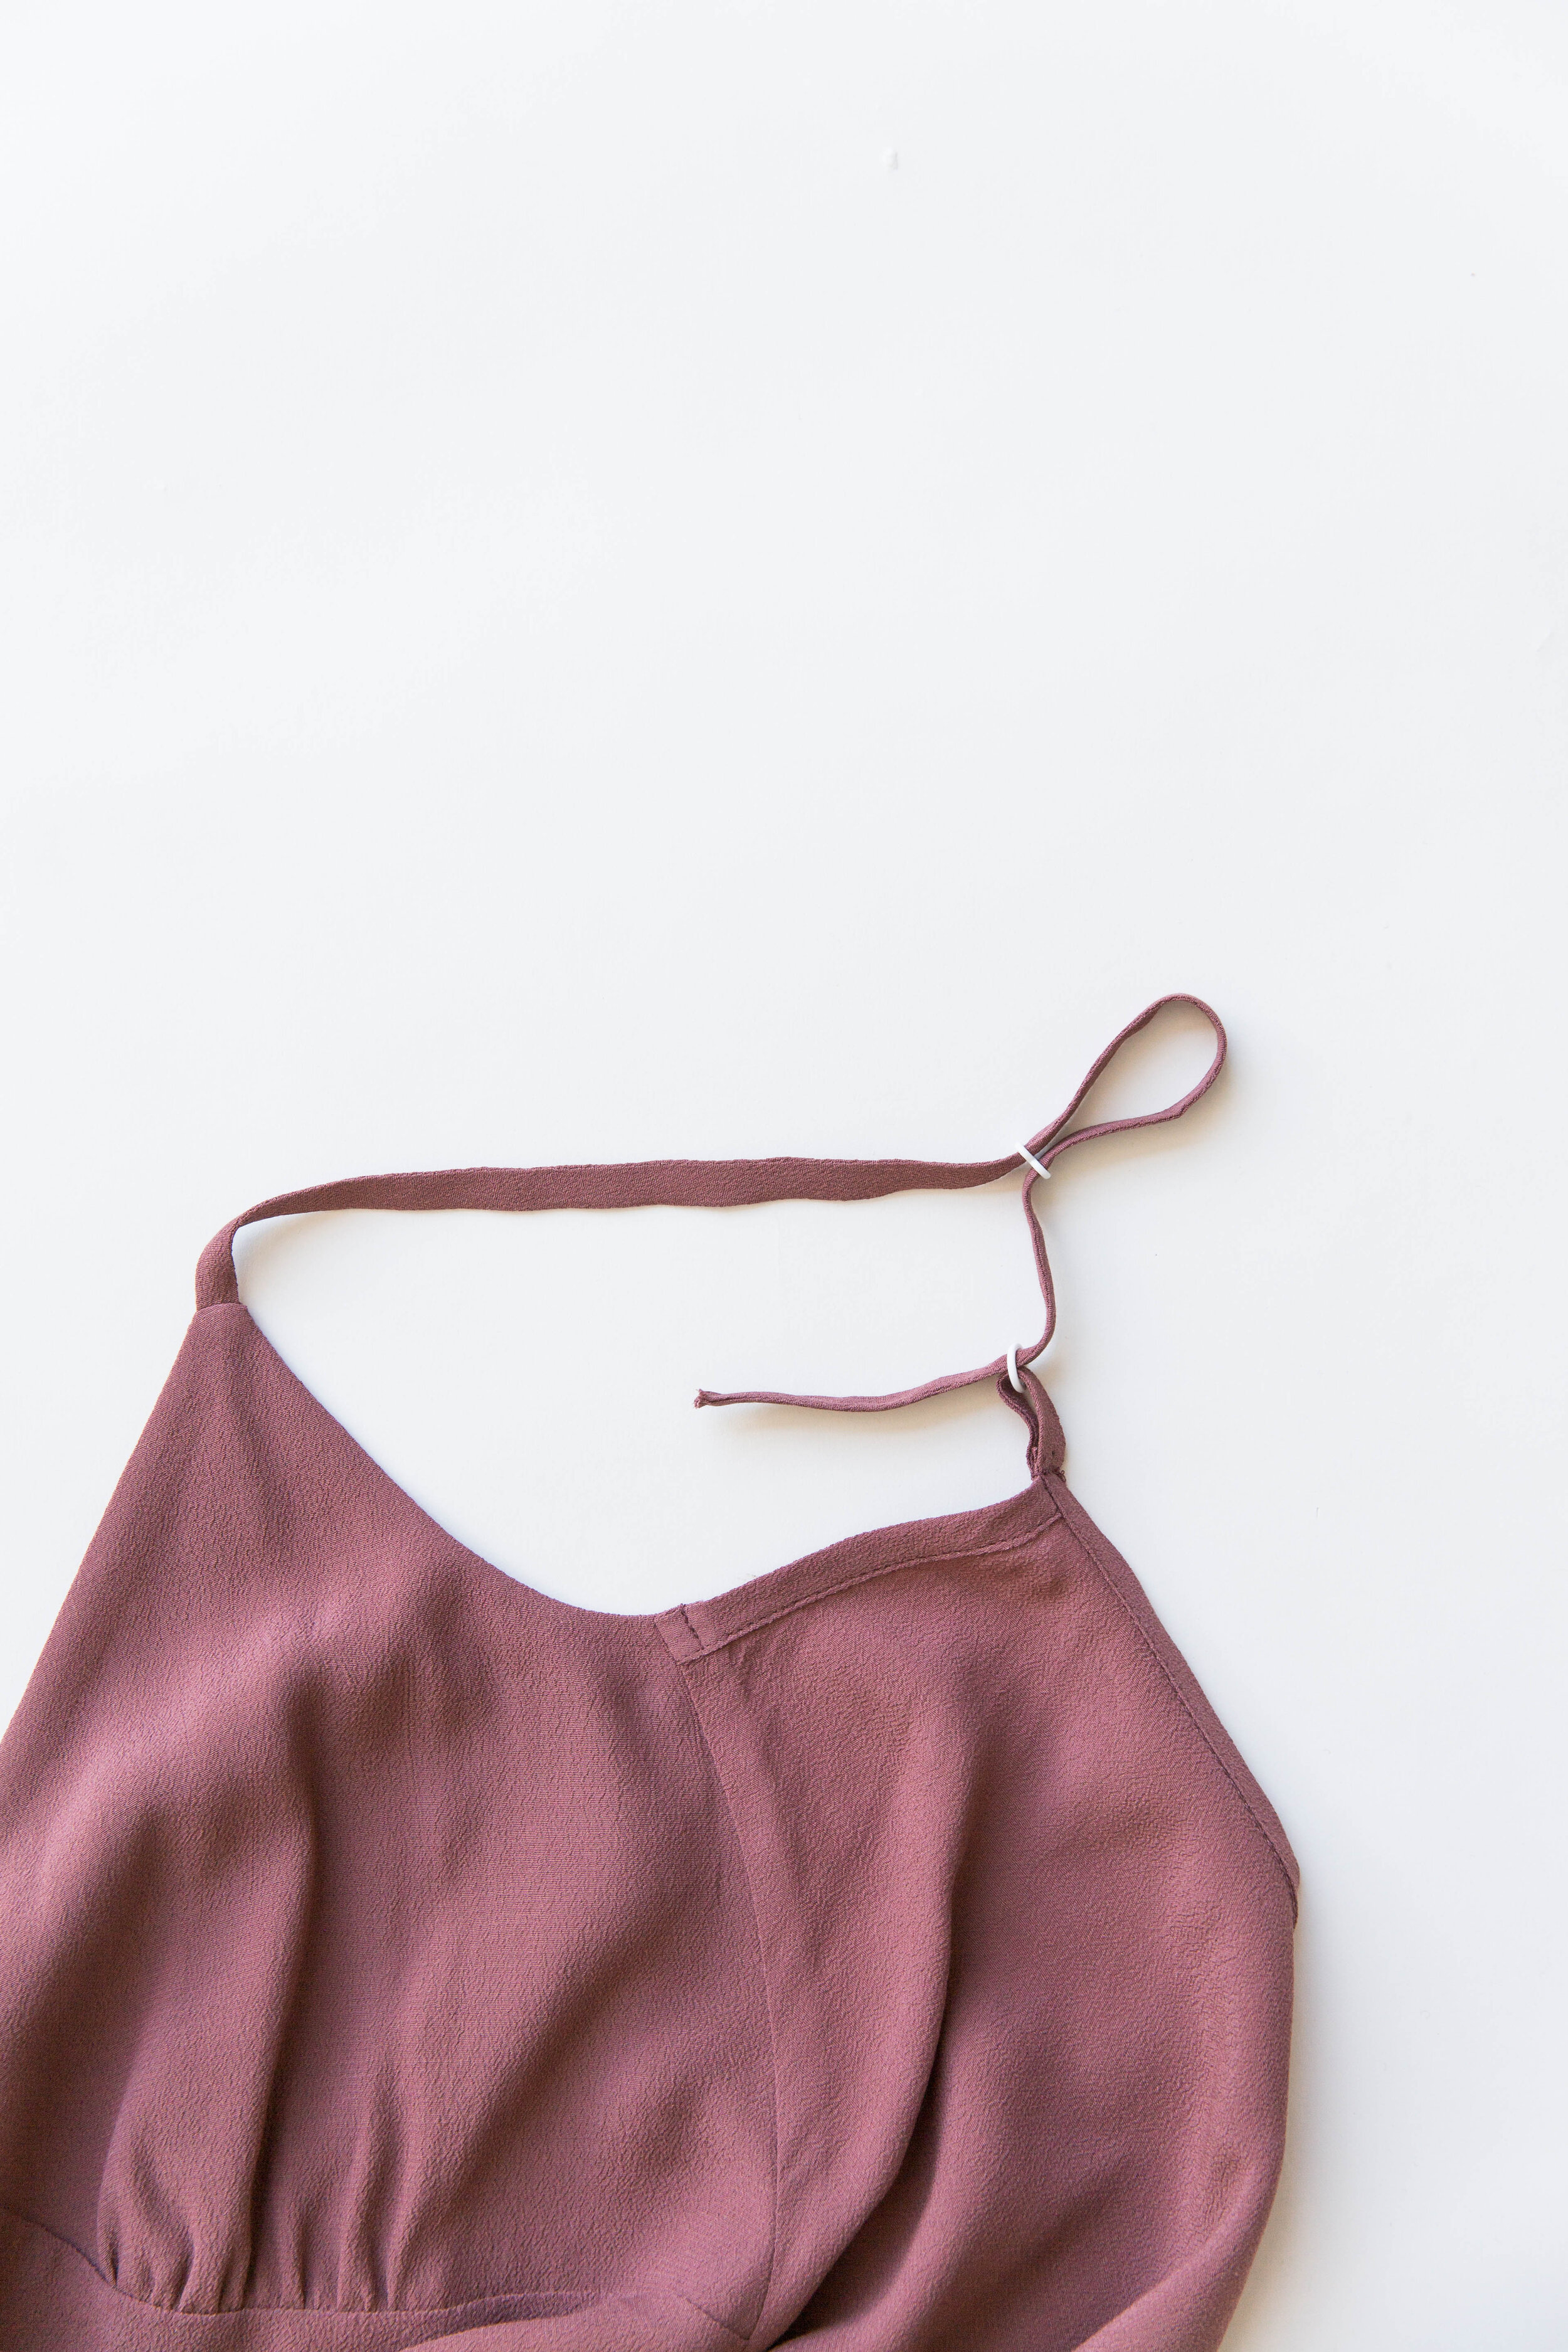
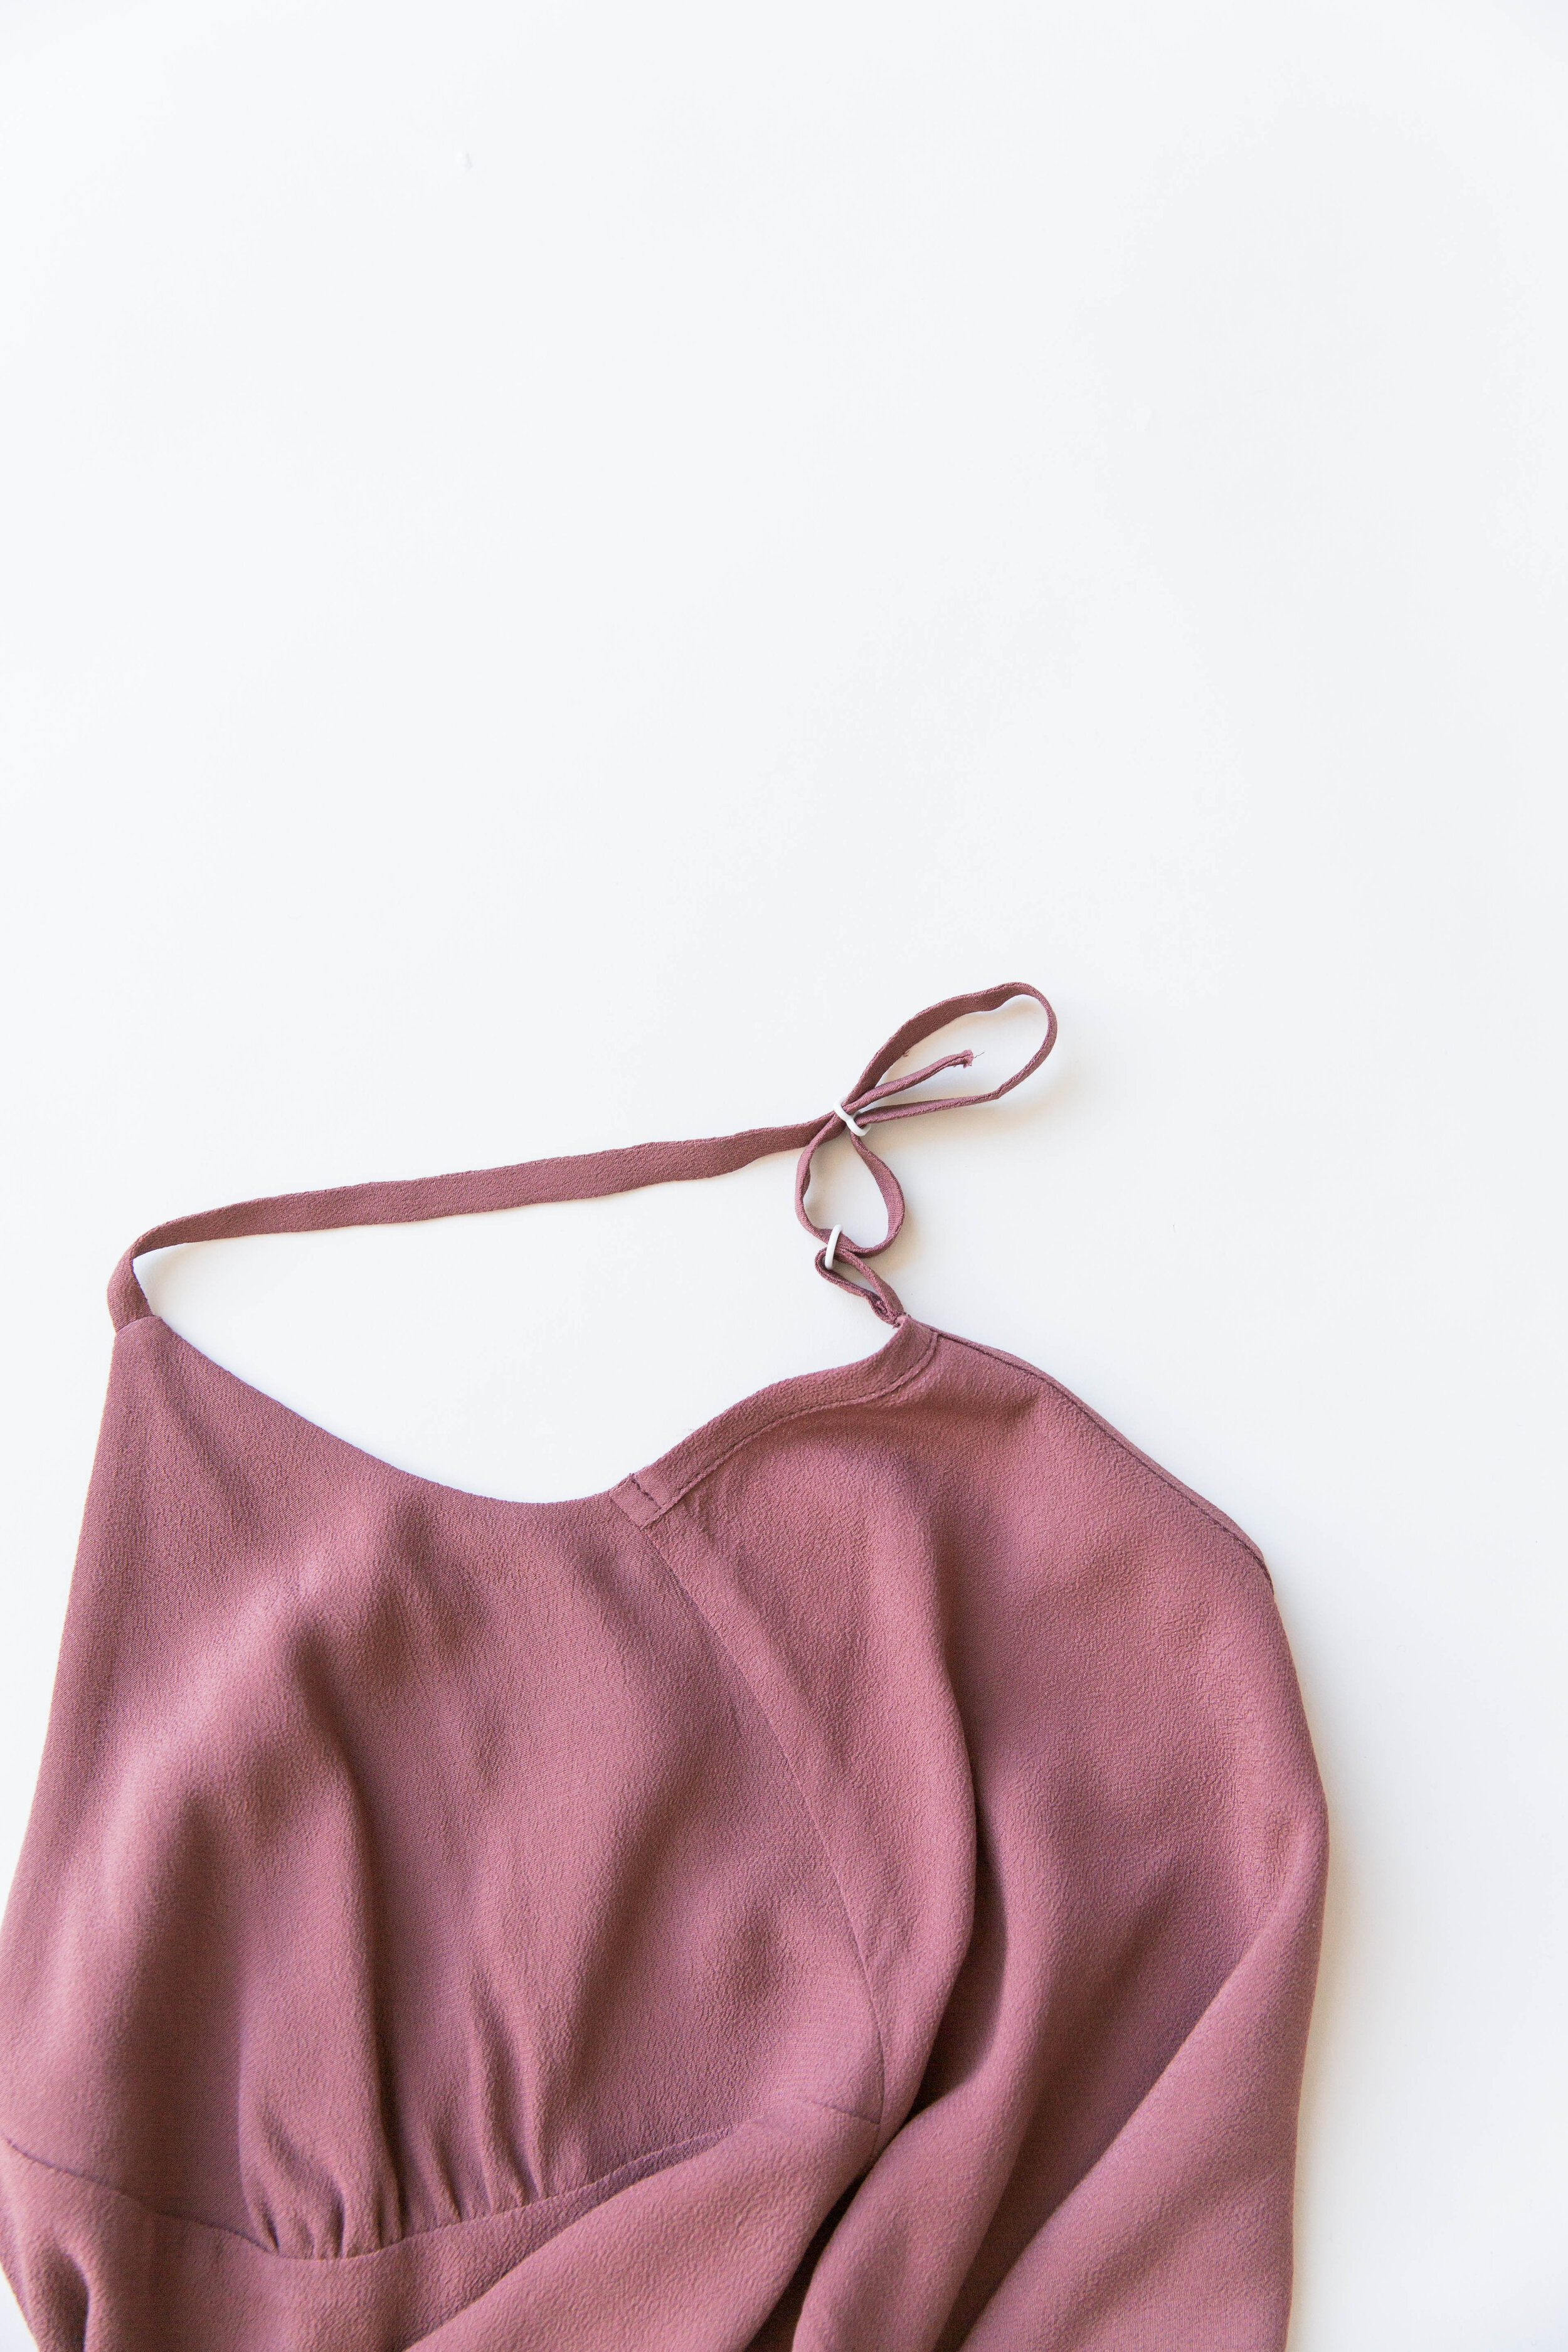
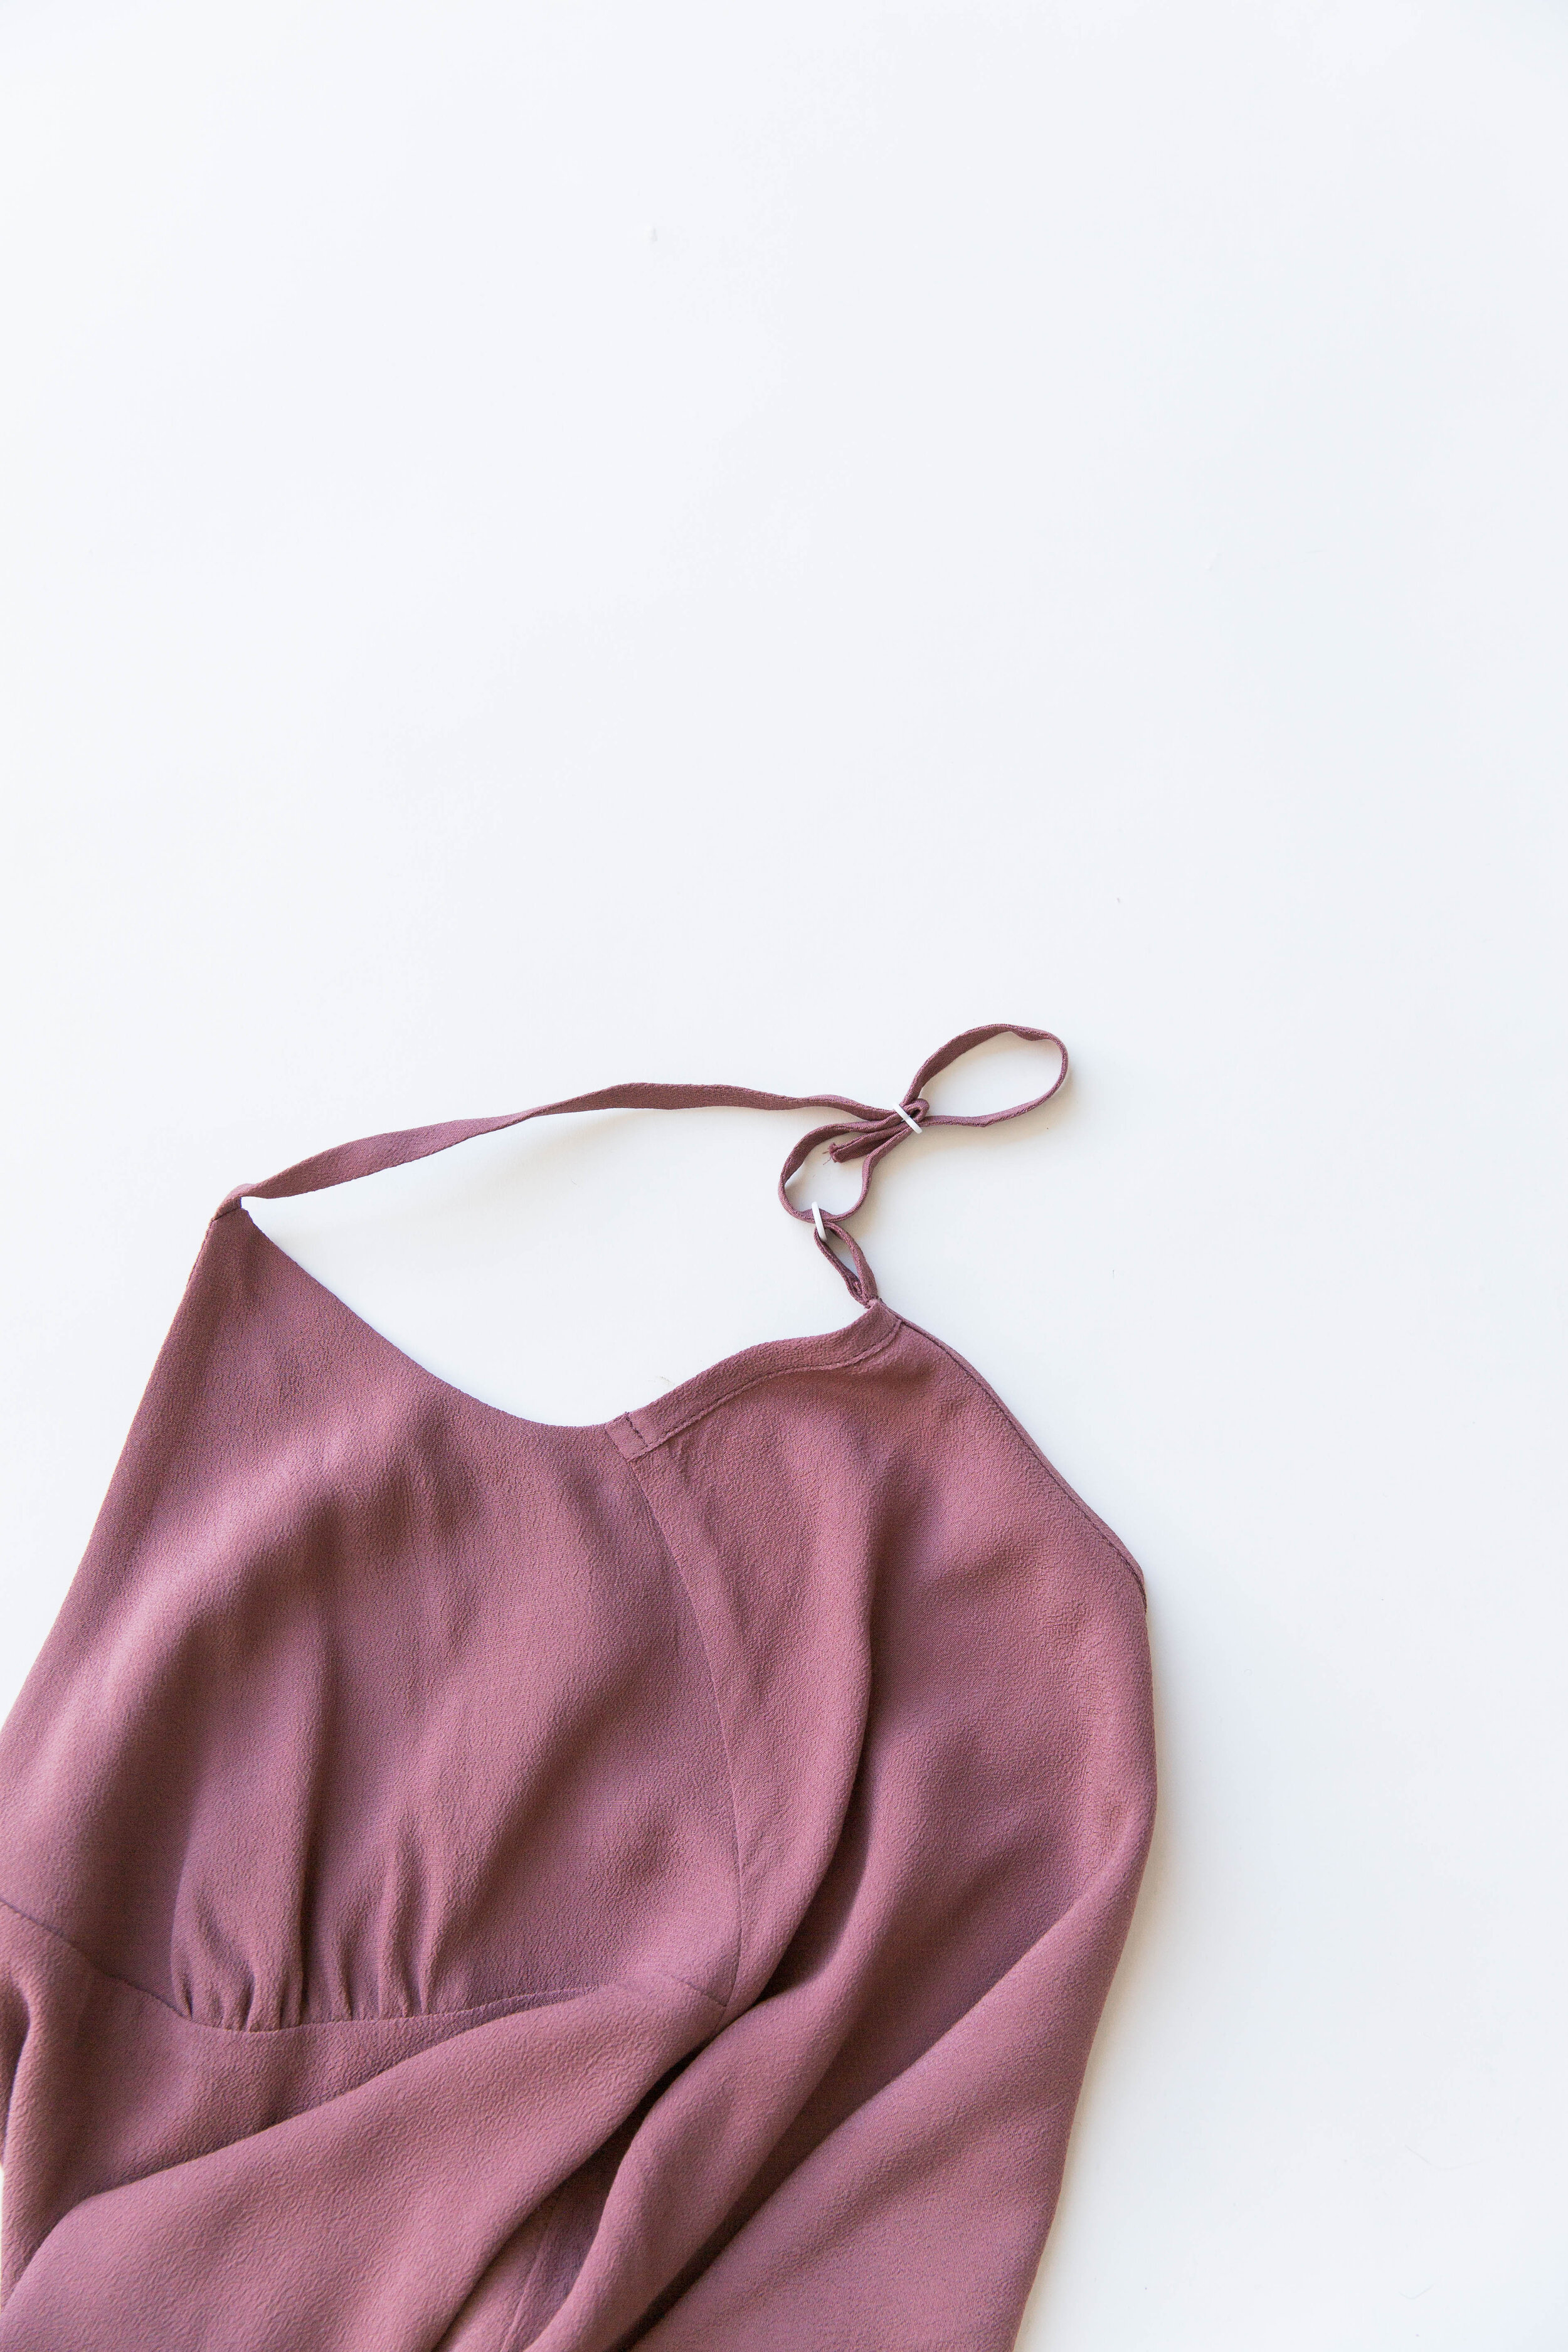
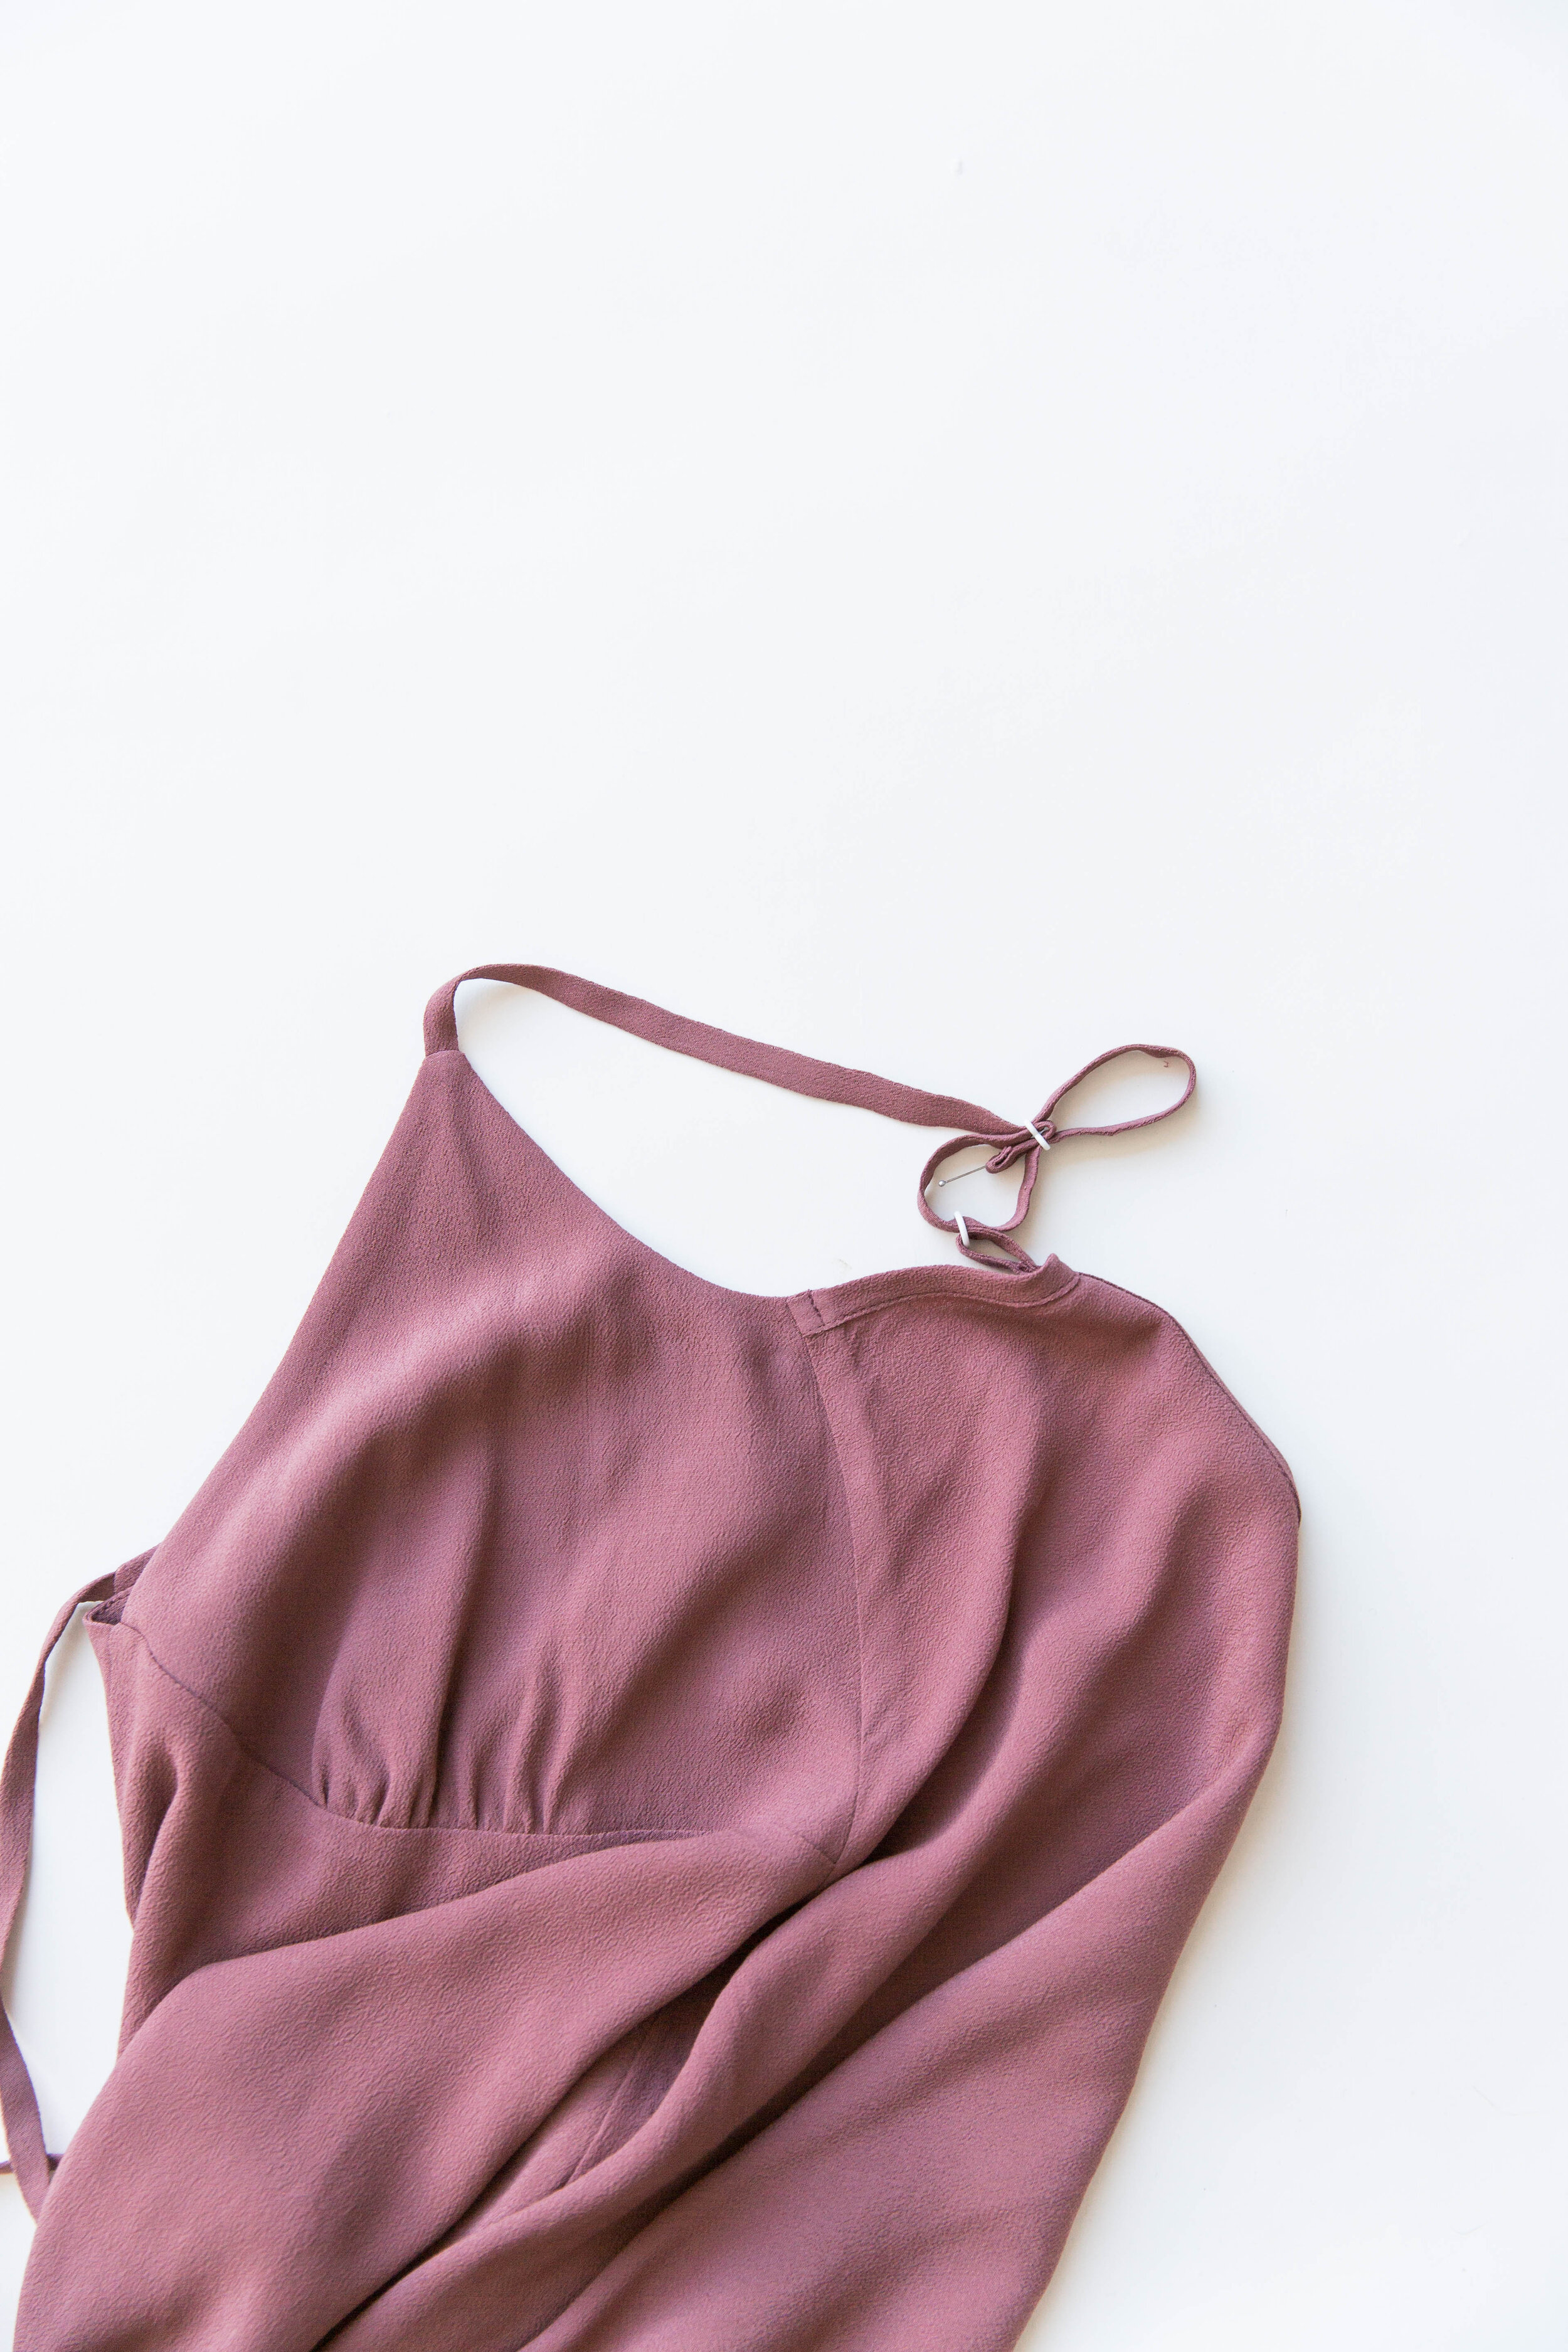
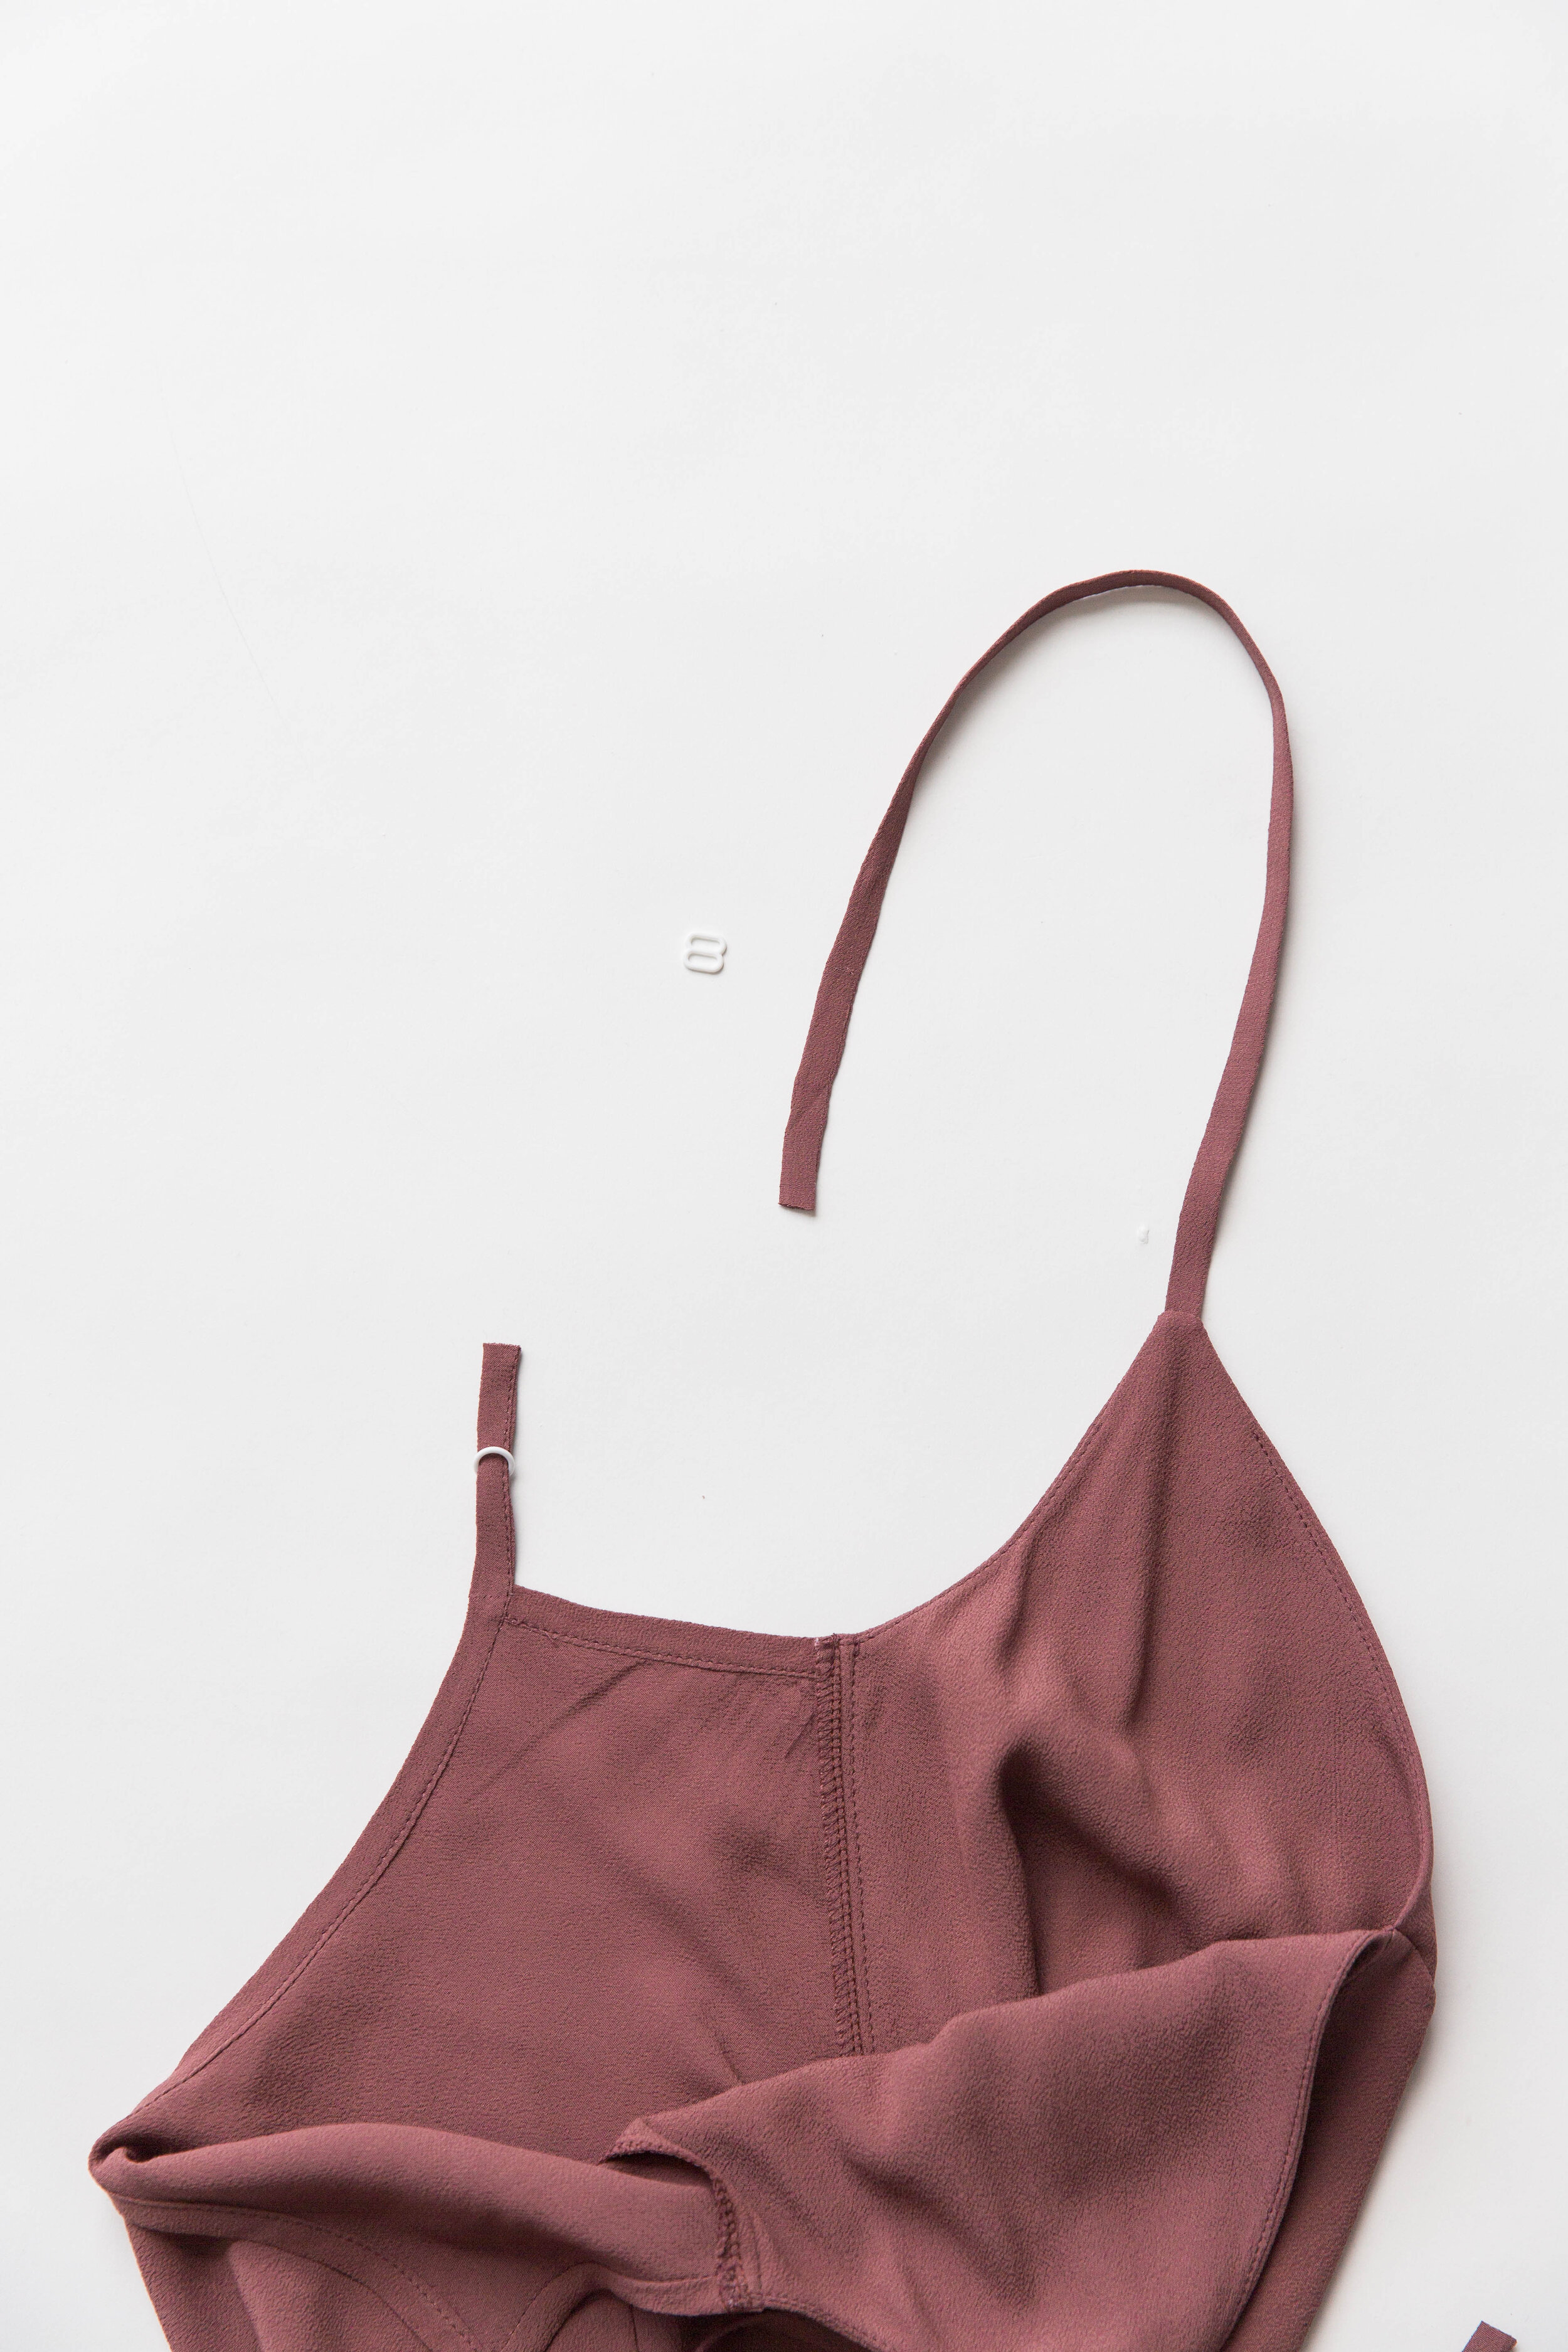
Step 15
Thread the front strap through the slider as shown in the first two images. Loop the front strap through the ring, then pull back through the centre bar of the slider. Fold the raw edge of strap under slightly and pin in place on each side. Try cami/dress on. Adjust the length of front straps, so that the hardware sits at the back. Once you’re happy with the length, edge stitch onto its self.

Voilà!