

Our Pinnacle Top was designed to be a cropped style to be worn with high waisted bottoms, however if you’d like to lengthen yours, this is a step-by-step guide on how to adjust your pattern pieces. Happy Sewing!
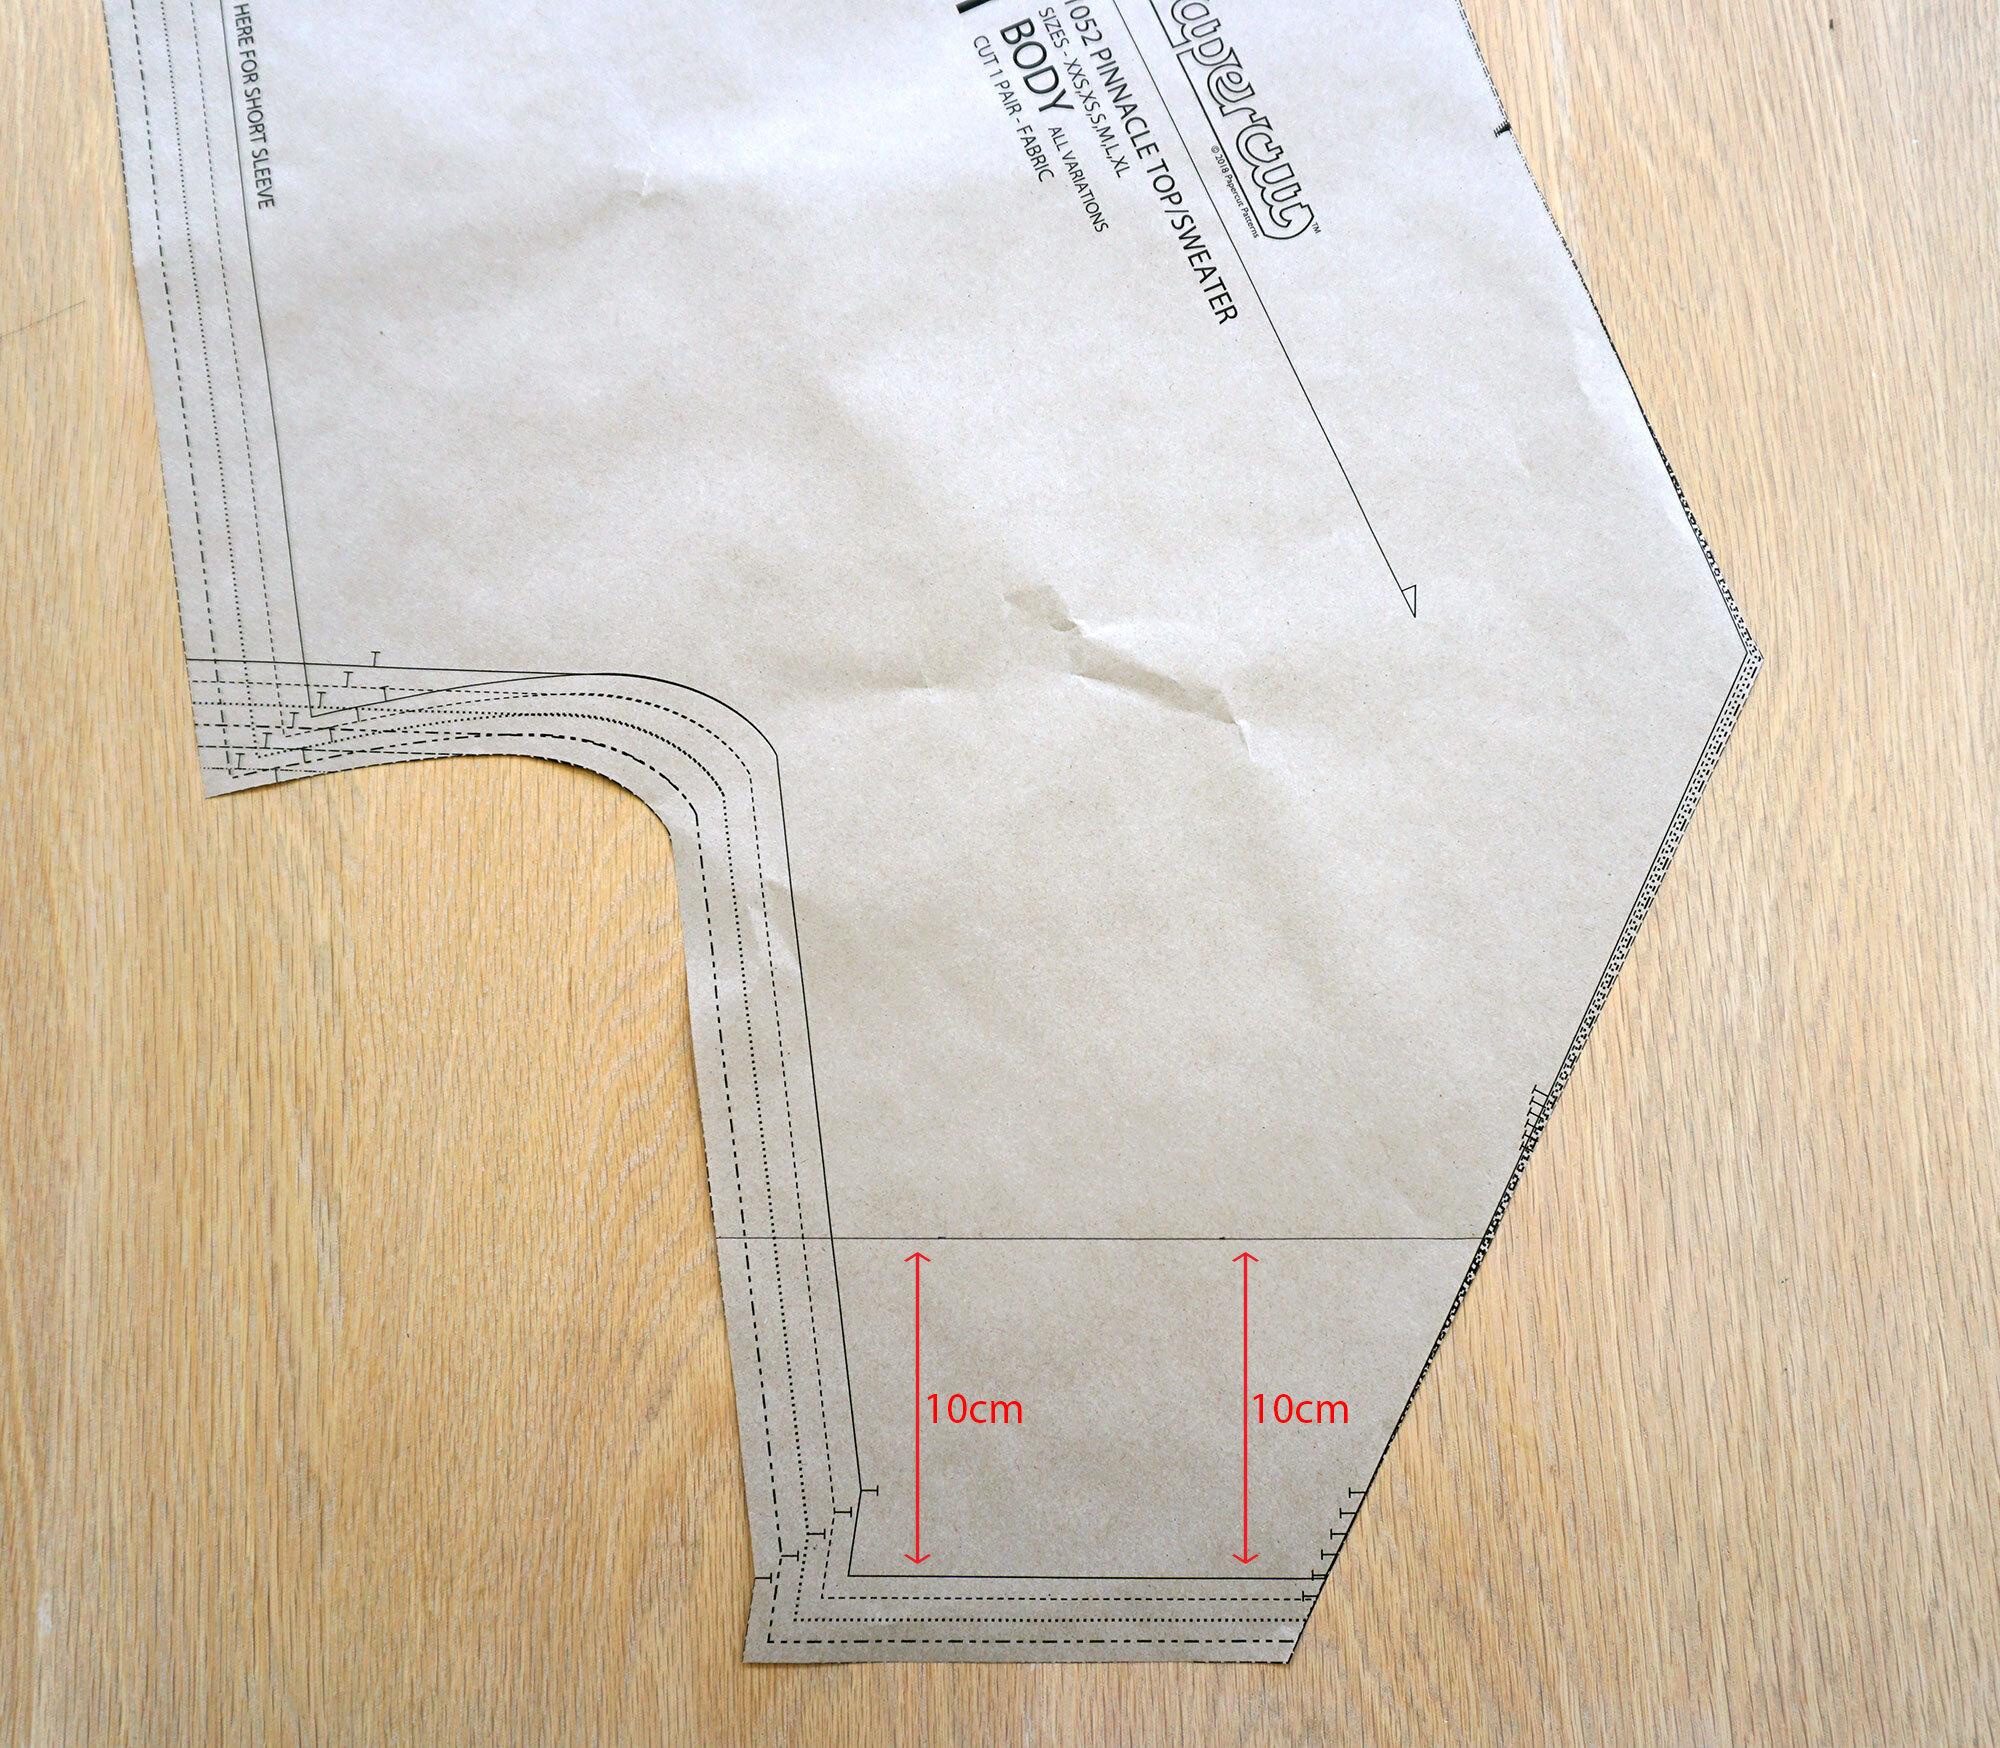
STEP 1
Draw a straight line across the front section of body pattern piece (Pattern Piece No.1), parallel with the hemline, 10cm up from bottom hem. Cut along line.

STEP 2
Draw a straight line across the back section of body pattern piece (Pattern Piece No.1), parallel with the hemline, 10cm up from bottom hem. Cut along line.

STEP 3
Draw a straight line across the Lower Triangle Pattern piece (No. 2), parallel with the hemline, 10cm up from bottom hem. Cut along line.

STEP 4
On a new piece of paper, draw two parallel lines. The distance between them the amount you want to lengthen your top. Place the top section of pattern piece along the top line and tape in place. Once the top piece is taped in place, square a line down from both side and front edges.

STEP 5
Place the bottom section of pattern piece along the bottom line and tape in place.

STEP 6
You now need to re draw the lines as indicated in red (i.e. Centre front neck point down to hemline and sideseam from under arm curve to hemline). Repeat the last 3 steps for the back.

STEP 7
Cut out. Transfer notches onto new line.

STEP 8
On a new piece of paper, draw two parallel lines. The distance between them the same amount as you've lengthened the front and back sections. Place the top section of triangle (Piece no 2) along the top line and the bottom section along bottom line. Tape in place.

STEP 9
Draw a new line as indicated in red. Top point of triangle down to hemline.

STEP 10
Cut out. Transfer notch onto new line. Voila! You are now ready to sew your new longer Pinnacle Top as per the instructions :-)