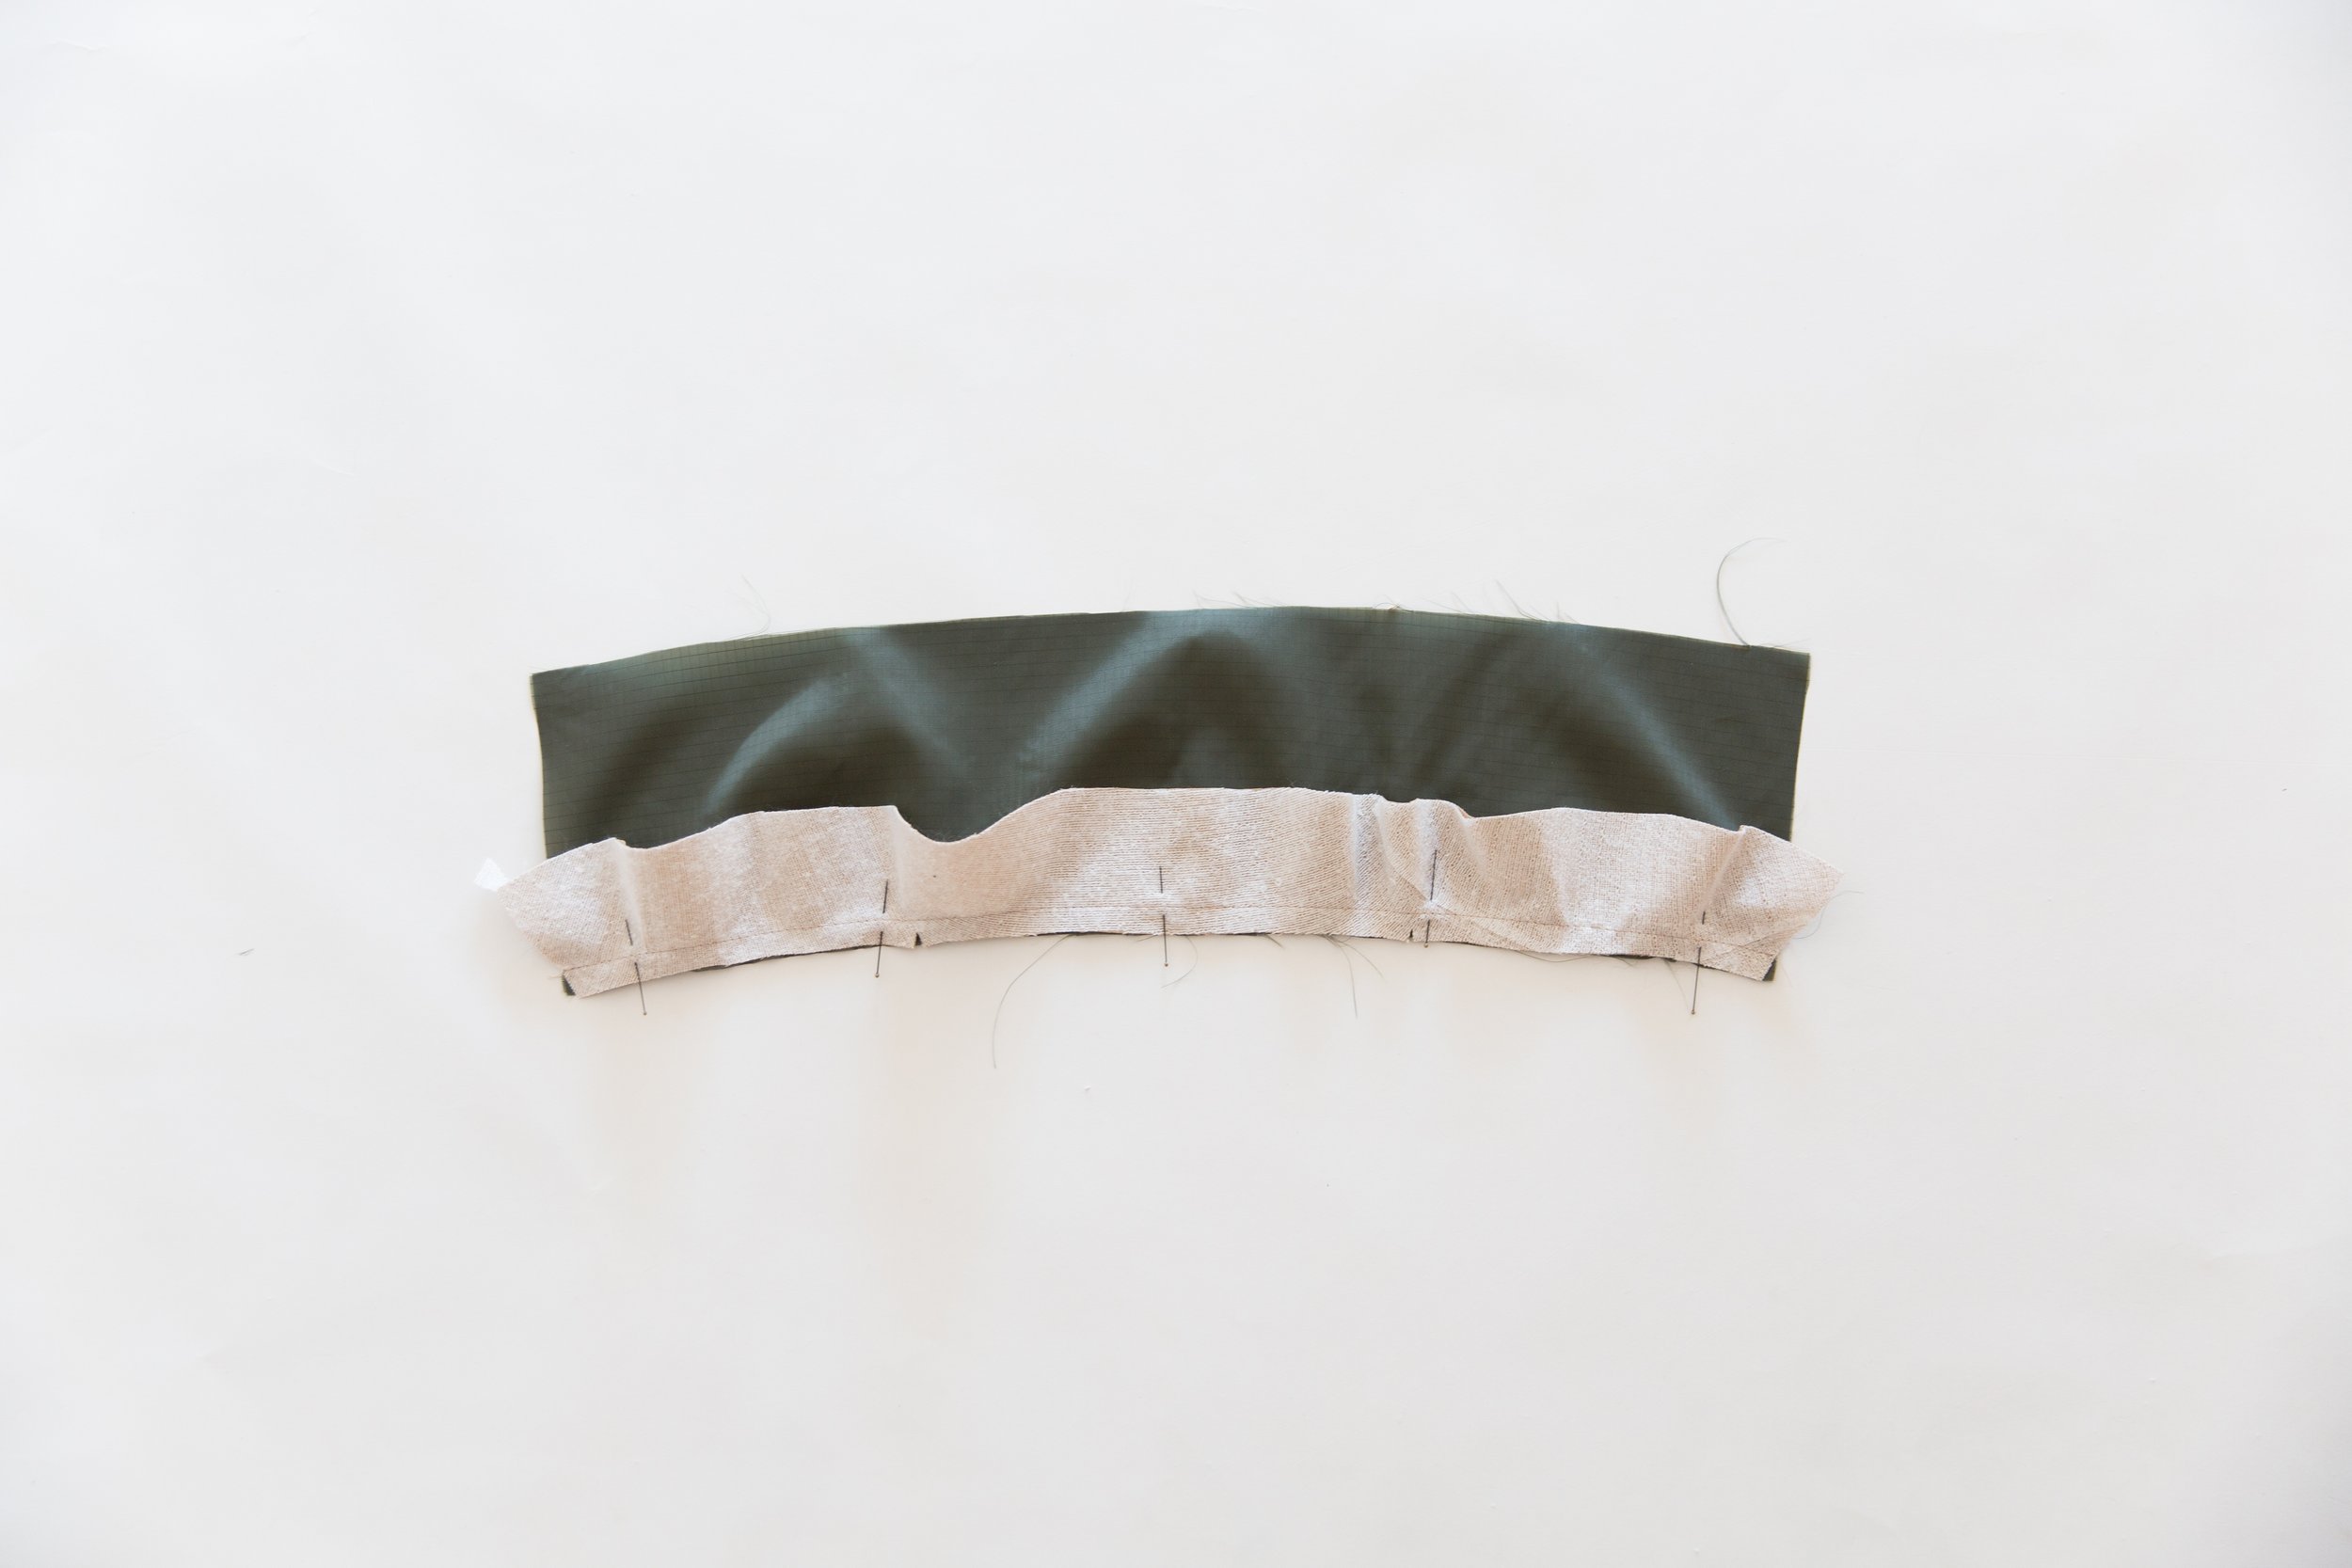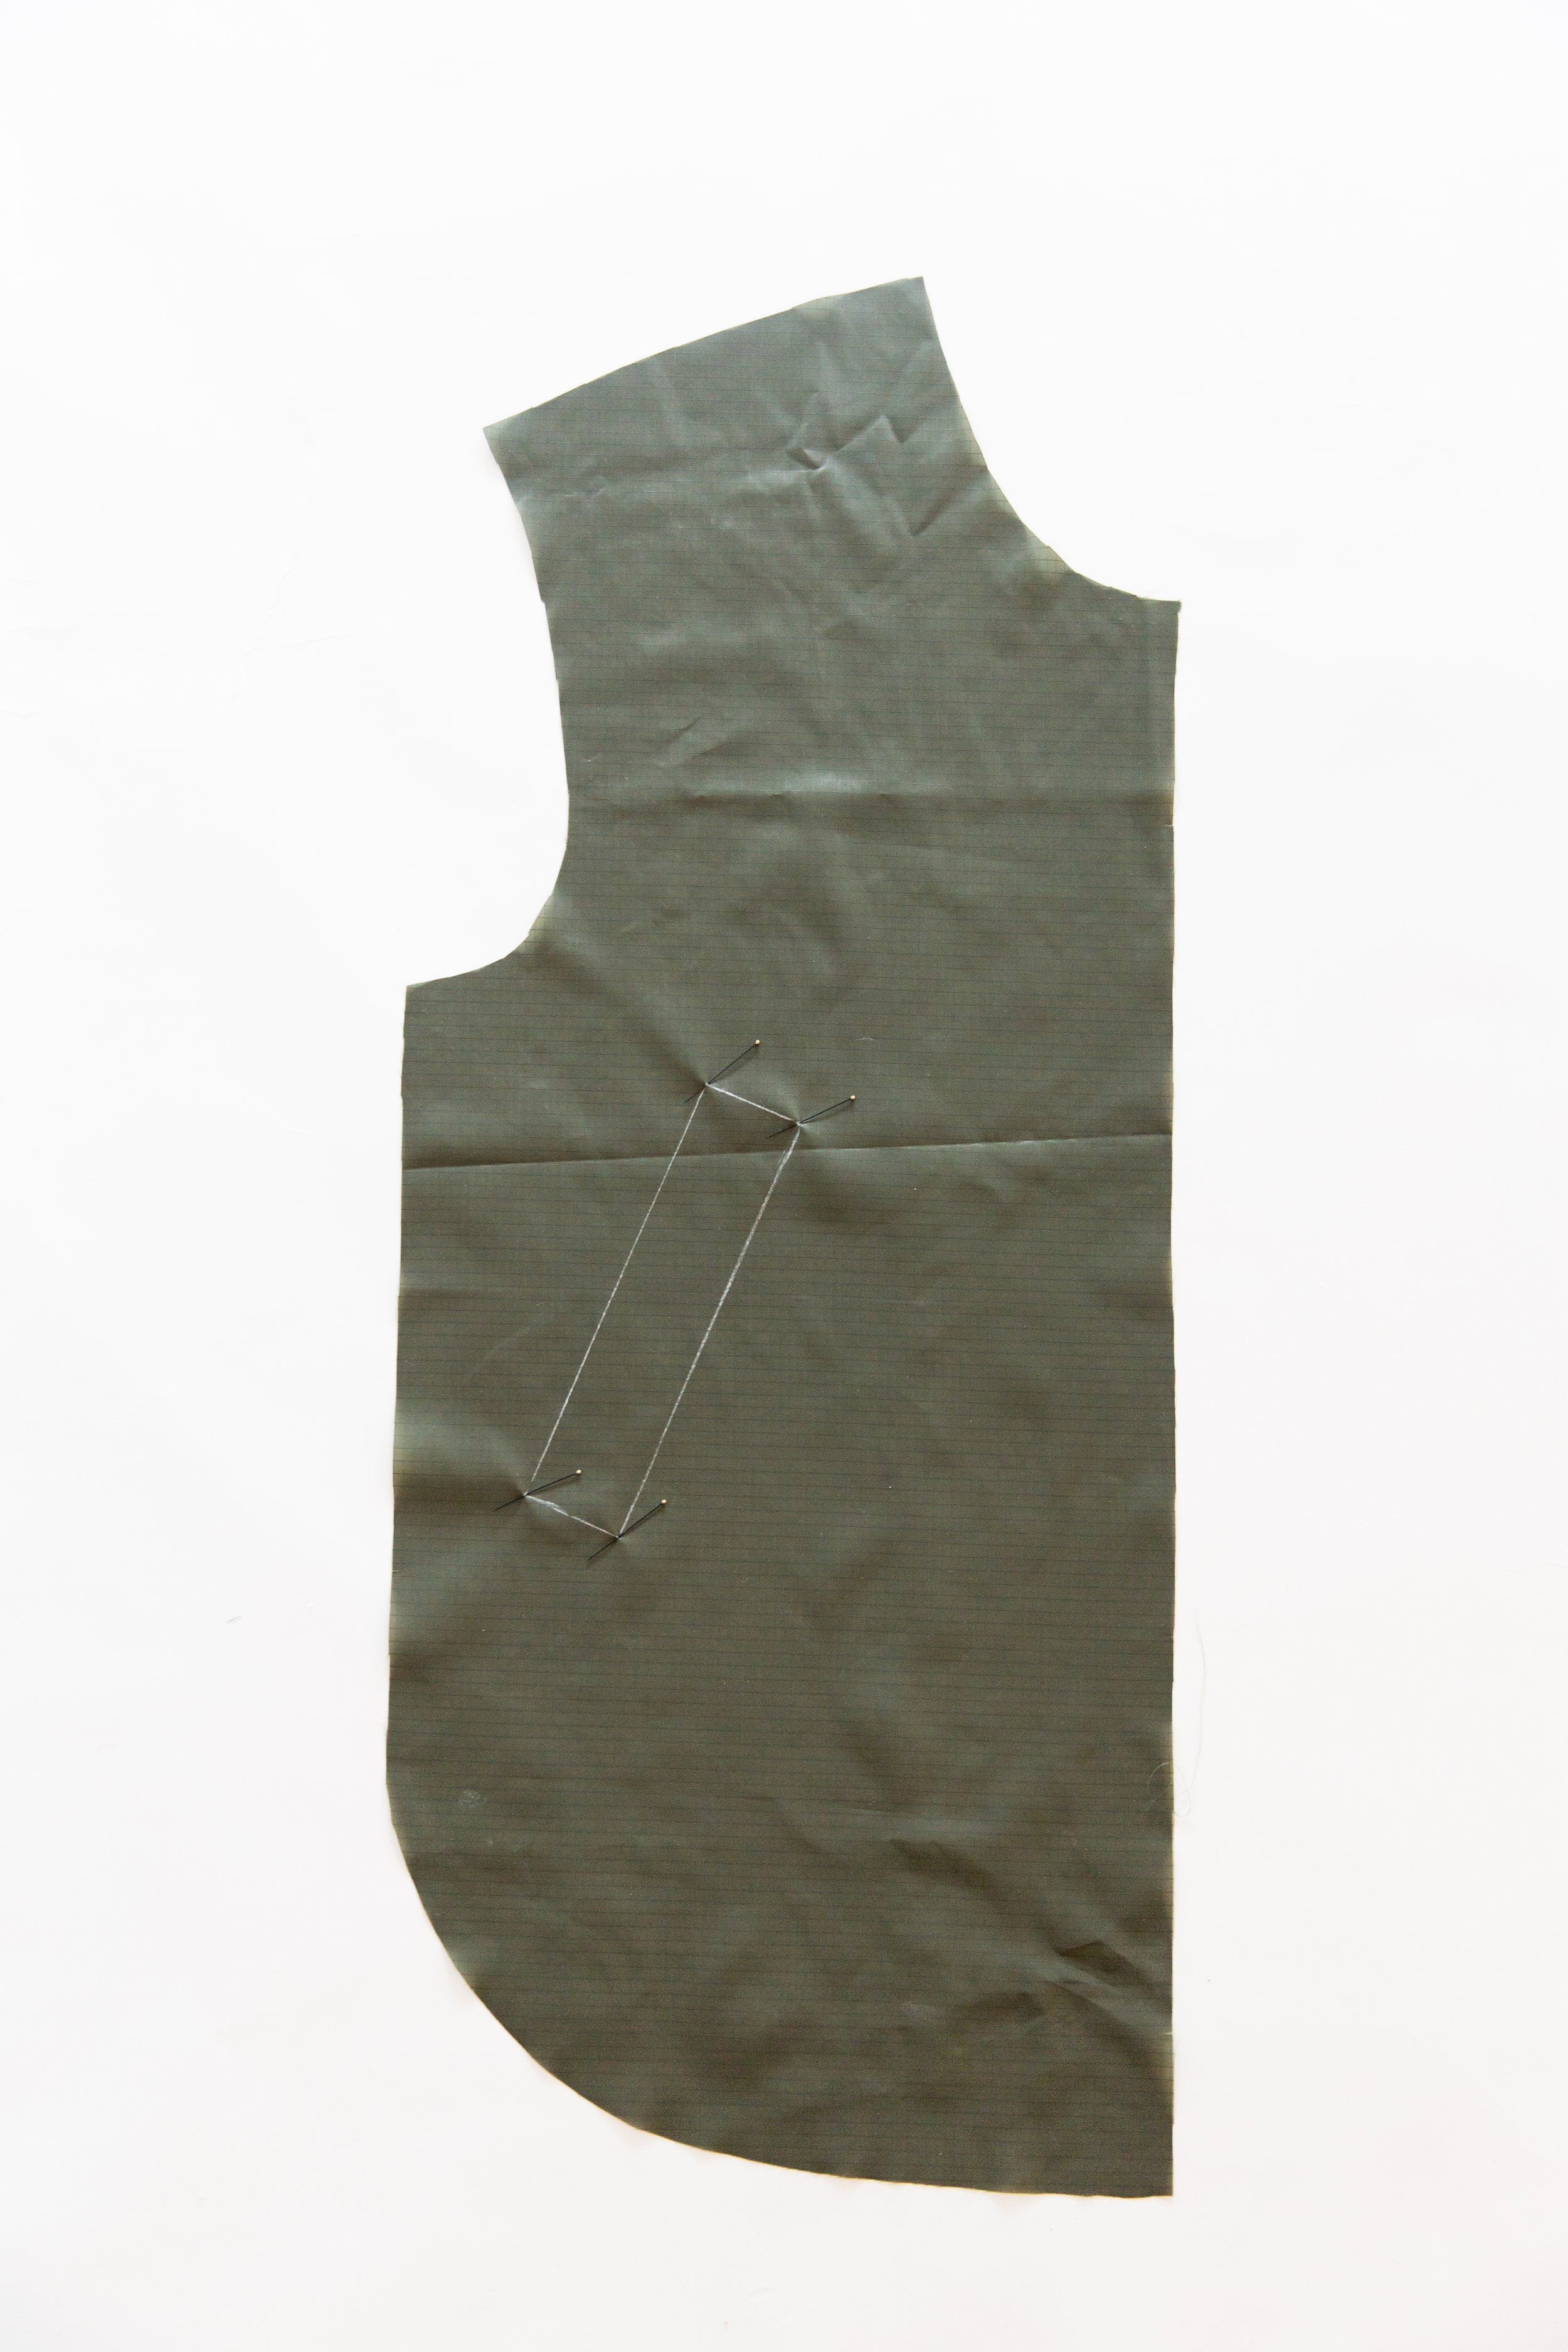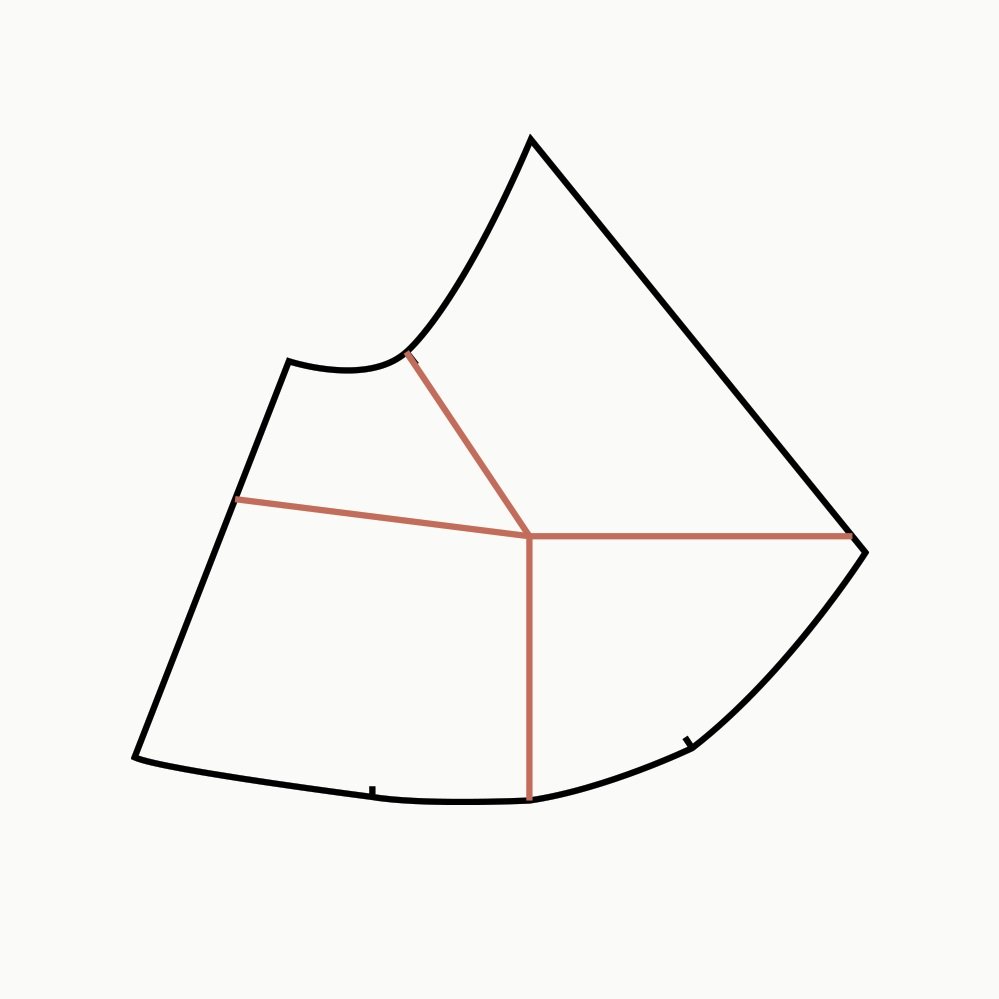
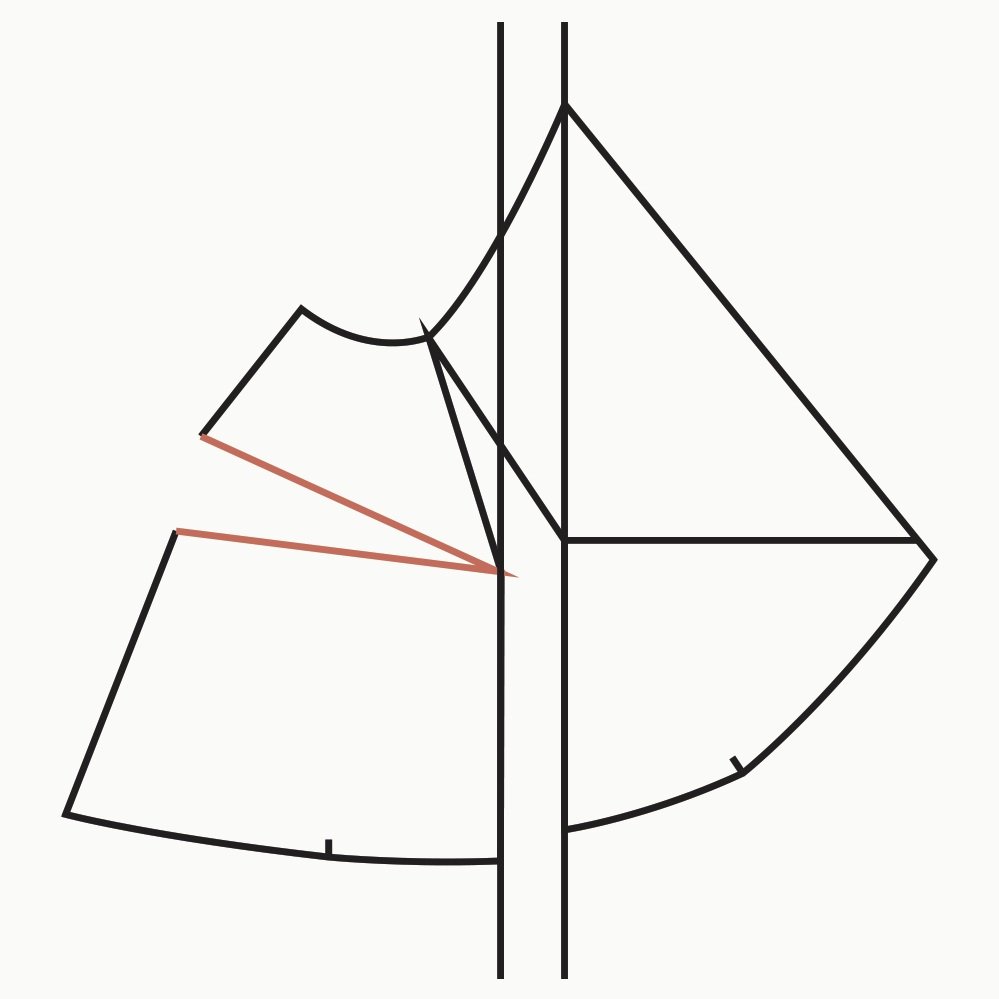
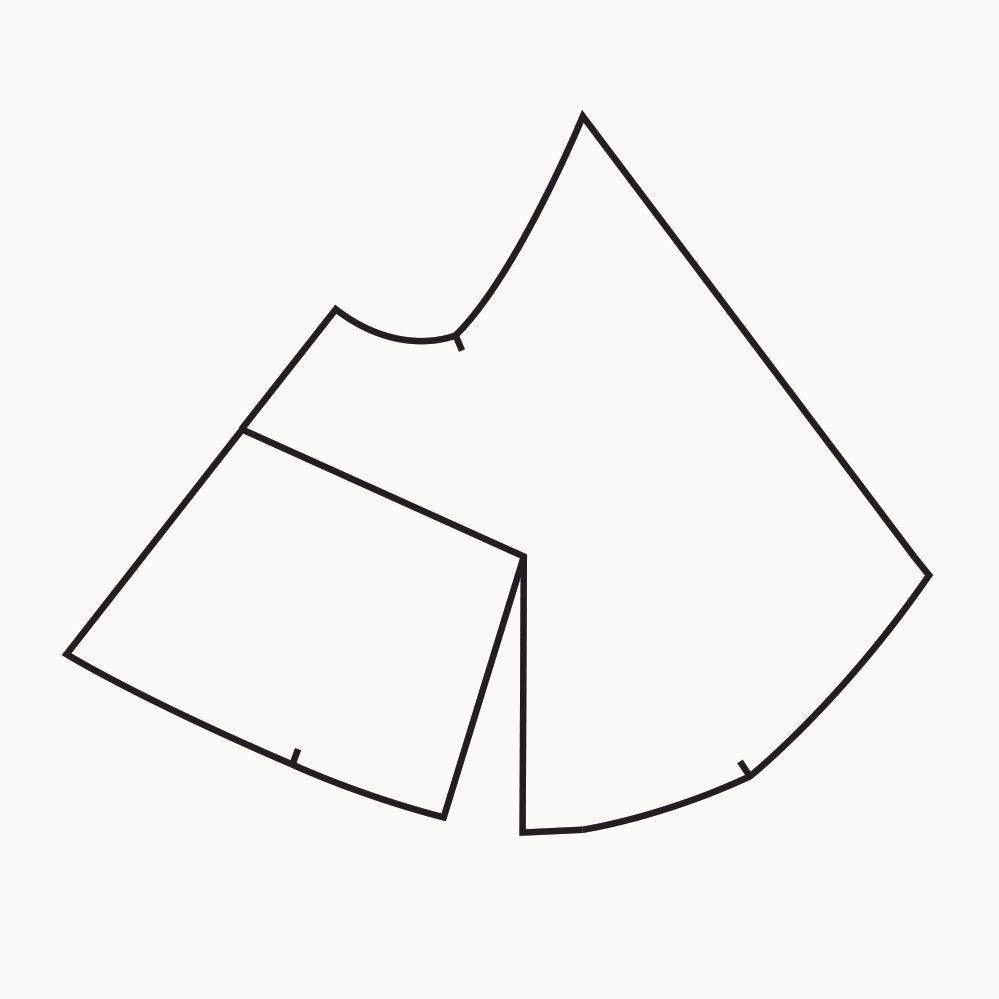
Step 1.
Following the grainline, draw a vertical line from the centre of the gathering notches up to the bust point (which is roughly the centre of the cup). From this point, draw a line connecting to the armhole notch. From the same bust point, draw a line out to the side seam and another to the centre front.
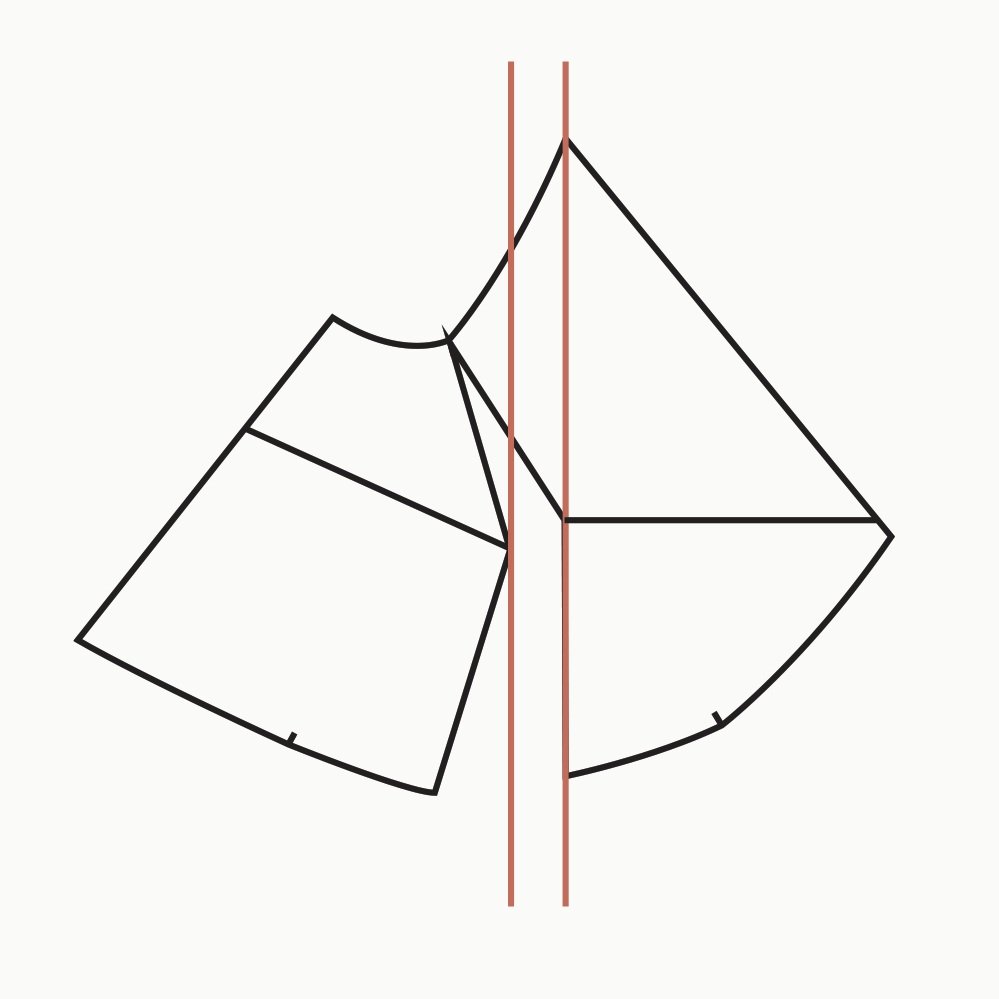
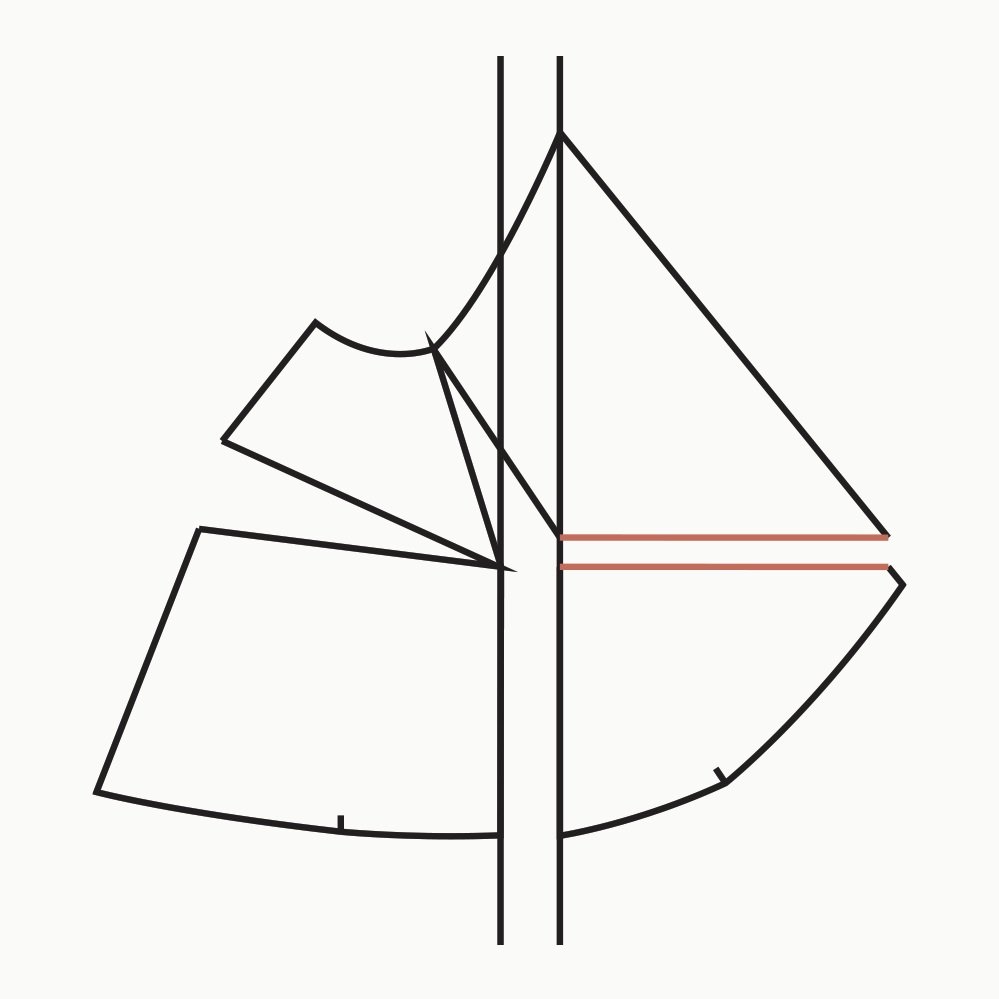
Step 2.
On a new sheet of paper, draw two vertical lines the distance apart you are wanting to spread your pattern. Place your pattern piece over these lines and cut up the line on bust cup starting from the bottom edge, up to the armhole notch, not quite cutting through at the armhole edge. Line up the edge closest to the centre with one of your vertical lines. Pivot the other side out until it touches your second line.
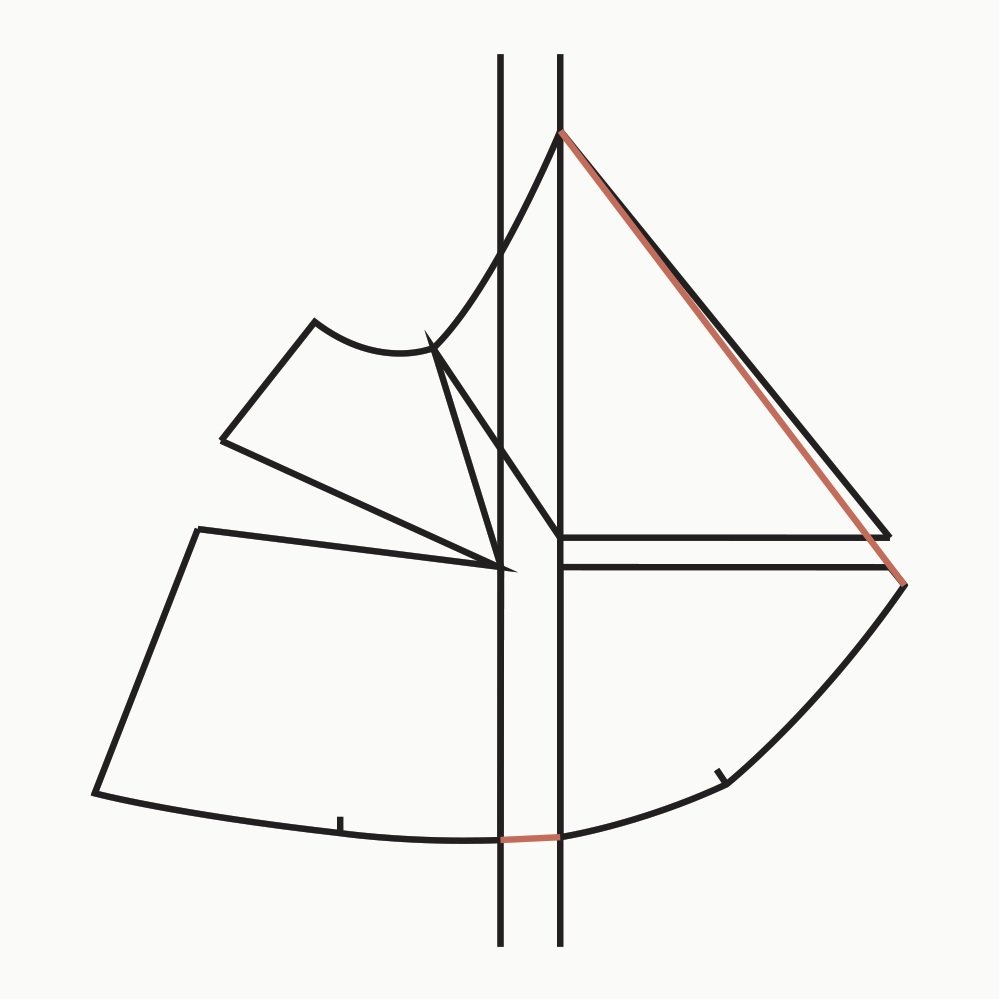
Step 3.
Cut through the line from the side seam, not quite cutting through at the bust point. Pivot the lower half of the side panel until it lines up with your second line.
Step 4.
Cut through the line from the centre front to the bust point. Pull the bottom edge down until it meets up with the bottom edge of the side panel.
Step 5.
Draw in a new centre front line and join the bottom edge.
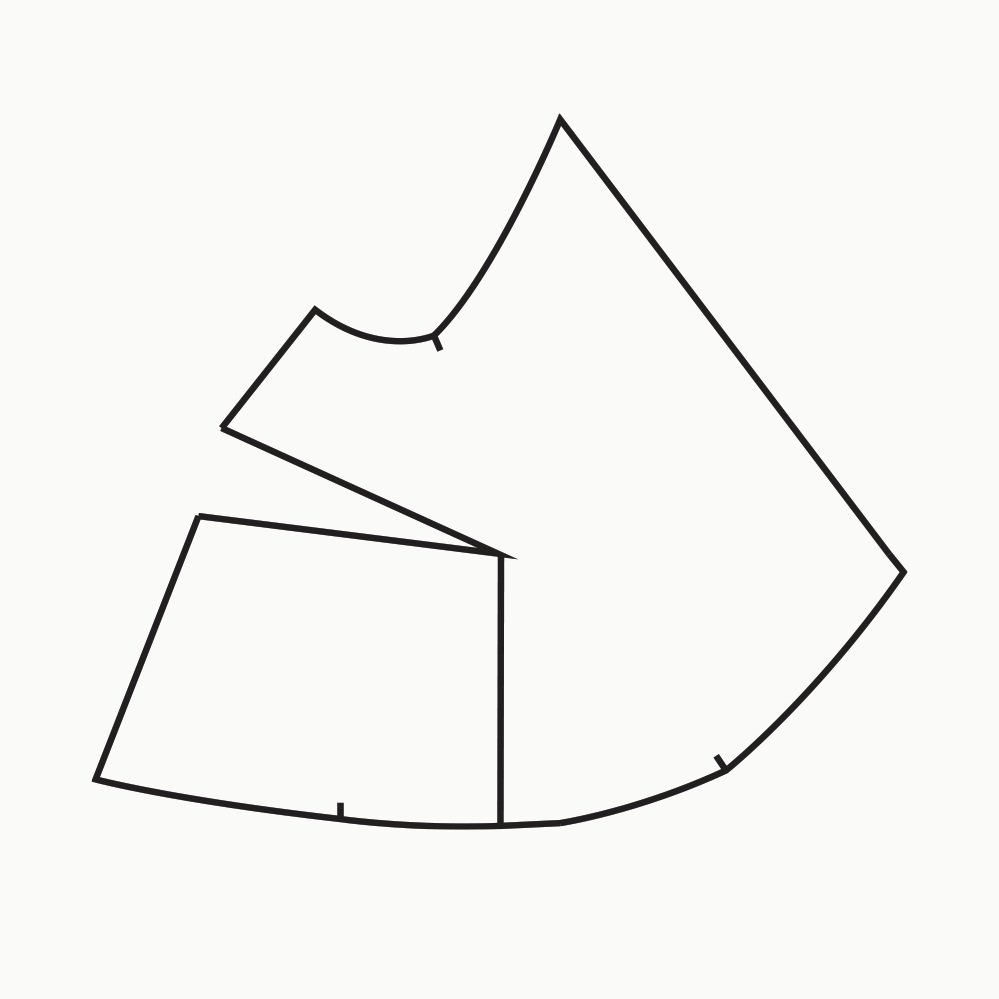
Step 6.
Now you want to close the dart, pivoting the excess into the gathers. Draw a line to join the open section at the bottom
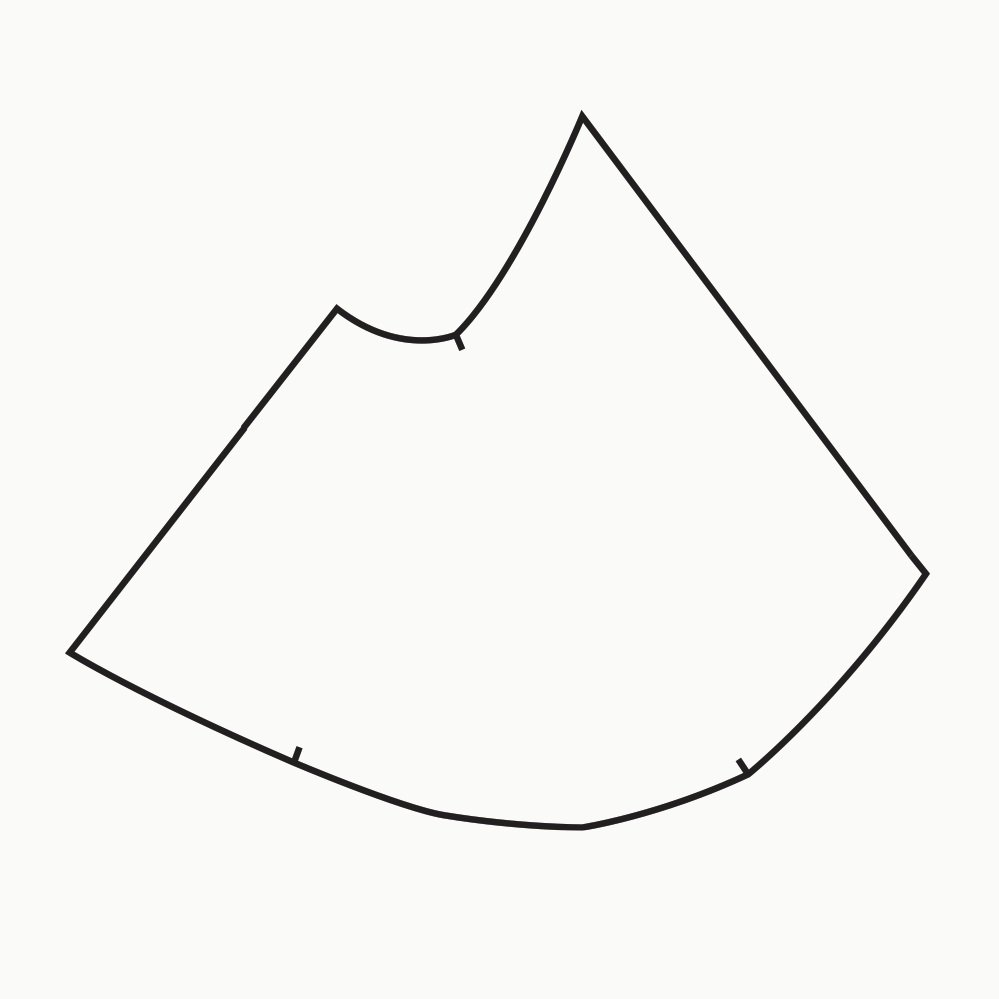
Voila! Your bust adjustment is complete!